Zum Hauptinhalt wechseln

Quiksilver The Fifty50 Analog Battery Replacement

Was du brauchst

  1. Quiksilver The Fifty50 Analog Battery Replacement, Strap: Schritt 1, Bild 1 von 2 Quiksilver The Fifty50 Analog Battery Replacement, Strap: Schritt 1, Bild 2 von 2
    • Place the watch (face down) on a solid surface.

    • Carefully use the screwdriver and push in one side of the strap.

    • Slowly remove the strap by pushing back one of the hidden metallic holders for the strap.

    • If you are having difficulty trying to take off the strap, feel free to use a 3.5 flat head screw driver, or any kind of tool that make this step easier.

  2. Quiksilver The Fifty50 Analog Battery Replacement: Schritt 2, Bild 1 von 2 Quiksilver The Fifty50 Analog Battery Replacement: Schritt 2, Bild 2 von 2
    • Gently pull the pin out of the strap.

    • Carefully handle the small metallic holder, as they are sharp and may be difficult to locate if lost.

  3. Quiksilver The Fifty50 Analog Battery Replacement, Back Panel: Schritt 3, Bild 1 von 2 Quiksilver The Fifty50 Analog Battery Replacement, Back Panel: Schritt 3, Bild 2 von 2
    • Remove the four 1.1 mm screws holding the back panel in place using the Phillips #00 screwdriver.

  4. Quiksilver The Fifty50 Analog Battery Replacement: Schritt 4, Bild 1 von 1
    • Carefully separate the panel off of the watch.

    • Careful not to lose the four 1.1 mm screw or else the back panel will not be able to put back.

  5. Quiksilver The Fifty50 Analog Battery Replacement, Analog Battery: Schritt 5, Bild 1 von 2 Quiksilver The Fifty50 Analog Battery Replacement, Analog Battery: Schritt 5, Bild 2 von 2
    • Carefully lift the white plastic circular out of the watch.

  6. Quiksilver The Fifty50 Analog Battery Replacement: Schritt 6, Bild 1 von 3 Quiksilver The Fifty50 Analog Battery Replacement: Schritt 6, Bild 2 von 3 Quiksilver The Fifty50 Analog Battery Replacement: Schritt 6, Bild 3 von 3
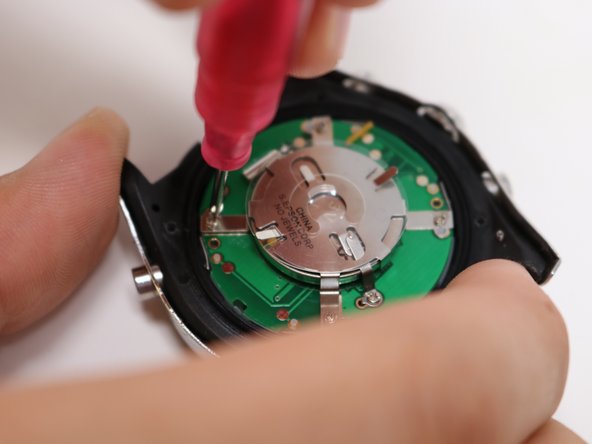
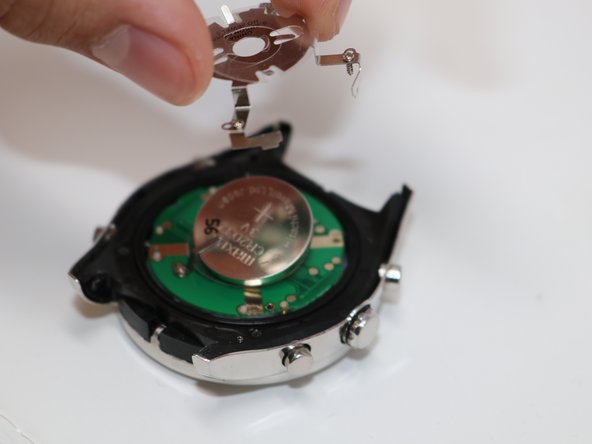
    • Remove the four 1.1 mm screws located on the metallic holder using the Phillips #00 screwdriver.

  7. Quiksilver The Fifty50 Analog Battery Replacement: Schritt 7, Bild 1 von 3 Quiksilver The Fifty50 Analog Battery Replacement: Schritt 7, Bild 2 von 3 Quiksilver The Fifty50 Analog Battery Replacement: Schritt 7, Bild 3 von 3
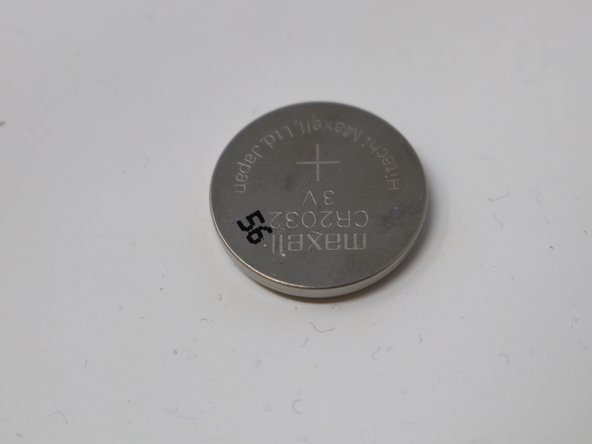
    • Remove the large circular Analog battery.

Abschluss

To reassemble your device, follow these instructions in reverse order.

Sue Giske

Mitglied seit: 07/16/19

622 Reputation

5 Anleitungen geschrieben

Team

UW Tacoma, Team S1-G4, Liner Summer 2019 Mitglied von UW Tacoma, Team S1-G4, Liner Summer 2019

UWT-LINER-SU19S1G4

5 Mitglieder

5 Anleitungen geschrieben

0 Kommentare

Kommentar hinzufügen

Seitenaufrufe:

Letzte 24 Stunden: 0

Letzte 7 Tage: 3

Letzte 30 Tage: 6

Insgesamt: 647