Einleitung
This guide is for the removal of a damaged or broken motherboard in the RCA Maven Pro 11 Tablet. For this guide you will need a Phillip’s head screwdriver and a prying tool to open the tablet and remove the necessary pieces.
Was du brauchst
-
-
Use a Phillip's head screwdriver to unscrew the screws that secure the back cover in place. There are 6 screws in total (4 black, 2 silver).
-
-
-
Using a prying tool to pry off the back cover of the tablet. To do this, insert the prying tool between the screen and the side of the tablet.
-
Once the prying tool is inserted, run it along the edge of the tablet until the back cover pops off.
-
-
-
-
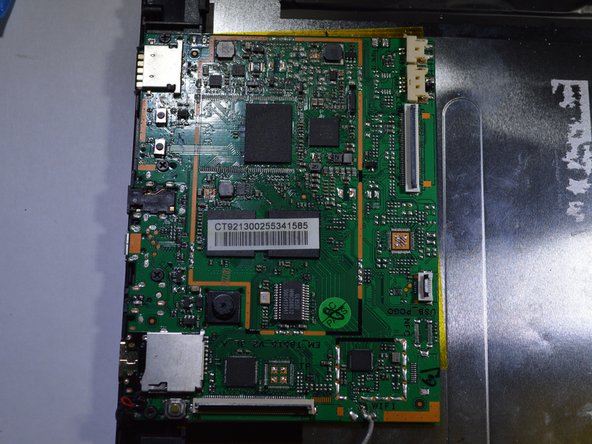
Use a Phillips head screwdriver to unscrew the 4 black screws that secure the motherboard to the device.
-
-
-
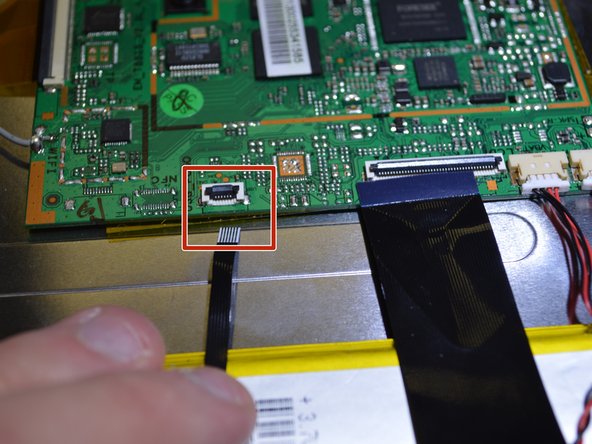
On the long edge of the motherboard, remove all of the ribbon and bundled cables.
-
The ZIF connections are removed by lifting up the small black tab on the connector and simply pulling out the ribbon cable(s).
-
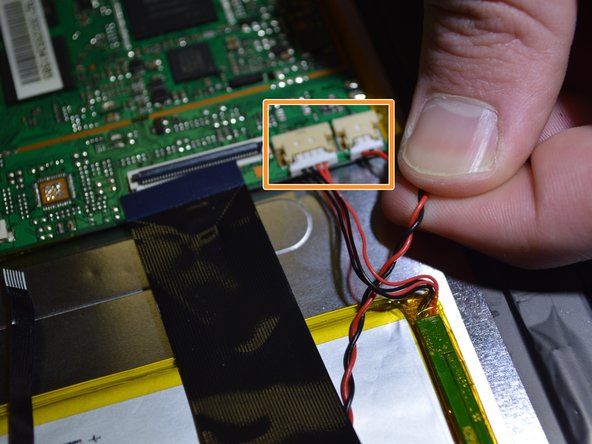
Insert a spudger or plastic opening tool under the lip of the white bundled cable connector(s), and push the connector(s) free.
-
-
-
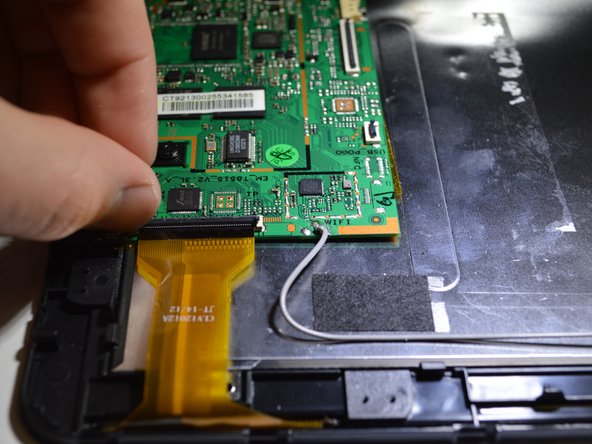
On the short edge of the motherboard, remove the yellow wire. To do this, lift up the clamp and pull out the wire.
-


To reassemble your device, follow these instructions in reverse order.
To reassemble your device, follow these instructions in reverse order.
Rückgängig: Ich habe diese Anleitung nicht absolviert.
2 weitere Nutzer:innen haben diese Anleitung absolviert.
Team

Purdue University Northwest, Team S4-G2, Hingst Spring 2019 Mitglied von Purdue University Northwest, Team S4-G2, Hingst Spring 2019
PNW-HINGST-S19S4G2
4 Mitglieder
5 Anleitungen geschrieben