Einleitung
The volume button turns up and down the volume on the RCA Maven Pro 11. If the button becomes damaged and will no longer press down this guide can be utilized to remove and replace it.
Was du brauchst
-
-
Remove all the 8 mm Phillips head screws on the side and back of the device.
-
-
-
-
Pry off the cover by sticking a wedge in between the screen and the cover.
-
Once the cover is partly removed, use your hands to take off the rest of the cover.
-
-
-
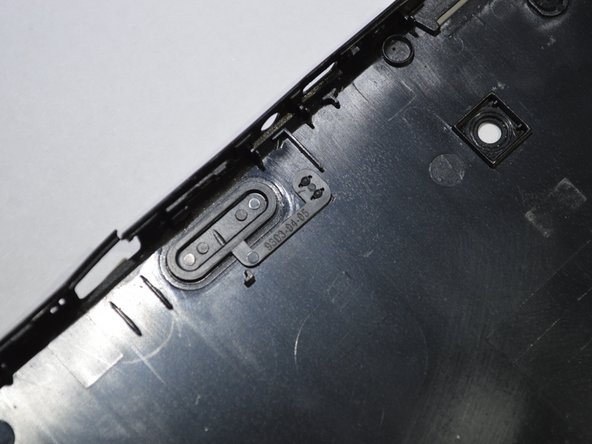
Locate the volume button on the inside of the cover.
-
Slide a wedge between the cover and the volume button and lightly lift it off.
-


To reassemble your device, follow these instructions in reverse order.
To reassemble your device, follow these instructions in reverse order.
Rückgängig: Ich habe diese Anleitung nicht absolviert.
Ein:e weitere:r Nutzer:in hat diese Anleitung absolviert.

Team

Purdue University Northwest, Team S4-G2, Hingst Spring 2019 Mitglied von Purdue University Northwest, Team S4-G2, Hingst Spring 2019
PNW-HINGST-S19S4G2
4 Mitglieder
5 Anleitungen geschrieben