Zum Hauptinhalt wechseln

RCA RCT6303W87 Speaker Replacement

Was du brauchst

  1. RCA RCT6303W87 Speaker Replacement, Battery: Schritt 1, Bild 1 von 3 RCA RCT6303W87 Speaker Replacement, Battery: Schritt 1, Bild 2 von 3 RCA RCT6303W87 Speaker Replacement, Battery: Schritt 1, Bild 3 von 3
    • Remove nine 4.8mm screws around the case with a JIS #00 screwdriver.

  2. RCA RCT6303W87 Speaker Replacement: Schritt 2, Bild 1 von 1
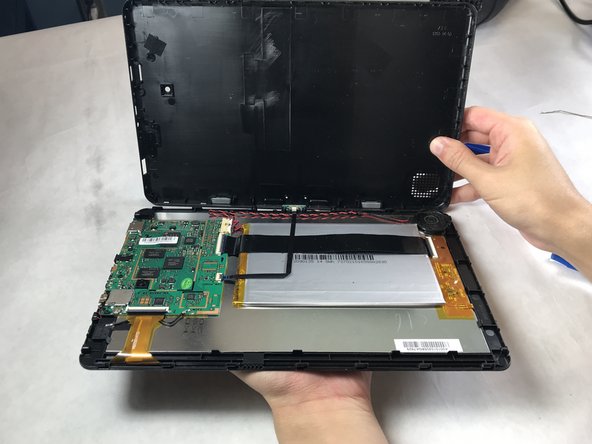
    • Insert plastic opening tool and slide it around the edges until the cover starts to pop off. It may be necessary to go over each side multiple times in order to pop the cover off.

  3. RCA RCT6303W87 Speaker Replacement: Schritt 3, Bild 1 von 3 RCA RCT6303W87 Speaker Replacement: Schritt 3, Bild 2 von 3 RCA RCT6303W87 Speaker Replacement: Schritt 3, Bild 3 von 3
    • Remove cover completely.

  4. RCA RCT6303W87 Speaker Replacement: Schritt 4, Bild 1 von 3 RCA RCT6303W87 Speaker Replacement: Schritt 4, Bild 2 von 3 RCA RCT6303W87 Speaker Replacement: Schritt 4, Bild 3 von 3
    • Disconnect battery cable from the motherboard.

  5. RCA RCT6303W87 Speaker Replacement: Schritt 5, Bild 1 von 3 RCA RCT6303W87 Speaker Replacement: Schritt 5, Bild 2 von 3 RCA RCT6303W87 Speaker Replacement: Schritt 5, Bild 3 von 3
    • Pull the thin black keyboard connector off and set it aside.

  6. RCA RCT6303W87 Speaker Replacement: Schritt 6, Bild 1 von 3 RCA RCT6303W87 Speaker Replacement: Schritt 6, Bild 2 von 3 RCA RCT6303W87 Speaker Replacement: Schritt 6, Bild 3 von 3
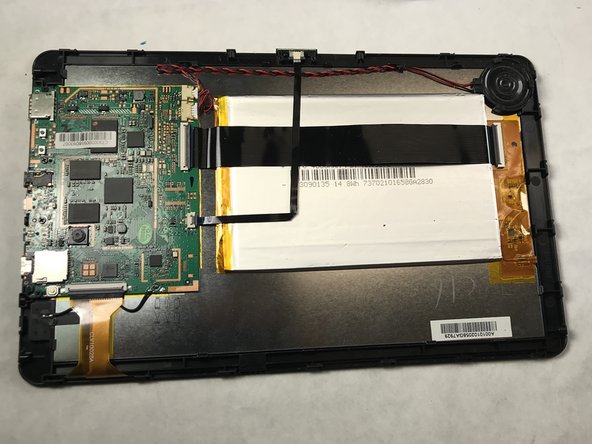
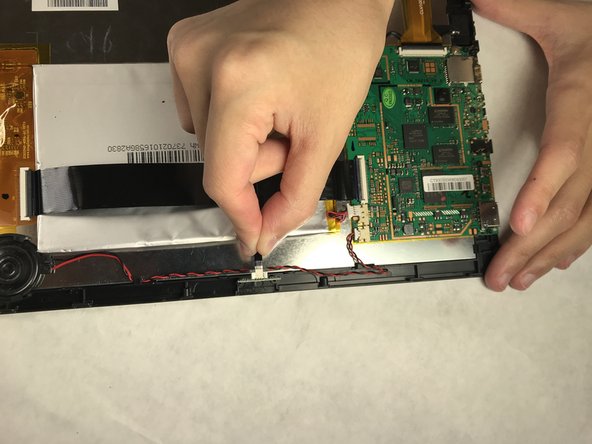
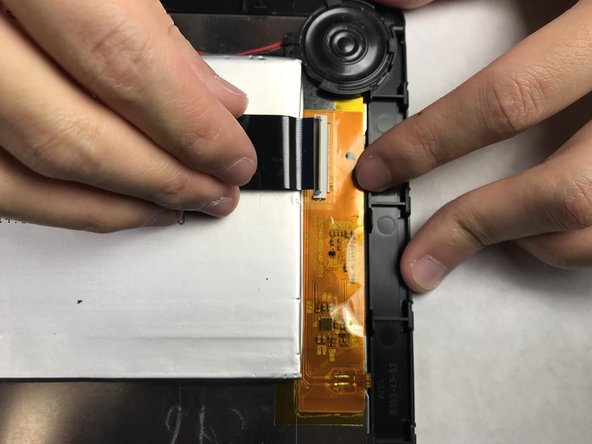
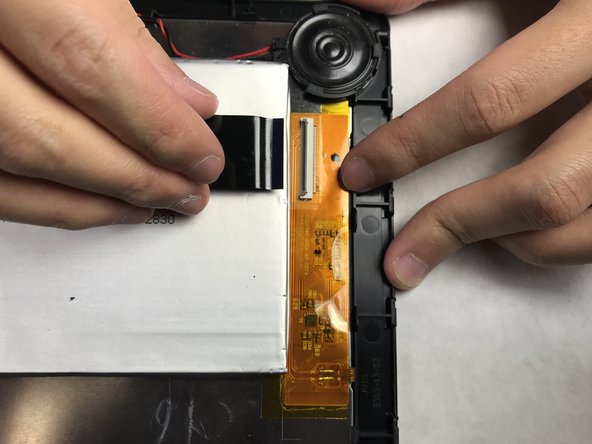
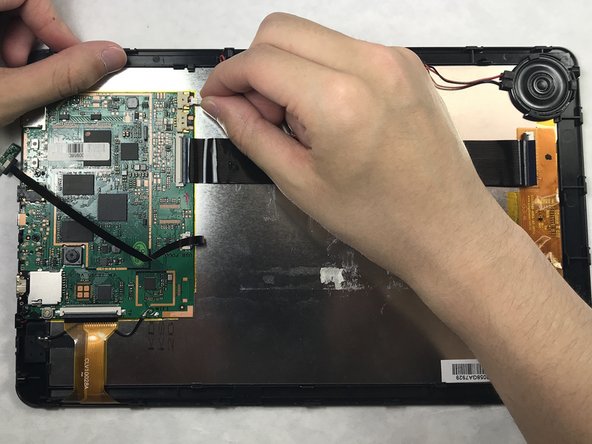
    • Disconnect the thick black band (bus) using a plastic opening tool or fingernail.

  7. RCA RCT6303W87 Speaker Replacement: Schritt 7, Bild 1 von 1
    In diesem Schritt verwendetes Werkzeug:
    Plastic Cards
    $2.99
    Kaufen
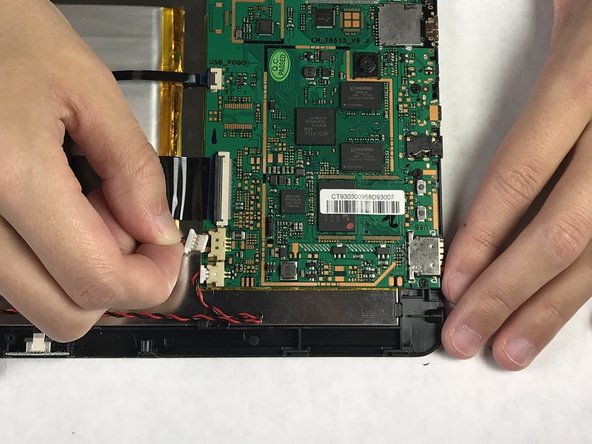
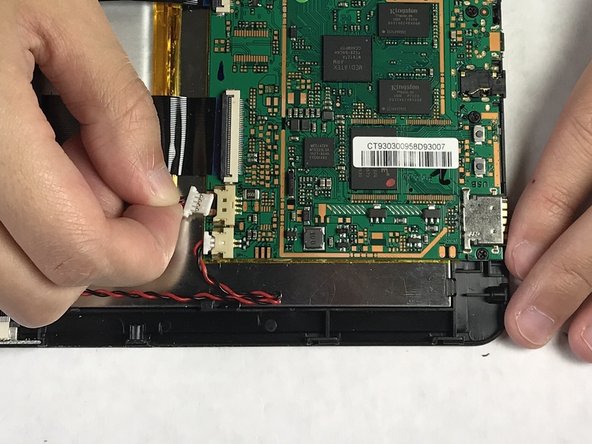
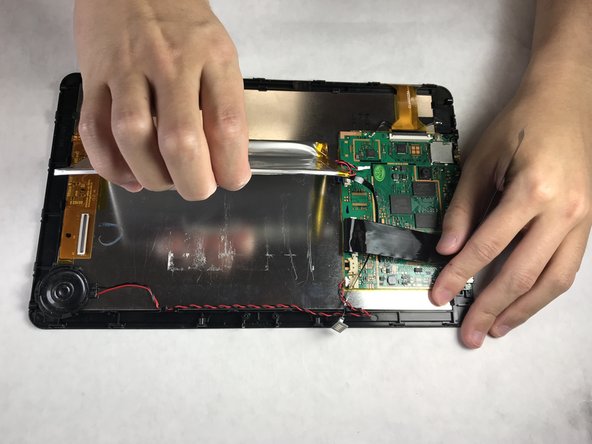
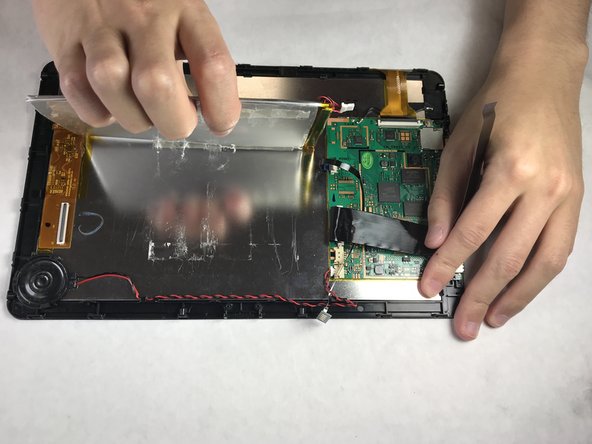
    • Use nylon spudger tool or plastic card to separate battery from the case.

  8. RCA RCT6303W87 Speaker Replacement: Schritt 8, Bild 1 von 3 RCA RCT6303W87 Speaker Replacement: Schritt 8, Bild 2 von 3 RCA RCT6303W87 Speaker Replacement: Schritt 8, Bild 3 von 3
    • Carefully peel off the battery.

  9. RCA RCT6303W87 Speaker Replacement, Speaker: Schritt 9, Bild 1 von 3 RCA RCT6303W87 Speaker Replacement, Speaker: Schritt 9, Bild 2 von 3 RCA RCT6303W87 Speaker Replacement, Speaker: Schritt 9, Bild 3 von 3
    • Disconnect the speaker cord from the motherboard.

  10. RCA RCT6303W87 Speaker Replacement: Schritt 10, Bild 1 von 3 RCA RCT6303W87 Speaker Replacement: Schritt 10, Bild 2 von 3 RCA RCT6303W87 Speaker Replacement: Schritt 10, Bild 3 von 3
    • Use the plastic spudger to slide the speaker out.

Abschluss

To reassemble your device, follow these instructions in reverse order.

Team

IUPUI, Team S3-G2, Harley Spring 2018 Mitglied von IUPUI, Team S3-G2, Harley Spring 2018

IUPUI-HARLEY-S18S3G2

3 Mitglieder

2 Anleitungen geschrieben

0 Kommentare

Kommentar hinzufügen

Seitenaufrufe:

Letzte 24 Stunden: 1

Letzte 7 Tage: 2

Letzte 30 Tage: 2

Insgesamt: 430