Einleitung
After noticing your battery life deteriorate or you notice a bulge in the back of the device, it is time to replace the battery. In this guide, you will be removing the following parts:
- 1. Back Cover
- 2. Battery
Was du brauchst
-
-
Remove two 2.4mm x 4mm screws from bottom of the tablet with Phillips #00 Screwdriver.
-
-
-
-
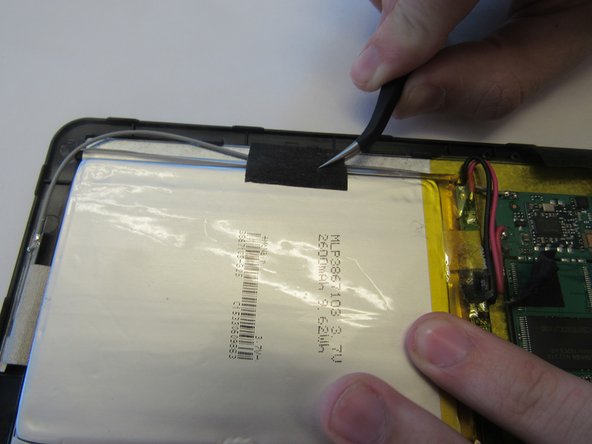
Remove the battery pack by carefully prying the battery back from the front cover. Then remove the wires connecting the battery to the motherboard at the motherboard using the tweezers.
-
-
-
Replace the damaged or malfunctioning battery with the new battery and wires. The new battery must be stuck back into its original place using thermal tape.
-
-
-
The new wires must be soldered back into place on the motherboard at the original location.
-
For tips on soldering techniques, see this Soldering Guide
-


To reassemble your device, follow these instructions in reverse order.
To reassemble your device, follow these instructions in reverse order.
Rückgängig: Ich habe diese Anleitung nicht absolviert.
Ein:e weitere:r Nutzer:in hat diese Anleitung absolviert.
Team

Clemson, Team 14-4, Shirley Spring 2015 Mitglied von Clemson, Team 14-4, Shirley Spring 2015
CLEM-SHIRLEY-S15S14G4
6 Mitglieder
15 Anleitungen geschrieben