Einleitung
If the screen of the device becomes cracked or stops registering touch commands, use the following guide to replace the screen.
Was du brauchst
-
-
Remove two 2.4mm x 4mm screws from bottom of the tablet with Phillips #00 Screwdriver.
-
-
-
-
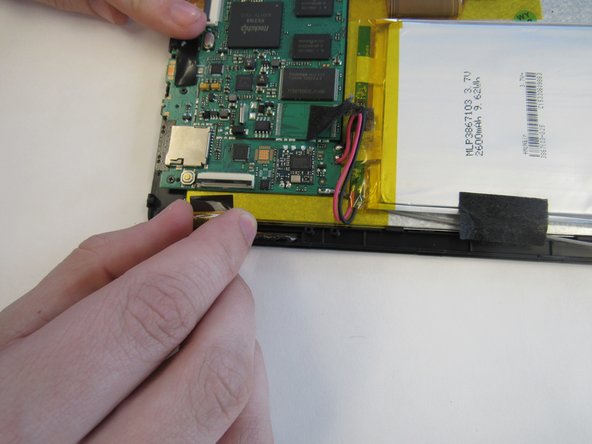
Using the tweezers, remove the black tape connecting the screen to the motherboard.
-
-
-
Heat the iOpener in the microwave, following the instructions provided with the tool. Lay the heated iOpener on the front screen for two minutes to soften the connection of the screen to the tablet.
-
-
-
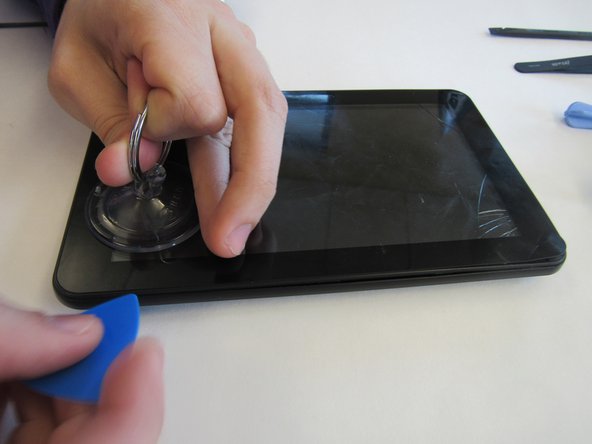
Use the suction cup and lever tool tool to pry the front screen from the tablet.
-


To reassemble your device, follow these instructions in reverse order.
To reassemble your device, follow these instructions in reverse order.
Rückgängig: Ich habe diese Anleitung nicht absolviert.
2 weitere Nutzer:innen haben diese Anleitung absolviert.
Team

Clemson, Team 14-4, Shirley Spring 2015 Mitglied von Clemson, Team 14-4, Shirley Spring 2015
CLEM-SHIRLEY-S15S14G4
6 Mitglieder
15 Anleitungen geschrieben