Zum Hauptinhalt wechseln

RCA RP3715A Motherboard Replacement

Was du brauchst

  1. RCA RP3715A Motherboard Replacement, Getting inside the device.: Schritt 1, Bild 1 von 1
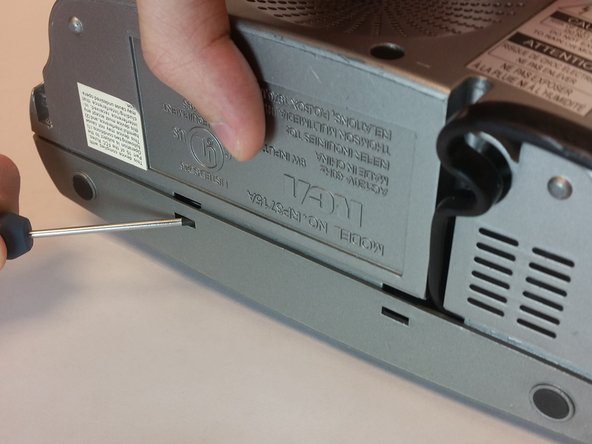
    • Take out the six screws located on the back of the device.

    • The red screws are 10 mm Phillip's #1. The orange screws are 13 mm Phillips #1.

    • Three screws are located on the back panel. One is located inside the battery carriage.

    • Two screws are located on the on the back panel on the bottom left and right side.

  2. RCA RP3715A Motherboard Replacement, Relieve extension cord tension.: Schritt 2, Bild 1 von 3 RCA RP3715A Motherboard Replacement, Relieve extension cord tension.: Schritt 2, Bild 2 von 3 RCA RP3715A Motherboard Replacement, Relieve extension cord tension.: Schritt 2, Bild 3 von 3
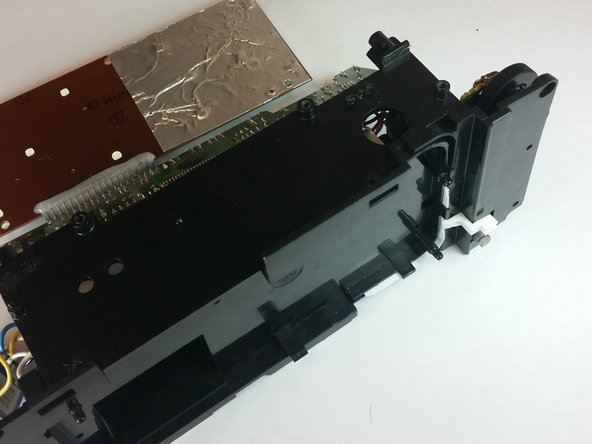
    • Remove the 10 mm Phillip's #1 screw.

    • Then remove the metal reinforcement.

  3. RCA RP3715A Motherboard Replacement: Schritt 3, Bild 1 von 2 RCA RP3715A Motherboard Replacement: Schritt 3, Bild 2 von 2
    • Using flathead screwdriver undo the release tabs.

  4. RCA RP3715A Motherboard Replacement: Schritt 4, Bild 1 von 3 RCA RP3715A Motherboard Replacement: Schritt 4, Bild 2 von 3 RCA RP3715A Motherboard Replacement: Schritt 4, Bild 3 von 3
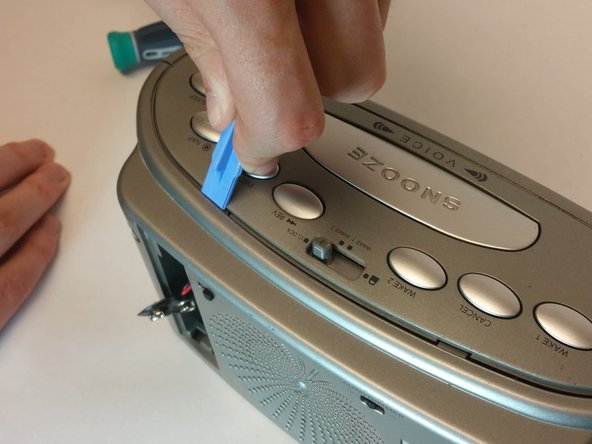
    • Pry the release tabs with a spudger.

    • Start with back of the device on the topside.

  5. RCA RP3715A Motherboard Replacement: Schritt 5, Bild 1 von 2 RCA RP3715A Motherboard Replacement: Schritt 5, Bild 2 von 2
    • Pry open both tabs to remove the topside of the clock.

  6. RCA RP3715A Motherboard Replacement, Speaker Replacement: Schritt 6, Bild 1 von 1
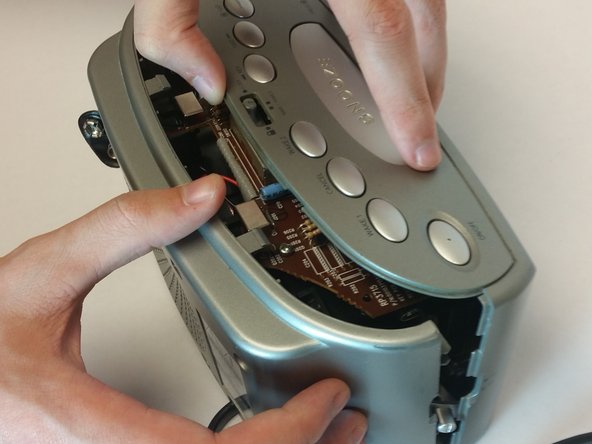
    • Remove the two 10mm Phillip's #1 screws. Also remove the two reinforcements holding the speaker in place.

  7. RCA RP3715A Motherboard Replacement, Detaching the front panel: Schritt 7, Bild 1 von 1
    • Remove the two 10 mm Phillip's #1 screws.

  8. RCA RP3715A Motherboard Replacement: Schritt 8, Bild 1 von 1
    • Remove the gray panel from the frame.

  9. RCA RP3715A Motherboard Replacement, Unlatch release tabs: Schritt 9, Bild 1 von 3 RCA RP3715A Motherboard Replacement, Unlatch release tabs: Schritt 9, Bild 2 von 3 RCA RP3715A Motherboard Replacement, Unlatch release tabs: Schritt 9, Bild 3 von 3
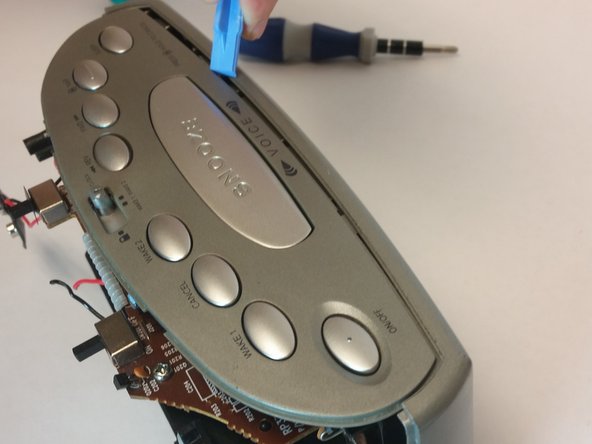
    • The two latches located in the picture will help take off the display.

    • Remove the display.

  10. RCA RP3715A Motherboard Replacement, Motherboard: Schritt 10, Bild 1 von 2 RCA RP3715A Motherboard Replacement, Motherboard: Schritt 10, Bild 2 von 2
    • asd

  11. RCA RP3715A Motherboard Replacement, Removing the top part of motherboard: Schritt 11, Bild 1 von 1
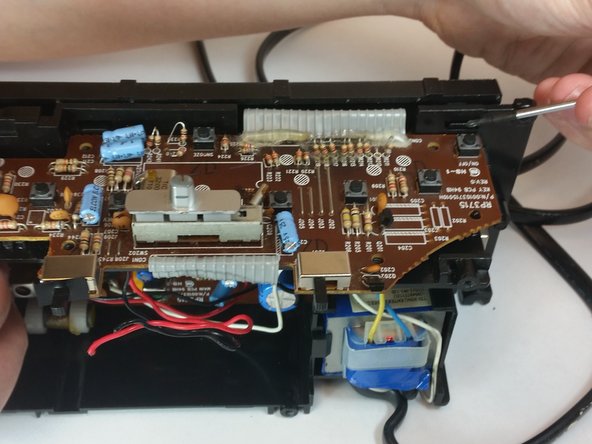
    • Remove the top 5 10mm Phillips #1 screws holding the top part of the motherboard

  12. RCA RP3715A Motherboard Replacement, Removing the side part of motherboard: Schritt 12, Bild 1 von 1
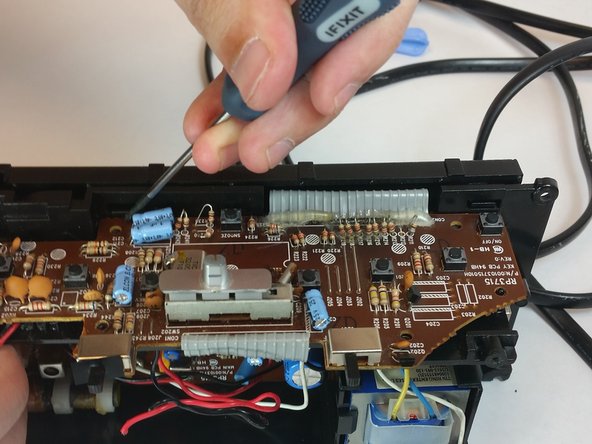
    • Remove the 5 10mm Phillip's #1 screws that holding side part of the motherboard

  13. RCA RP3715A Motherboard Replacement: Schritt 13, Bild 1 von 1
    • Remove the transformer by pulling back the release tab shown.

  14. RCA RP3715A Motherboard Replacement: Schritt 14, Bild 1 von 1
    • Pull the battery terminal through the whole shown.

  15. RCA RP3715A Motherboard Replacement, Lift the digital screen: Schritt 15, Bild 1 von 1
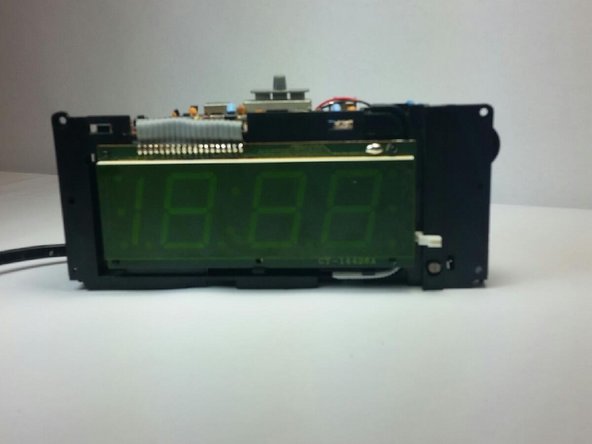
    • First release the latch highlighted in the picture. Then grab the screen by the bottom and lift it up.

  16. RCA RP3715A Motherboard Replacement, Lift the top piece of motherboard: Schritt 16, Bild 1 von 3 RCA RP3715A Motherboard Replacement, Lift the top piece of motherboard: Schritt 16, Bild 2 von 3 RCA RP3715A Motherboard Replacement, Lift the top piece of motherboard: Schritt 16, Bild 3 von 3
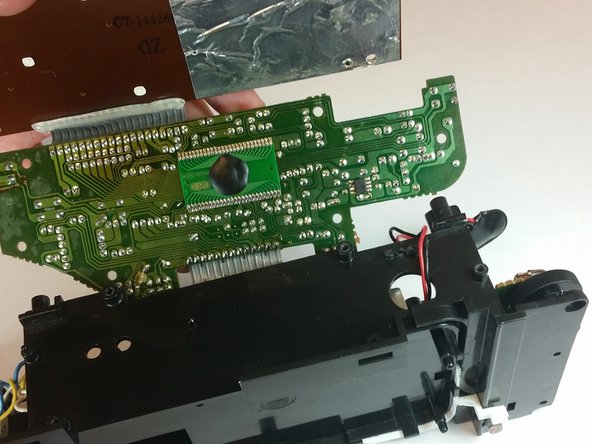
    • Remove the motherboard from the frame using the illustration shown.

Abschluss

To reassemble your device, follow these instructions in reverse order.

Ein:e weitere:r Nutzer:in hat diese Anleitung absolviert.

Team

USF Tampa, Team 10-5, Brown Fall 2014 Mitglied von USF Tampa, Team 10-5, Brown Fall 2014

USFT-BROWN-F14S10G5

3 Mitglieder

5 Anleitungen geschrieben

0 Kommentare

Kommentar hinzufügen

Seitenaufrufe:

Letzte 24 Stunden: 0

Letzte 7 Tage: 0

Letzte 30 Tage: 4

Insgesamt: 546