Einleitung
If your RIDGID R2740 Belt Sander won't turn on, the on/off switch may be defective and need to be replaced. This guide will walk you through how to replace the on/off switch on your RIDGID R2740 Belt Sander.
Was du brauchst
-
-
Orient the belt sander so that the RIDGID logo is facing you.
-
Remove the six 19 mm and three 51 mm T20 screws that hold the cover into place.
-
Remove the cover from the belt sander.
-
-
-
Remove the two 16 mm T10 screws.
-
Remove the support bracket that holds the power cord into place.
-
-
-
-
Lift the power cord from the resting grooves.
-
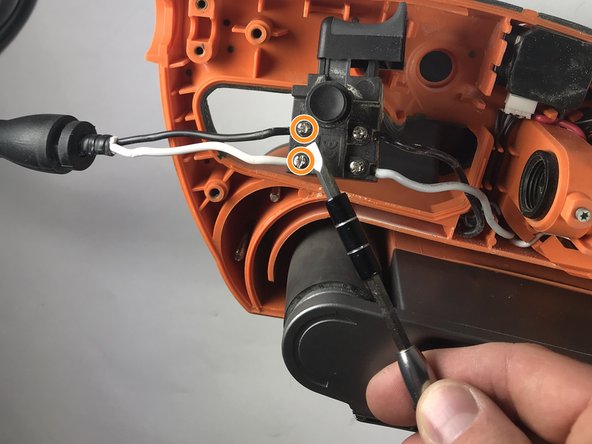
Rotate the switch so that the lock-on button is facing you.
-
Loosen the two 8 mm Phillips #3 screws.
-
Pull the two wires away from the switch.
-
-
-
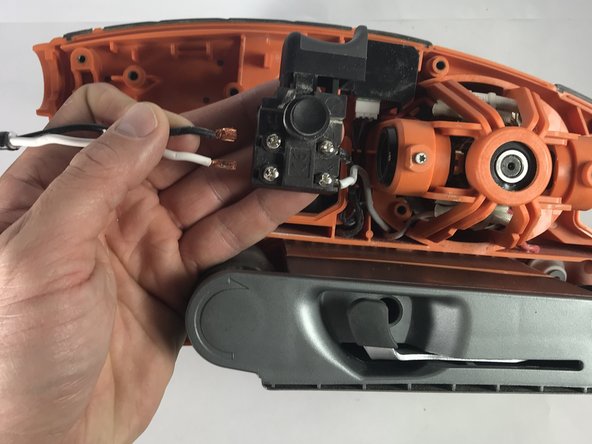
Undo the two screws on the backside of the switch with a Phillips #3 screw driver.
-


To reassemble your device, follow these instructions in reverse order.
To reassemble your device, follow these instructions in reverse order.
Rückgängig: Ich habe diese Anleitung nicht absolviert.
Ein:e weitere:r Nutzer:in hat diese Anleitung absolviert.
Team

Oregon Institute of Technology, Team S1-G1, Lancaster Winter 2019 Mitglied von Oregon Institute of Technology, Team S1-G1, Lancaster Winter 2019
OIT-LANCASTER-W19S1G1
4 Mitglieder
6 Anleitungen geschrieben