Zum Hauptinhalt wechseln

RYOBI P422 Grinding Head Assembly Replacement

Was du brauchst

  1. RYOBI P422 Grinding Head Assembly Replacement, Battery and Handle: Schritt 1, Bild 1 von 2 RYOBI P422 Grinding Head Assembly Replacement, Battery and Handle: Schritt 1, Bild 2 von 2
    • To remove the battery press down on the two buttons located on each side of the battery and pull away from the body of the grinder.

    • To remove the handle hold grinder with one hand and use the other hand to unscrew the handle with a counter-clockwise motion

  2. RYOBI P422 Grinding Head Assembly Replacement, Wheel Guard: Schritt 2, Bild 1 von 3 RYOBI P422 Grinding Head Assembly Replacement, Wheel Guard: Schritt 2, Bild 2 von 3 RYOBI P422 Grinding Head Assembly Replacement, Wheel Guard: Schritt 2, Bild 3 von 3
    • Do not perform this task immediately after using the grinder for grinding/cutting. The blade will be to hot to touch and could result in injury.

    • Fully press the spindle lock button.

    • With the spindle lock button held down, use the wrench provided to loosen the clamp nut. Once loose, you can use your fingers to unscrew the nut completely

  3. RYOBI P422 Grinding Head Assembly Replacement: Schritt 3, Bild 1 von 2 RYOBI P422 Grinding Head Assembly Replacement: Schritt 3, Bild 2 von 2
    • Remove your grinding/cutting tool by simply pulling it off the spindle.

    • Next remove the disc flange (a.k.a spacer) by pulling it off of the back end of the spindle.

    • The disc flange has two small raised edges on its back side. These ridges need to be aligned with the two flat faces at the back of the spindle lock when reassembled. This will ensure a safe, snug fit for your grinding blades.

  4. RYOBI P422 Grinding Head Assembly Replacement: Schritt 4, Bild 1 von 3 RYOBI P422 Grinding Head Assembly Replacement: Schritt 4, Bild 2 von 3 RYOBI P422 Grinding Head Assembly Replacement: Schritt 4, Bild 3 von 3
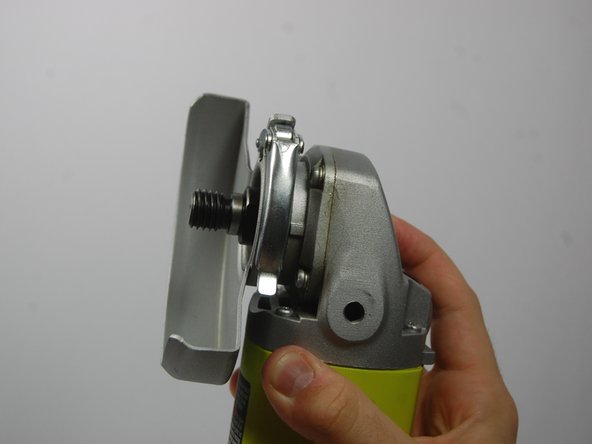
    • Lift the clasp on the grinder guard. Make sure the clasp is completely loosened before proceeding.

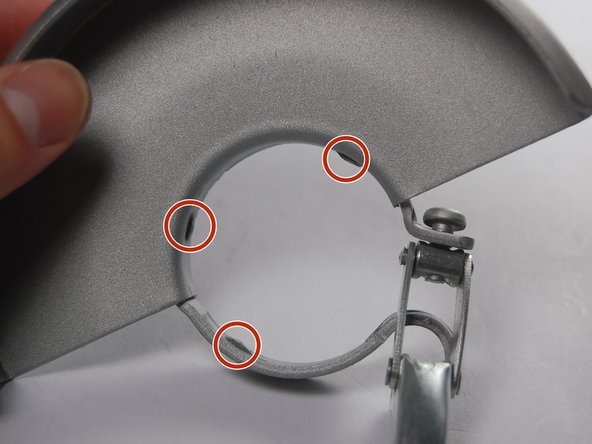
    • Rotate the grinder guard so that the three notches on its interior align with the three slots on the grinding head assembly.

    • Once aligned, simply pull the guard off.

  5. RYOBI P422 Grinding Head Assembly Replacement, Grinding Head Assembly: Schritt 5, Bild 1 von 3 RYOBI P422 Grinding Head Assembly Replacement, Grinding Head Assembly: Schritt 5, Bild 2 von 3 RYOBI P422 Grinding Head Assembly Replacement, Grinding Head Assembly: Schritt 5, Bild 3 von 3
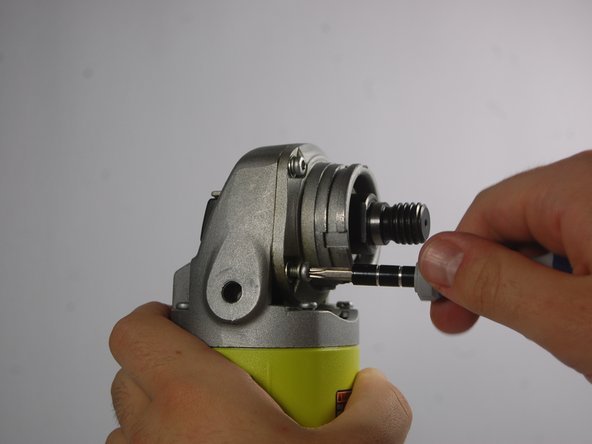
    • Remove the four 1.4 cm screws from the grinding head assembly using a Torx T20 screwdriver.

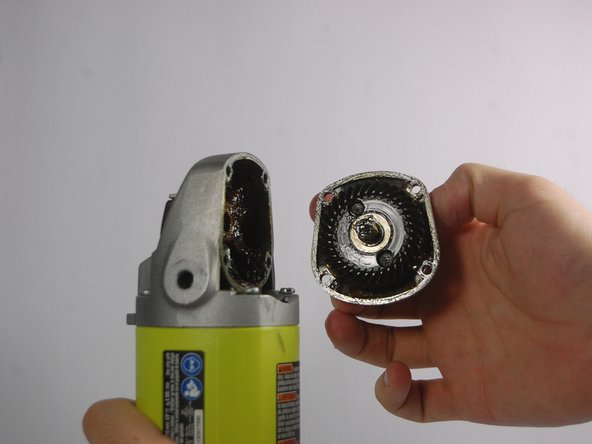
    • With the screws removed, the grinding head assembly can be removed from the rest of the head with a gentle pull.

    • If there is no visible damage to either the pinion or gear inside the grinder head, the issue may stem from a lack of lubrication. Clean the interior of the grinder head before applying new lubricating grease to the pinion and gear.

    • When replacing the grinder head, make sure that the head edges are flush with the edges of the gear case assembly (The larger half of the head assembly).

Abschluss

To reassemble your device, follow these instructions in reverse order.

Thomas Napert

Mitglied seit: 03/16/15

279 Reputation

2 Anleitungen geschrieben

Team

UMass Dartmouth, Team 3-6, Duarte Spring 2015 Mitglied von UMass Dartmouth, Team 3-6, Duarte Spring 2015

UMASSD-DUARTE-S15S3G6

3 Mitglieder

5 Anleitungen geschrieben

0 Kommentare

Kommentar hinzufügen

Seitenaufrufe:

Letzte 24 Stunden: 0

Letzte 7 Tage: 4

Letzte 30 Tage: 29

Insgesamt: 5,273