Einleitung
Follow this guide to learn how to replace the chain guard. Before removing the crank arms, the pedals must first be removed . To reassemble the crank arms and chain guard, follow steps in reverse order.
Was du brauchst
-
-
Use an 8" adjustable crescent wrench to fit it into the base of the pedal.
-
-
-
Twist the the wrench in a counter -clockwise direction to unscrew the right-side pedal (The chain side).
-
Repeat the process on the other side with a clockwise direction.
-
-
-
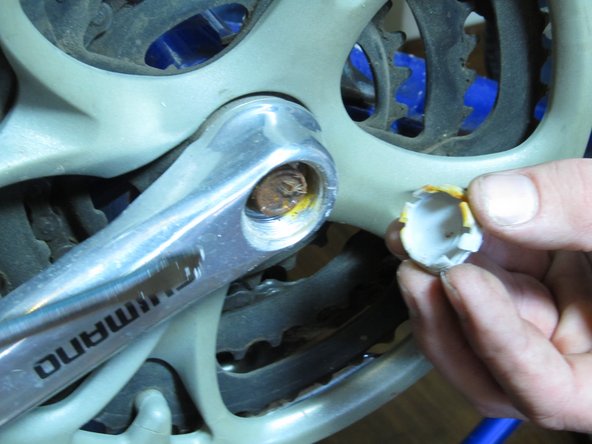
Use a flathead screwdriver to remove the dust cap of the crank arm.
-
Repeat the process on other side.
-
-
-
-
Next, use a socket wrench to unscrew the crank arm.
-
Turn the socket wrench clockwise to remove the bolt.
-
-
-
Insert the crank arm puller into the screw hole.
-
Now use a crescent wrench to tighten the crank arm puller. Twist it in a clockwise direction until the puller is fully tightened.
-
-
-
Turn the crank arm puller in a clockwise direction to remove it.
-
Repeat step 2 to 4 on the other side.
-
-
-
Flip the crank arm over with the chainring on it.
-
Locate the four screws on the back of the chainring.
-
-
-
Use a Phillips #2 screwdriver to remove the four screws on the back of the chainring.
-


To reassemble your device, follow these instructions in reverse order.
If you are replacing the chain guard, use the new chain guard when reassembling the device.
To reassemble your device, follow these instructions in reverse order.
If you are replacing the chain guard, use the new chain guard when reassembling the device.
Rückgängig: Ich habe diese Anleitung nicht absolviert.
Eine weitere Person hat diese Anleitung absolviert.
Team

Cal Poly, Team 7-49, Forte Fall 2012 Mitglied von Cal Poly, Team 7-49, Forte Fall 2012
CPSU-FORTE-F12S7G49
5 Mitglieder
5 Anleitungen geschrieben