Zum Hauptinhalt wechseln

Removing Audio Technica ATH-AD500 Foam Disks

Was du brauchst

  1. Removing Audio Technica ATH-AD500 Foam Disks, Speaker Assembly: Schritt 1, Bild 1 von 1
    • Remove the ear pads by peeling them away from the grill.

  2. Removing Audio Technica ATH-AD500 Foam Disks: Schritt 2, Bild 1 von 1
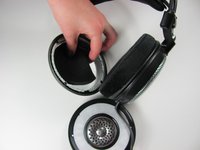
    • Remove all four 1cm screws on the inside of the headphone using a #1 Phillips head.

  3. Removing Audio Technica ATH-AD500 Foam Disks: Schritt 3, Bild 1 von 1
    • Remove the speaker from the grill by pulling it out.

    • Remove the speaker carefully so you do not rip the wires out.

  4. Removing Audio Technica ATH-AD500 Foam Disks, Foam Disks: Schritt 4, Bild 1 von 2 Removing Audio Technica ATH-AD500 Foam Disks, Foam Disks: Schritt 4, Bild 2 von 2
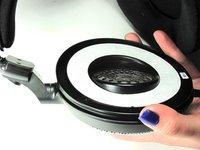
    • Remove the foam disk from the grill by peeling it away from the grill.

    • During reassembly, make sure that the speaker is angled into your ear canal.

Abschluss

To reassemble your device, follow these instructions in reverse order.

2 weitere Nutzer:innen haben diese Anleitung absolviert.

Melanie Reis

Mitglied seit: 01/11/13

227 Reputation

5 Anleitungen geschrieben

Team

Cal Poly, Team 17-19, Forte Winter 2013 Mitglied von Cal Poly, Team 17-19, Forte Winter 2013

CPSU-FORTE-W13S17G19

6 Mitglieder

17 Anleitungen geschrieben

0 Kommentare

Kommentar hinzufügen

Seitenaufrufe:

Letzte 24 Stunden: 0

Letzte 7 Tage: 5

Letzte 30 Tage: 22

Insgesamt: 2,074