Einleitung
In many devices such as handheld phones, the buttons necessary to operate the device will malfunction. This guide will show you how to access the rubber keypad in a step-by-step manner in order to determine what is malfunctioning with the keypad. If the keypad is damaged, this guide will show you how to remove the keypad from the housing.
Was du brauchst
-
-
Orient the phone so that the phone model and other descriptive information is facing upward.
-
Locate the two silver screws near the hinge where the battery is housed.
-
Remove the silver screws using a Phillips head #2 screwdriver.
-
-
-
Make sure you pull the cover off carefully in order to prevent damage to the back cover.
-
-
-
-
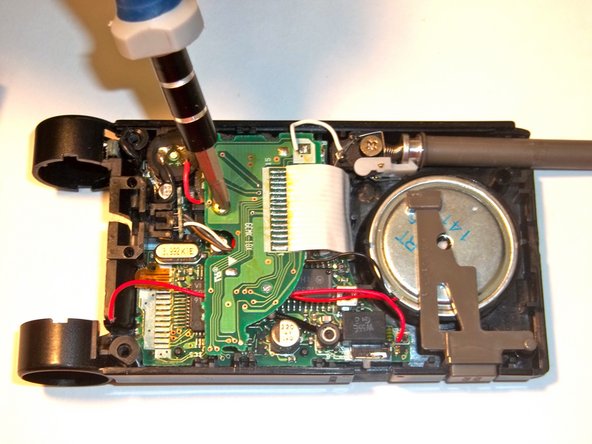
Locate and unscrew the circled screw using a Philips head #2 screw driver or screw driver head.
-
-
-
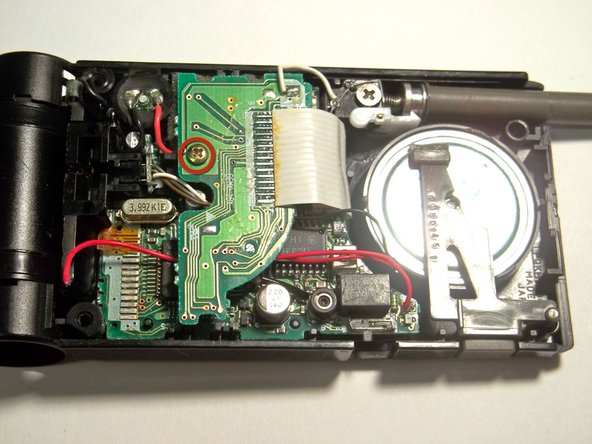
Be careful when lifting the motherboard. To prevent damage to the motherboard, gradually lift it from its place in the assembly.
-
-
-
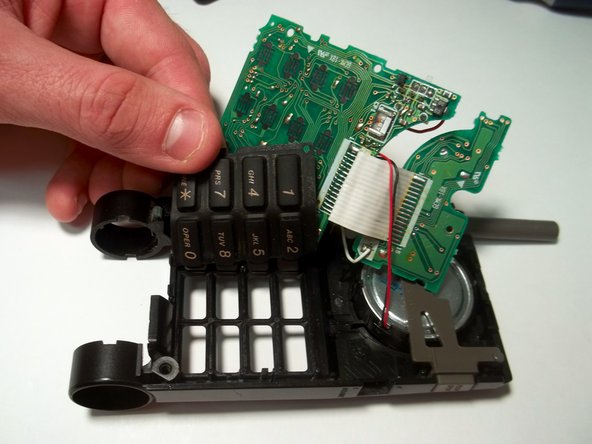
Now that the motherboard has been lifted out of place, the keypad can be accessed.
-
Using your fingers push the buttons from the the phone toward the lifted motherboard.
-
Remove the keypad from the assembly.
-


To reassemble your device, follow these instructions in reverse order.
To reassemble your device, follow these instructions in reverse order.
Team

Clemson, Team 15-1, Benson Fall 2012 Mitglied von Clemson, Team 15-1, Benson Fall 2012
CLEM-BENSON-F12S15G1
4 Mitglieder
10 Anleitungen geschrieben