Einleitung
Plus de son? Remplacez la prise Jack!
Was du brauchst
-
-
Insérez un éjecteur de carte SIM ou un trombone dans le trou près de la prise casque.
-
Appuyez jusqu'à ce que le tiroir de carte SIM sorte.
-
-
YOU NEED TO PUT THE OPENER TOOL BETWEEN THE ANTENNA COVER AND THE DOCK CONNECTOR FIRST, THEN YOU WILL HAVE SPACE TO OPEN IT.. MY 2 CENTS
You better lay off the caps.
Very hard to remove and the plastic is very fragile
Take care when removing
When you get stuck follow this guy guide
Great Guide.
My dad banged his iPhone in a table after arguing with someone and got the aluminum cover next to the volume control bent in such a way as it got the volume control stuck in the max position. I used this guide to remove all parts out of the way so I can get the shape of that region and corrected it the "Han Solo" Way. It was an excellent opportunity to get the phone cleaned up as well
The biggest problem I had was screwing some of the screws back. The screwdriver that I had was not magnetized, so I used a little bit of superglue to bind the screw and the screwdriver until I had it screwed tightly.
The second biggest problem I had was that I lost a screw twice, but was lucky enough to find it quickly on the floor next to me.
I am very happy as I waited more than a month to get the confidence to get this iPhone repaired.
Zitat von Ivanfrost:
how do i know what part is in my phone? There are 2...
Once you have the phone apart and have gently unplugged the power ribbon, read the part number on the ribbon. If it's in the 821- family, you can safely use corresponding 821 headphone assembly. If it is the other part number, use the newer replacement. Many sites list both parts and let you order the appropriately numbered part. Otherwise (if you order the wrong part) it won't work or you'll have to [unnecessarily] hack the part to get it to work.
Zitat von Steve:
Once you have the phone apart and have gently unplugged the power ribbon, read the part number on the ribbon. If it's in the 821- family, you can safely use corresponding 821 headphone assembly. If it is the other part number, use the newer replacement. Many sites list both parts and let you order the appropriately numbered part. Otherwise (if you order the wrong part) it won't work or you'll have to [unnecessarily] hack the part to get it to work.
I bought the wrong one.... how do I hack it?
My iPhone is very first model. It doesn't have any of the four tabs shown.
The very first model does not have the four tabs. To open this version, use a plastic opener tool and push it into the middle of the tiny space between the rectangular dock connector and the antenna cover. Move the tool to the side and push it in a little deeper. A small gap should open up at the bottom of the antenna cover, where it meets the metal. Continue using the plastic opener tool in there, pushing it in and forcing it around the edge so that the antenna cover further separates. Then repeat this on the other side. To me it seems like a very brittle piece of plastic, so be careful. But now that it's loose at the bottom you can lift it with your fingers and work it off.
-
-
Insérez une spatule (spudger) en métal dans la fente entre le connecteur de dock et le cache de l'antenne. Faites délicatement levier près des deux languettes pour créer un petit interstice entre le cache de l'antenne et le joint frontal argenté.
Take heed to the note about getting the spudger between the dock connector and the cover. The dock connector is black plastic, as is the antenna cover, so it's difficult to see any gap between them. Putting the spudger between the metal shielding of the connector and the plastic is incorrect.
-
-
-
Insérez un opening tool (outil d'ouverture en plastique) dans l'interstice entre le cache de l'antenne et le cadre avant. L'extrémité en forme de cale doit pointer vers le cache de l'antenne. Faites glisser l'outil autour du coin et vers le haut jusqu'au revers métallique.
-
Répétez la même procédure de l'autre côté du connecteur de dock.
-
-
-
Saisissez le cache de l'antenne des deux côtés et faites-le glisser vers le haut et hors de l'iPhone. Ceci peut demander une certaine force. Si le cache ne s'enlève pas, vérifiez qu'il a été suffisamment soulevé pour dégager les loquets.
It was released very hard on my iPhone 2G but the problem comes when i have to put it back.
It remains a little more space between the dock and the Antena cover and maybe that's because the two tabs between the mic and the speaker are not entered under the gold board?
If someone knows please tell me how to put it back.
Thanks
There is a very easy way to remove the cover by simply sticking duct tape on it and pulling the tape away of the phone.
It will leave no marks and it didn't damage my antenna cover as much(my "chinese" repair tools were to weak).
Thanks, using the tape was quick and easy, no damage at all.
Roeland -
Brilliant. Works perfectly. 20 seconds of work.
-
-
-
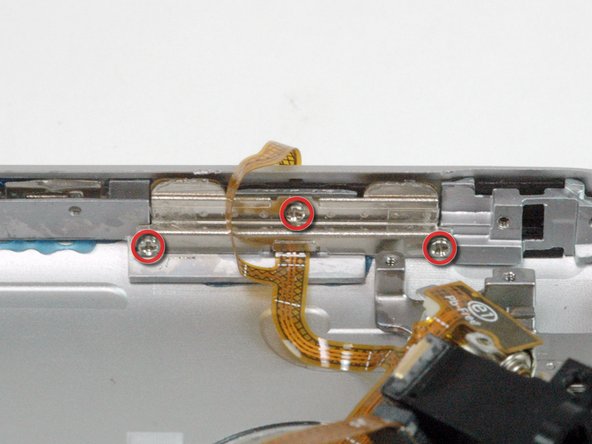
Retirez les trois vis cruciformes #00 qui maintiennent le boîtier arrière fixé à l'iPhone.
-
-
-
Le petit trou carré est l'endroit où il faut insérer le cure-dents lors de la prochaine étape.
-
Insérez le bout pointu d'une spatule (spudger) robuste dans l'espace entre la barre de métal grise et le boîtier arrière. Soulevez la vitre jusqu'à ce que vous puissiez insérer la pointe de l'iPod opening tool (outil d'ouverture) dans la jointure entre le joint frontal et le boîtier arrière.
-
-
-
-
Commencez par retirer le boîtier arrière sur le côté où se trouvent les boutons.
-
Faites glisser le cure-dents entièrement dans le trou carré. Il va probablement falloir tortiller l'outil et forcer un peu pour le faire rentrer entièrement.
Zitat von soporte:
Dental pick??? which other tool can be used to replace it? thanks!
At Lowes (and probably Home Depot) you can buy a set of 4 tools from Kobalt for about $6. They look like small icepicks with differently bent tips. They are much stronger than the dental picks you get at the local chain drugstore.
-
-
-
Faites levier sur le boîtier arrière en tournant rapidement le cure-dents en sens inverse des aiguilles d'une montre (trigonométriquement). Appliquez la force perpendiculairement au plan de l'écran. N'hésitez pas de faire ce mouvement rapidement, si vous le faites lentement vous risquez davantage de tordre le boîtier.
-
-
-
A l'aide d'une spatule (spudger), dégagez le boîtier arrière de l'iPhone le long du coin et du haut.
-
-
-
Répétez la même procédure de l'autre côté de l'iPhone. Faites glisser le cure-dents complètement dans le trou carré. Il va probablement falloir tortiller l'outil et forcer un peu pour le faire rentrer entièrement.
-
-
-
Faites levier sur le boîtier arrière en tournant rapidement le cure-dents en sens inverse des aiguilles d'une montre (trigonométriquement). Appliquez la force perpendiculairement au plan de l'écran. N'hésitez pas de faire ce mouvement rapidement, si vous le faites lentement vous risquez davantage de tordre le boîtier.
-
Le boîtier arrière est toujours relié à l'iPhone par la nappe de la prise Jack, ne retirez donc pas encore entièrement le boîtier arrière de l'iPhone.
-
-
-
A l'aide d'une spatule (spudger), déconnectez la nappe de la prise Jack de la carte mère.
-
-
-
Retirez les deux vis cruciformes Philipps #00 fixant l'interrupteur on/off sur le boîtier arrière.
-
-
-
Retirez les 3 vis suivantes:
-
Deux vis cruciformes Philipps #00 fixant le vibreur sur le boîtier arrière.
-
Une vis cruciforme Philipps #00 plus longue et à tête plus large, fixant la prise Jack au boîtier arrière.
-
-
-
Saisissez la vis de métal fixée au commutateur on/off et tirez-la doucement vers le haut et hors du boîtier arrière. Le bouton devrait venir avec la nappe.
-
Décollez délicatement la nappe du commutateur on/off. Assurez-vous de tirer sur la nappe à l’endroit où elle est collée au boîtier arrière.
-
-
-
La prise Jack est légèrement encastrée dans le boîtier arrière. Faites d'abord glisser la prise Jack hors de son emplacement puis soulevez-la légèrement (de seulement 1/2 cm) de façon à ce qu'elle ne soit plus dans le boîtier arrière.
-
-
-
Saisissez la prise Jack par l'extrémité et soulevez-la doucement en poussant le vibreur hors du boîtier arrière.
-
-
-
Retirez les deux vis cruciformes Philips #00 fixant le silencieux au boîtier arrière.
-
Retirez le revers métallique avec les trous pour vis et mettez-le de côté pour fixer le bouton de remplacement.
-
-
-
Saisissez le silencieux et soulevez-le pour faire apparaître la vis en dessous.
Does reinstallation of the vibrator motor get it back working. If not, does the Gen 1 replacement headphone jack include a new vibrator motor?
Zitat von BrooklynTed:
Does reinstallation of the vibrator motor get it back working. If not, does the Gen 1 replacement headphone jack include a new vibrator motor?
Yes, i have bought two off ebay, they come with the silent switch, volume button, power, vibrate and headphone jack, they cost between $10-$15
-
-
-
Retirez les trois vis cruciformes Philips #00 fixant le bouton de volume au boîtier arrière.
-


Pour remonter votre appareil, suivez les étapes dans l'ordre inverse.
Pour remonter votre appareil, suivez les étapes dans l'ordre inverse.
Rückgängig: Ich habe diese Anleitung nicht absolviert.
52 weitere Nutzer:innen haben diese Anleitung absolviert.
Besonderer Dank geht an diese Übersetzer:innen:
100%


Diese Übersetzer:innen helfen uns, die Welt zu reparieren! Wie kann ich mithelfen?
Hier starten ›

2 Kommentare
Keep in mind there is two different models - always check part number on actual flex - if you'll replace it with wrong one audio will work "other way around" - if you plug in headphones - speakers will start to work, if you unplug them speakers will not work.
I bought a iphone 2g off ebay and it has this problem.. :( Please is there anyway to fix it? There is 0 information on the internet about this problem.
Robert -
To remove the SIM, insert the end of a SIM eject tool or a small thin paper clip into the hole on the SIM tray. Press firmly and push the tool straight in until the tray pops out.
http://support.apple.com/kb/ht1438
neuronetix - Antwort
I put the SIM card back in, and the slide to unlock does not work.
dean -
The only carrier to accept this iPhone was AT&T, they have discontinued use of that baseband. Nobody else in the world except for early renegade reverse engineers such as Geohot can get the device to work as a really old iPod no use unlocking the device because the technology inside the most recently OEM sold/refurbed iPhone 1st gen fails universally. You should only buy a screen assembly and snap it onto the back and call it a dummy phone and put it in a museum.
Alexander Weinhart - Antwort