Zum Hauptinhalt wechseln

Repair Broken Connections in the Pyrus PY21S03211

Was du brauchst

  1. Repair Broken Connections in the Pyrus PY21S03211, Repair Broken Connections in the Pyrus PY21S03211: Schritt 1, Bild 1 von 1
    • Turn the video camera upside down so the bottom of the device is visible.

  2. Repair Broken Connections in the Pyrus PY21S03211: Schritt 2, Bild 1 von 2 Repair Broken Connections in the Pyrus PY21S03211: Schritt 2, Bild 2 von 2
    • Pull back the bottom tab to reveal the battery compartment.

  3. Repair Broken Connections in the Pyrus PY21S03211: Schritt 3, Bild 1 von 1
    • Pull back the tab that is holding in the battery in place and remove the battery from the device.

  4. Repair Broken Connections in the Pyrus PY21S03211: Schritt 4, Bild 1 von 1
    • Find the device's HDMI/TV cover.

  5. Repair Broken Connections in the Pyrus PY21S03211: Schritt 5, Bild 1 von 1
    • Open the cover to reveal the device ports.

  6. Repair Broken Connections in the Pyrus PY21S03211: Schritt 6, Bild 1 von 2 Repair Broken Connections in the Pyrus PY21S03211: Schritt 6, Bild 2 von 2
    • Use the screwdriver to remove the 2 4mm screws from the port cover.

  7. Repair Broken Connections in the Pyrus PY21S03211: Schritt 7, Bild 1 von 3 Repair Broken Connections in the Pyrus PY21S03211: Schritt 7, Bild 2 von 3 Repair Broken Connections in the Pyrus PY21S03211: Schritt 7, Bild 3 von 3
    • Use the tweezers to remove the plastic port cover.

  8. Repair Broken Connections in the Pyrus PY21S03211: Schritt 8, Bild 1 von 1
    • Open the display screen.

  9. Repair Broken Connections in the Pyrus PY21S03211: Schritt 9, Bild 1 von 3 Repair Broken Connections in the Pyrus PY21S03211: Schritt 9, Bild 2 von 3 Repair Broken Connections in the Pyrus PY21S03211: Schritt 9, Bild 3 von 3
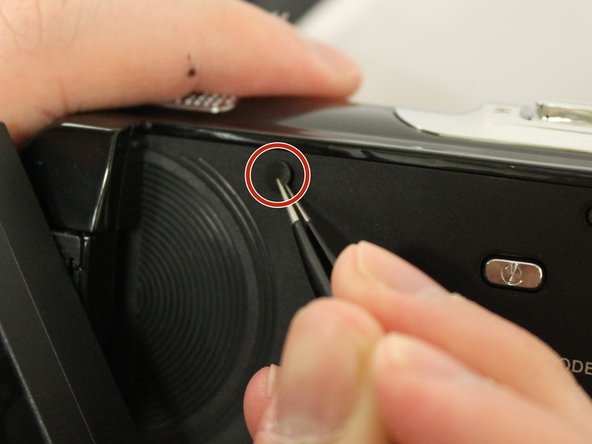
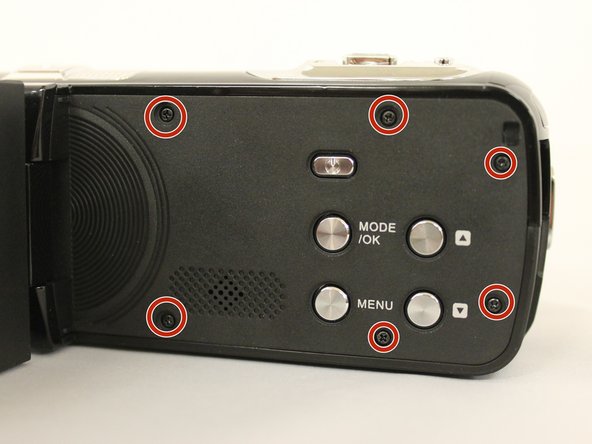
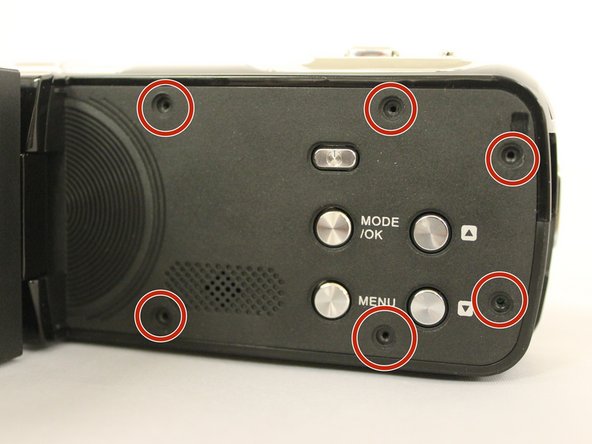
    • Use tweezers to carefully pull out the circular stickers to reveal the 4mm screws.

  10. Repair Broken Connections in the Pyrus PY21S03211: Schritt 10, Bild 1 von 2 Repair Broken Connections in the Pyrus PY21S03211: Schritt 10, Bild 2 von 2
    • Use the screwdriver to remove all six 4mm screws from the side of the device.

  11. Repair Broken Connections in the Pyrus PY21S03211: Schritt 11, Bild 1 von 3 Repair Broken Connections in the Pyrus PY21S03211: Schritt 11, Bild 2 von 3 Repair Broken Connections in the Pyrus PY21S03211: Schritt 11, Bild 3 von 3
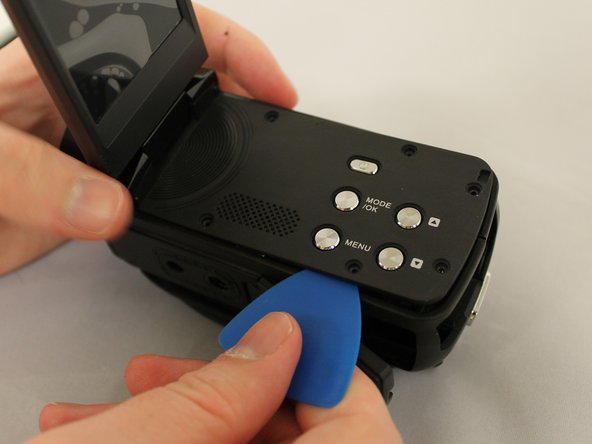
    • Use a thin plastic pick to pry off the side of the device and carefully remove the display.

  12. Repair Broken Connections in the Pyrus PY21S03211: Schritt 12, Bild 1 von 1
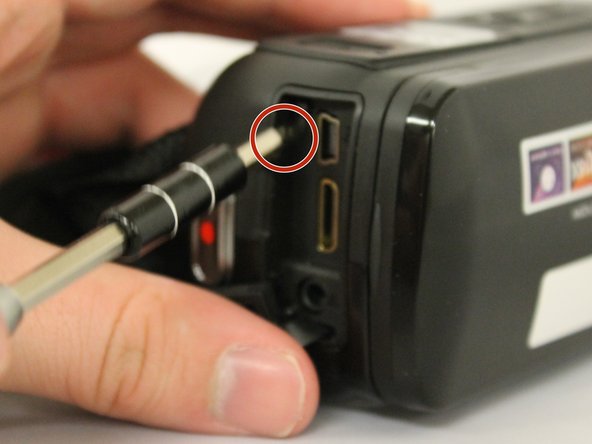
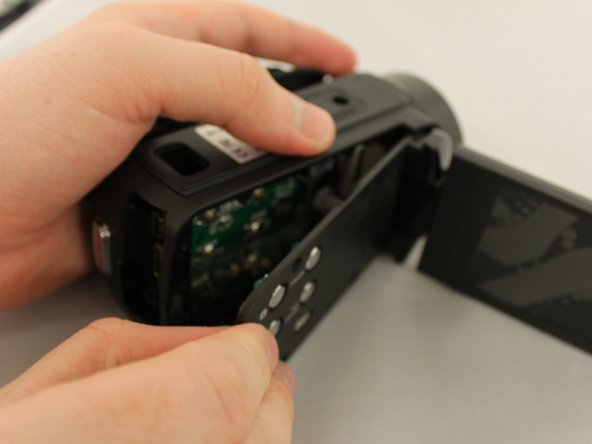
    • Carefully remove the side face from the device. Avoid pulling on the white connector.

  13. Repair Broken Connections in the Pyrus PY21S03211: Schritt 13, Bild 1 von 1
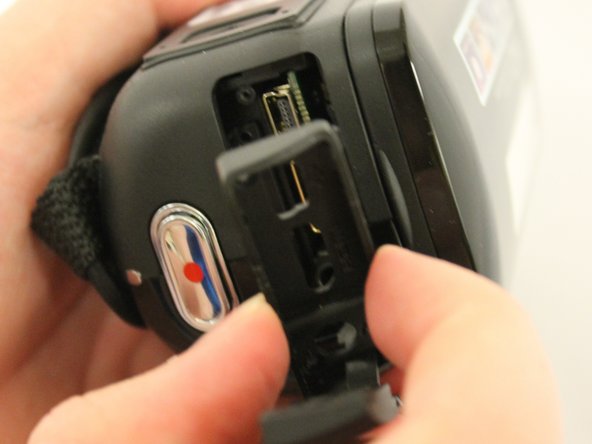
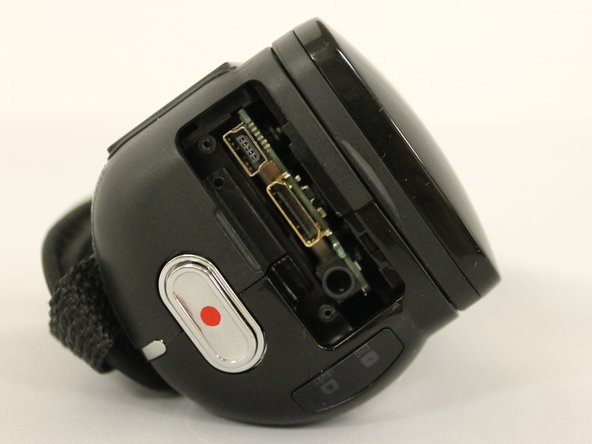
    • To remove the side face entirely, find the large white connector, flip open the grey lip with tweezers, and gently remove the white connector.
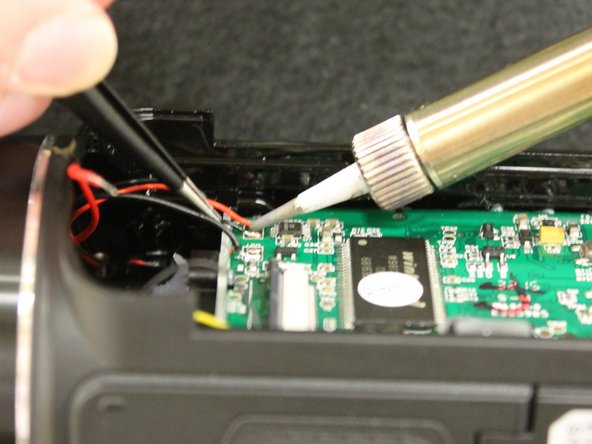
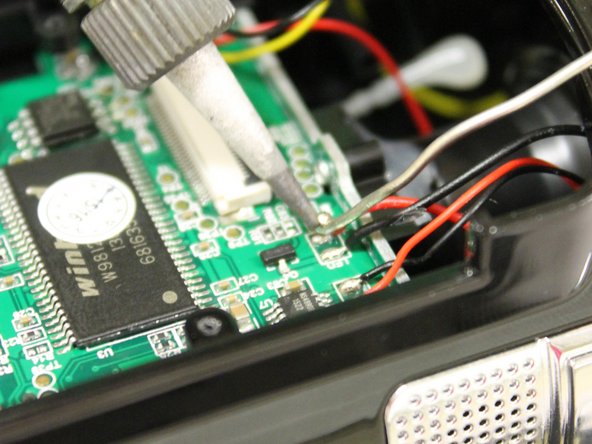
  14. Repair Broken Connections in the Pyrus PY21S03211: Schritt 14, Bild 1 von 1
    • Find the broken wire.

  15. Repair Broken Connections in the Pyrus PY21S03211: Schritt 15, Bild 1 von 3 Repair Broken Connections in the Pyrus PY21S03211: Schritt 15, Bild 2 von 3 Repair Broken Connections in the Pyrus PY21S03211: Schritt 15, Bild 3 von 3
Ziellinie

0 Kommentare

Kommentar hinzufügen

Seitenaufrufe:

Letzte 24 Stunden: 0

Letzte 7 Tage: 2

Letzte 30 Tage: 2

Insgesamt: 197