Zum Hauptinhalt wechseln

Repairing HTC Droid Incredible Logic Board

Archivierte Anleitung
Diese Anleitung wurde ausschließlich für historische Zwecke erhalten. Verwende die aktualisierte Version dieser Anleitung, um deine Reparatur durchzuführen.

Was du brauchst

  1. Repairing HTC Droid Incredible Logic Board, Battery: Schritt 1, Bild 1 von 3 Repairing HTC Droid Incredible Logic Board, Battery: Schritt 1, Bild 2 von 3 Repairing HTC Droid Incredible Logic Board, Battery: Schritt 1, Bild 3 von 3
    • Pry off back plastic, starting at the gap provided at the bottom of the phone. A spudger can be used to make this easier.

  2. Repairing HTC Droid Incredible Logic Board: Schritt 2, Bild 1 von 2 Repairing HTC Droid Incredible Logic Board: Schritt 2, Bild 2 von 2
    • Remove battery, prying from the provided gap at the upper-right corner of the battery

  3. Repairing HTC Droid Incredible Logic Board, Back Panel: Schritt 3, Bild 1 von 2 Repairing HTC Droid Incredible Logic Board, Back Panel: Schritt 3, Bild 2 von 2
    • Depress MicroSD to eject it from the side of the case.

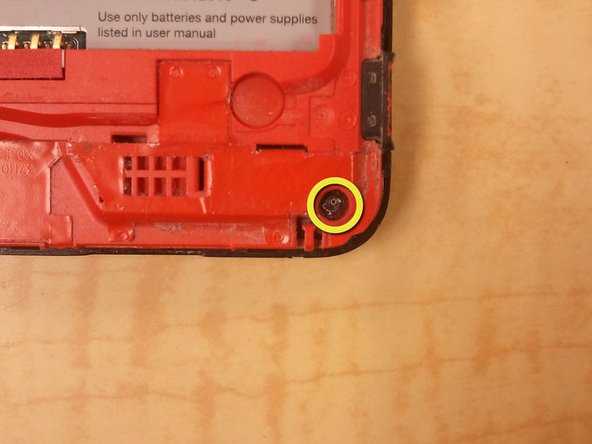
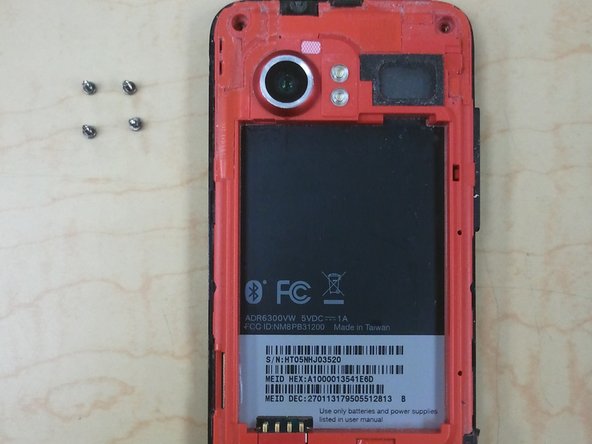
  4. Repairing HTC Droid Incredible Logic Board: Schritt 4, Bild 1 von 3 Repairing HTC Droid Incredible Logic Board: Schritt 4, Bild 2 von 3 Repairing HTC Droid Incredible Logic Board: Schritt 4, Bild 3 von 3
    • Remove 4 corner screws, you may have to remove a "VOID" sticker from one of the screw heads.

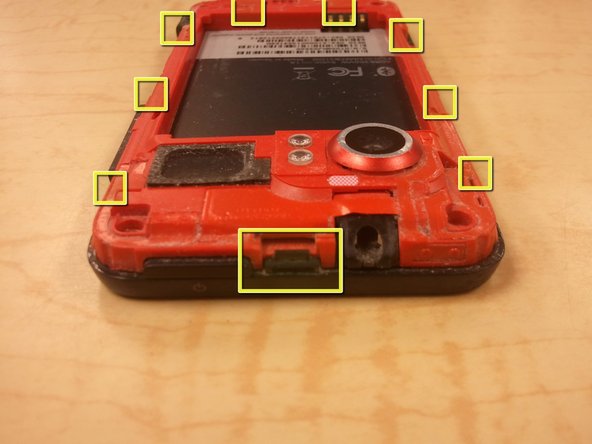
  5. Repairing HTC Droid Incredible Logic Board: Schritt 5, Bild 1 von 3 Repairing HTC Droid Incredible Logic Board: Schritt 5, Bild 2 von 3 Repairing HTC Droid Incredible Logic Board: Schritt 5, Bild 3 von 3
    • Using a spudger, unclip the nine clips holding the back panel to the front panel, highlighted in included pictures.

    • Start at the top, and work clockwise, being careful not to break the clips.

    • There are, 1, 3, 2, and 3 clips on each side, respectively.

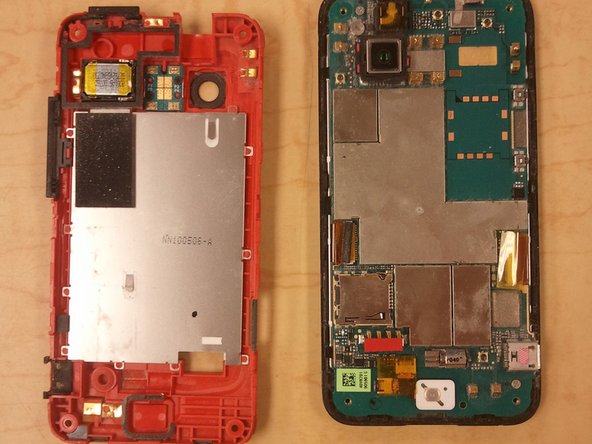
    • After the clips are disengaged, there are no cables holding the back panel in place.

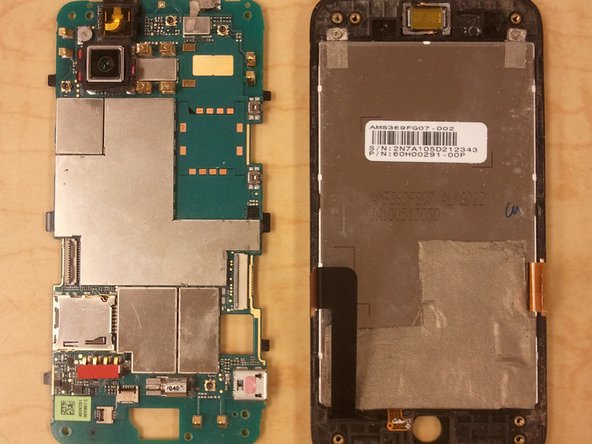
  6. Repairing HTC Droid Incredible Logic Board, Logic Board: Schritt 6, Bild 1 von 1
    • Use your spudger to release the remaining clips, disconnecting the ribbon cables from the logic board.

  7. Repairing HTC Droid Incredible Logic Board: Schritt 7, Bild 1 von 2 Repairing HTC Droid Incredible Logic Board: Schritt 7, Bild 2 von 2
    • Remove 2 Phillips Screws holding the logic board to the front panel.

    • Gently lift the logic board off the front panel.

Abschluss

To reassemble your device, follow these instructions in reverse order.

6 weitere Nutzer:innen haben diese Anleitung absolviert.

0 Kommentare

Kommentar hinzufügen

Seitenaufrufe:

Letzte 24 Stunden: 0

Letzte 7 Tage: 0

Letzte 30 Tage: 1

Insgesamt: 3,983