Einleitung
This is a television/PC monitor that did not work after a storm. I expected to replace a few capacitors, but it only needed a single diode at the cost of twenty-nine cents and about an hour of labor. A new power board for this TV would have cost somewhere around $80.
Was du brauchst
-
-
This is the LG 17LX1R that will no longer turn on.
-
Remove the cover from the stand by.
-
Press down on the two tabs. The cover should come off easily.
-
Remove the four screws that hold the stand assembly to the chassis.
-
-
-
Remove the four Phillips head screws that attach the stand to the chassis.
-
Remove the eight Phillips screws that hold the back to the chassis. Once the screws are removed, the back will simply snap off.
-
Remove the metal shield. It is fastened with six Phillips screws.
-
-
-
-
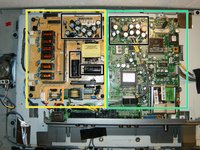
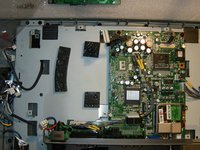
After the shield is removed, the power board and the main board are visible.
-
Power Board
-
Main Board
-
Fuse
-
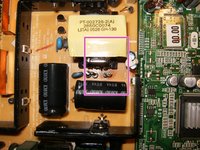
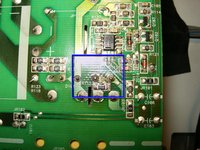
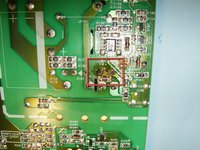
Thoroughly inspect the boards. Brown discoloration around Diode D102 is evidence of a short circuit, possibly a blown component.
-
Disconnect all connectors from the power board
-
Remove the four screws that mount the power board to the chassis.
-
-
-
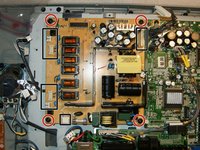
These are the chassis with the power board removed.
-
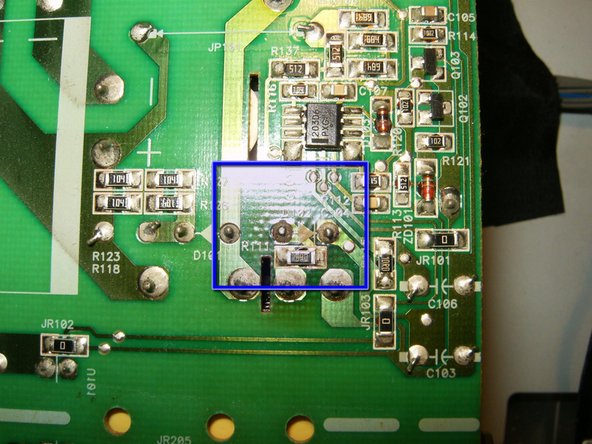
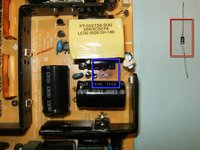
Discoloration of the back side of the power board is a sign of a faulty diode.
-
Unsolder the diode from the power board.
-
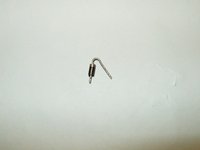
Replacement diode
-
-
In diesem Schritt verwendetes Werkzeug:Tweezers$4.99
-
Here is the removed diode. Description on the diode reads LT526 IN4007.
-
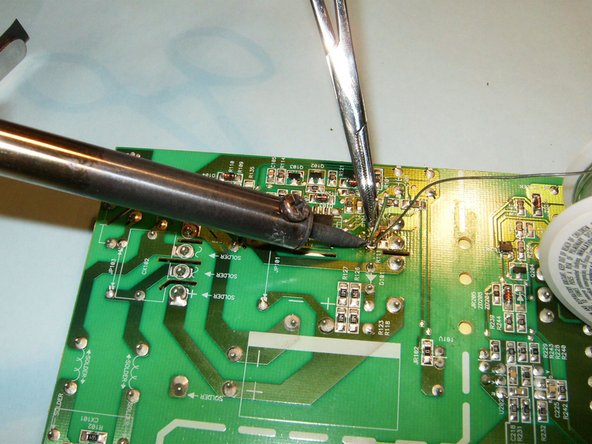
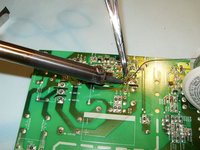
Solder the new diode onto the power board. Use a pair of tweezers or hemostat to hold the diode in place while soldering.
-
Once the diode is replaced, clean the board with isopropyl alcohol to get rid of any debris or old flux.
-


To reassemble your device, follow these instructions in reverse order.
To reassemble your device, follow these instructions in reverse order.
Rückgängig: Ich habe diese Anleitung nicht absolviert.
38 weitere Personen haben diese Anleitung absolviert.

Team
