Einleitung
Sewing a missing buckle back on to your tent is an easy way to keep your rainfly ready for action in the backcountry. 'Cause let's face it: when it rains, it pours!
Protect yourself from an unexpected cold shower with this simple repair.
If the webbing around your buckle is frayed, replace it before starting this repair.
This technique can be used to sew just about any textile—not just tent buckles. Bring out your inner boy scout and be prepared by mastering this technique.
Was du brauchst
-
-
Thread your needle and tie a knot in the end of the thread.
-
Drive the needle through the back of the bottom material.
-
Pull the thread taut.
-
-
-
Drive the needle through the back side of the top material.
-
Pull the thread taut.
-
Align the two materials in their final position.
-
-
-
-
Drive the needle down through both layers of material, coming out on the back side of the bottom material. Push the needle out of the material.
-
Pull the thread taut.
-
-
-
Ensure the two layers are correctly aligned.
-
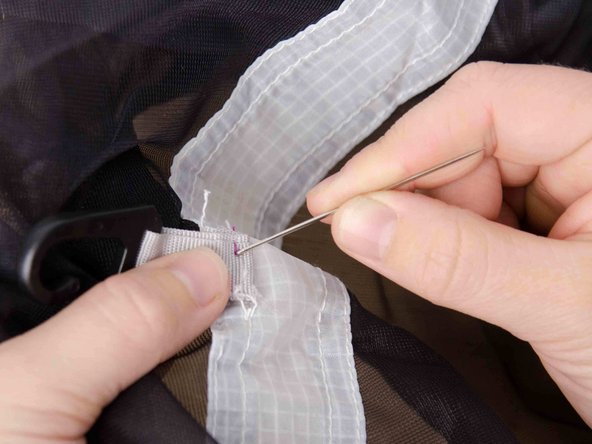
Drive the needle through both layers of fabric from the back side of the bottom material, coming up on the top side of the top material.
-
Pull the thread taut.
-
-
-
Continue sewing through both layers, going down from the top and up from the bottom, as described in steps 3 and 4 of this guide.
-
When you come to the end of your material, draw the needle in between the two layers of material, under the thread of the closest stitch.
-
Slowly start to pull the thread taut. As you pull a loop will form.
-
Draw the needle through the loop and pull the thread taut.
-
Repeat the process of drawing the needle between the layers, creating a loop, and drawing the needle through the loop as described in this step.
-


Rückgängig: Ich habe diese Anleitung nicht absolviert.
Ein:e weitere:r Nutzer:in hat diese Anleitung absolviert.


Ein Kommentar
I've found that small bungee cords (or the poor-boy version, an old bicycle inner tube cut with a scissors into very many tough rubber bands just as thick or thin as you wish) is a great add-on to tent and tarp guy lines. When those big gusts of wind arrive, the elasticity of the added-on stretchy thing allows the wind to buffet the tent or tarp about, but prevents tent stakes from being dislodged, or tarps from becoming shredded. No stitches are needed when the elastic, instead of the fabric, takes the strain.