Einleitung
This repair guide will teach you the steps to take in order to patch holes in any fiber glass body.
Was du brauchst
-
-
For this jet ski the hood is detachable so it can be removed and worked on while it is off. This allows us to work on both sides of the hole.
-
The hole is highlighted on the jet ski by the red circle.
-
-
-
Begin by sanding both sides of the hole surface with the rough sandpaper until the larger pieces of old fiberglass are smooth.
-
Use the fine sandpaper in succession with the rough to make the surface as smooth as possible.
-
-
-
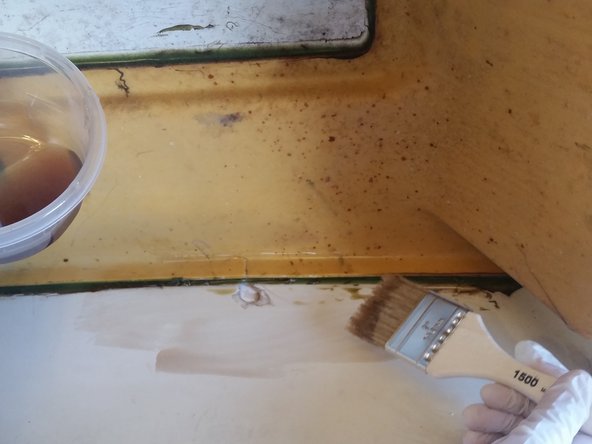
Use the Acetone and a paper towel to clean both sides of the hole and be sure to remove any dirt from the surface.
-
-
-
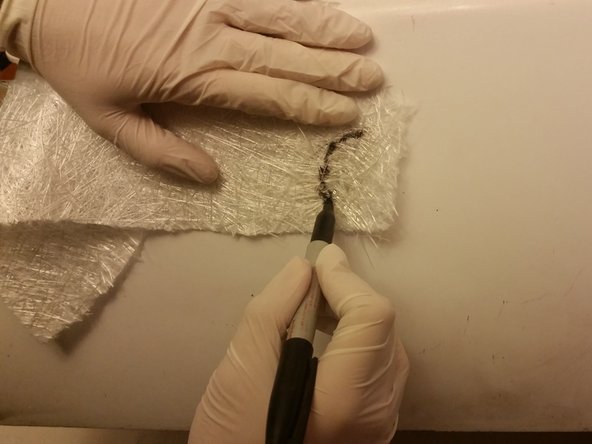
On the back side of the hole take your fiber glass mat and size out the piece of material needed to cover the hole.
-
Include some extra space around the hole, as shown by the red square, for additional support.
-
Once you have sized the material, cut out multiple pieces with the scissors for additional layers.
-
-
-
-
It's time to mix the resin and hardener together. Read the specific instructions on the back of the container to get the accurate ratio of resin to hardener.
-
Use a mixing stick to swirl the resin once you have added the hardener. The resin is now active and ready to be applied.
-
-
-
With the throw away paint brush begin to apply the resin to the back side of the hole directly on the cleaned surface.
-
After the resin is on, take one of the fiberglass pieces you cut out earlier and place it over the hole onto the resin.
-
Continuing with the brush, apply more resin onto the fiberglass until it is entirely soaked.
-
-
-
After the first layer has been entirely soaked in resin, the next layer can be placed on top of it.
-
Soak this layer in resin as well and repeat if you wish to apply more than two layers.
-
-
-
Allow the layers to dry for the recommended amount of time listed of the back of the resin container.
-
-
-
Once dry, it is time to move onto the front side of the hole.
-
Use the sharpie to carefully outline the shape of the hole and then cut out the shape with your scissors, again making multiple layers.
-
-
-
After you have again mixed your resin, begin by applying a small layer to the inside of the hole only.
-
Place your fiberglass piece onto the resin in the hole, and then continue to coat the layer in resin until soaked.
-
Continue this process with all layers until resin surface is flush with existing surface.
-
-
-
Once dry, confirm that the resin has fully hardened.
-
Use the sand paper to sand the resin surface and existing surface to create a seamless finish.
-
After sanding, the fiber glass should be flush with the existing surface of the body. At this point feel free to paint over the hole and get back on the lake.
-


Be sure to check the structural stability of the patch by pressing on the patch firmly.
Be sure to check the structural stability of the patch by pressing on the patch firmly.
Team

Cal Poly, Team 12-1, Green Winter 2015 Mitglied von Cal Poly, Team 12-1, Green Winter 2015
CPSU-GREEN-W15S12G1
6 Mitglieder
7 Anleitungen geschrieben
3 Kommentare
An old boat repairman's trick to make the fiberglass mat patch blend in with the surrounding area (if it will show-- which it doesn't in the repair on the jet ski): Tear the mat, rather than cut it. The torn edge tapers to nothing while a cut edge is abrupt and will show more obviously as a patch.
If you add enough fiberglass mat on the back side to make your patch strong enough there's no need to add more fiberglass on the front side. Use Bondo to fill the hole on the front. It can be smoothed with a putty knife and easily sanded flush with ease after it solidifies, which only takes minutes.
If you're repairing a cracked fiberglass panel, as opposed to fixing a hole, it's hard to get the cracked edges to line up on the outside so the repair will be invisible after painting. The trick is to run a smallish drill bit along the crack to clear away the fractured edges and leave a narrow gap. If the edges are bent out of shape press them back into place with a board or other form protected from bonding to the resin with a covering of waxed paper. After structural repairs are finished on the less visible side, Bondo will fill the gap smoothly.