Einleitung
There you go! There you go! You have just spilled your glass of Johnnie Walker Black Label on the keyboard of your Dell XPS 12 9Q23 and it no longer works...
What a pity (especially for whisky), but luck is with you, this tutorial will guide you step by step to make the replacement.
PS: This tutorial also works for other drinks spilling on the keyboard or simply to clean them up.)
Was du brauchst
-
-
Pop the center cover open on the bottom cover.
-
Remove the center screw with a #00 Phillips screwdriver.
-
Use a T5 Torx screwdriver for the remaining screws around the edge of the bottom cover.
-
-
-
After the back panel has been removed, disconnect the battery to prevent electrical shock
-
-
-
Once all the screws have been removed the battery is now safe to extract
-
-
-
Close the laptop, flip the laptop over, and pop off the back small panel with a flathead screwdriver. The panel will be hanging by the hinges once open.
-
-
-
Use a T5 Torx screwdriver to remove the screws along the edge of the bottom cover.
-
Open the center cover and use a Phillips #00 screwdriver to remove single screw.
-
-
-
Disconnect the battery to prevent electrical shock.
-
-
-
-
Disconnect yellow-colored ribbon cable from its port which sits at the bottom left of the fan housing.
-
-
-
Use a Phillips #00 screwdriver to loosen the screws that secure the heat sink's heat spreader.
-
-
-
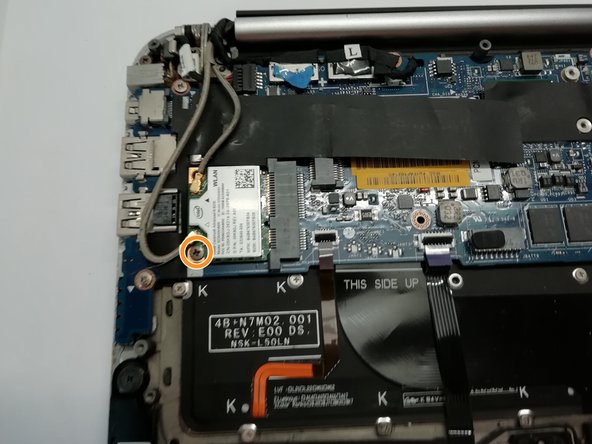
Disconnect the two wires from the WiFi card. You can do this with a pair of pliers or your fingernail.
-
Remove the screw with a #00 Phillips screwdriver.
-
Now remove your WiFi card to replace it.
-
-
-
Remove the screw with a #00 Phillips screwdriver.
-
Remove the hard disk from its location.
-
-
-
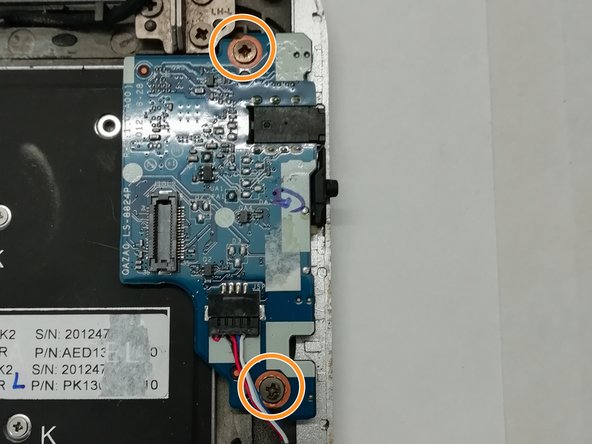
Remove the connector with a pair of pliers or your fingernail.
-
Remove the screws with a #00 Phillips screwdriver.
-
Remove the card afterwards.
-
-
-
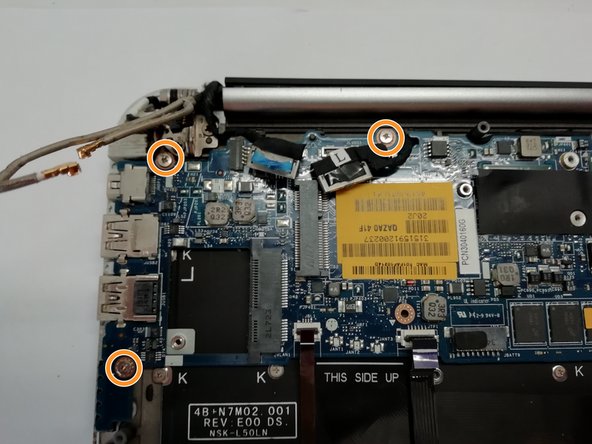
Disconnect the various connections from the motherboard.
-
Remove the screws with a #00 Phillips screwdriver.
-
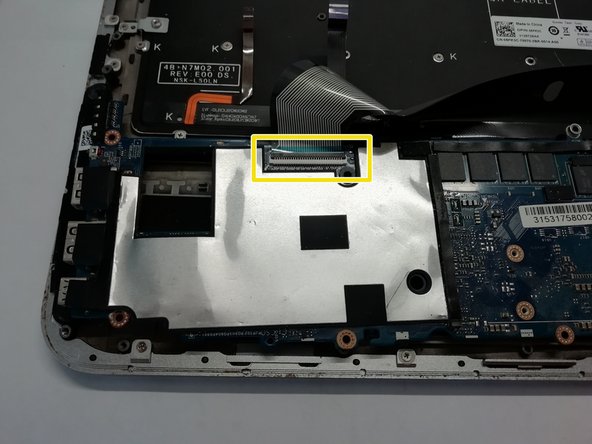
Carefully turn the motherboard over to disconnect the tablecloth from the keyboard.
-
You can now replace the motherboard.
-
-
-
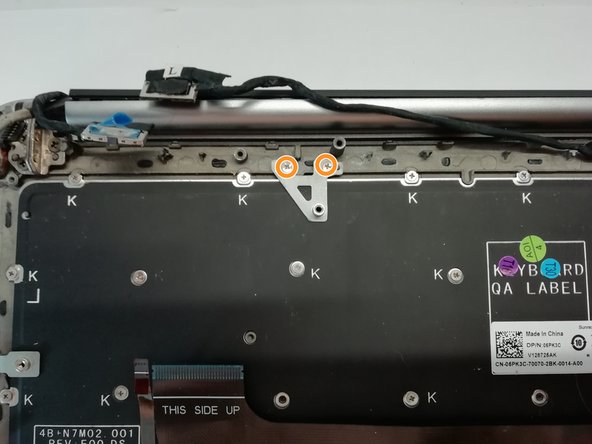
Remove the screw with a #00 Phillips screwdriver and remove the bracket.
-
Remove the screw with a #00 Phillips screwdriver and remove the support.
-
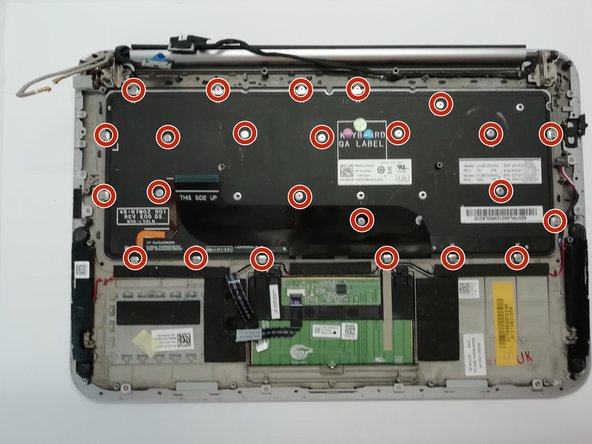
Be patient and unscrew the 24 keyboard screws.
-
-
-
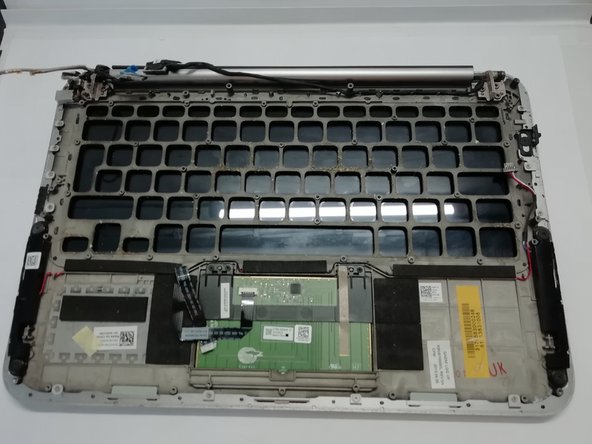
You can now remove the keyboard. And also do a cleaning if necessary, as in the second photo.
-


To reassemble your device, follow the instructions in reverse order.
To reassemble your device, follow the instructions in reverse order.
Rückgängig: Ich habe diese Anleitung nicht absolviert.
Eine weitere Person hat diese Anleitung absolviert.
Besonderer Dank geht an diese Übersetzer:innen:
100%

Schwarzer hilft uns, die Welt in Ordnung zu bringen! Wie kann ich mithelfen?
Hier starten ›

Team
