Diese Version enthält möglicherweise inkorrekte Änderungen. Wechsle zur letzten geprüften Version.
Was du brauchst
-
Dieser Schritt ist noch nicht übersetzt. Hilf mit, ihn zu übersetzen!
-
Okay, so here is Nikon Coolpix L20 purchased for $8.00. Only issue identified is an obviously cracked LCD screen
-
-
Dieser Schritt ist noch nicht übersetzt. Hilf mit, ihn zu übersetzen!
-
Open the USB cover
-
Remove the two Phillips screws on this side.
-
Remove the one Phillips screw the left side
-
Remove the three Phillips screws on the bottom
-
-
-
Dieser Schritt ist noch nicht übersetzt. Hilf mit, ihn zu übersetzen!
-
Open the battery cover.
-
Separate the rear cover from the front by simply gently pulling the two halves apart. You may have to use your fingernails to separate them. Start at the bottom side, by the AC Power cover. Work your way around the bottom.
-
Once the bottom part of the halves is released, gently pull the back cover in an upward motion. The top is secured by some tabs to the front part.
-
-
Dieser Schritt ist noch nicht übersetzt. Hilf mit, ihn zu übersetzen!
-
With the halves separated, you are now looking at the LCD in the bracket unit.
-
gently fold the LCD toward the ribbon cable out of the bracket unit. DO NOT try to remove the LCD or to loosen the cable.
-
Remove the four screws from the bracket unit.
-
-
Dieser Schritt ist noch nicht übersetzt. Hilf mit, ihn zu übersetzen!
-
When you remove this screw, make sure that the shield plate on top of the bracket plate, is just slightly pushed out of the way. This will free the bracket plate.
-
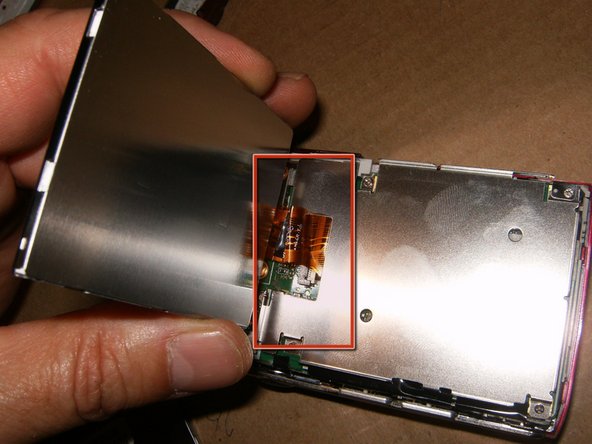
After the removal of the bracket plate, you have access to the connector. Move the white clip gently to the lift (upright) position, to free the cable.
-
The LCD should now easily separate from the logic board.
-
-
Dieser Schritt ist noch nicht übersetzt. Hilf mit, ihn zu übersetzen!
-
For the reassembly, the trickiest part is to bend the LCD ribbon cable so that it fold under the LCD into the bracket unit.
-
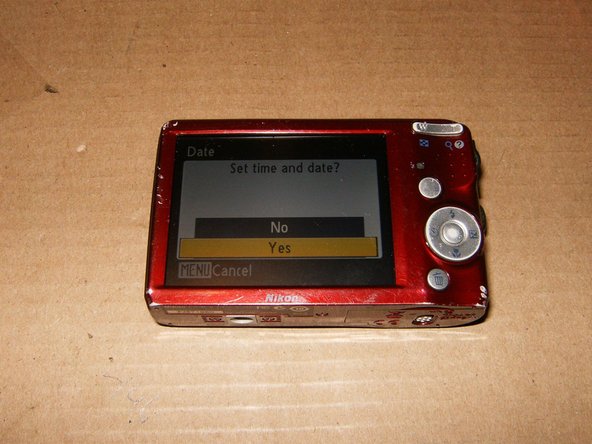
After reassembly, you should hopefully have the same result as I did. Total cost $8.00 for the camera, $15.00 for the LCD and one hour of my time...
-


Rückgängig: Ich habe diese Anleitung nicht absolviert.
5 weitere Nutzer:innen haben diese Anleitung absolviert.

Team

3 Kommentare
Very good, I really appreciate it. Thank you.
where did you buy the replacement lcd? my l20 broke recently and i’m trying to fix it.
@katherinelam had to be either ebay or aliexpress. It's been to long ago to remember for sure.