Einleitung
If the selector switch of your drill is stuck or not switching the chuck's direction when pressed, use this guide to remove and replace your selector switch.
Was du brauchst
-
-
Orient the drill to have the side with the screws facing up.
-
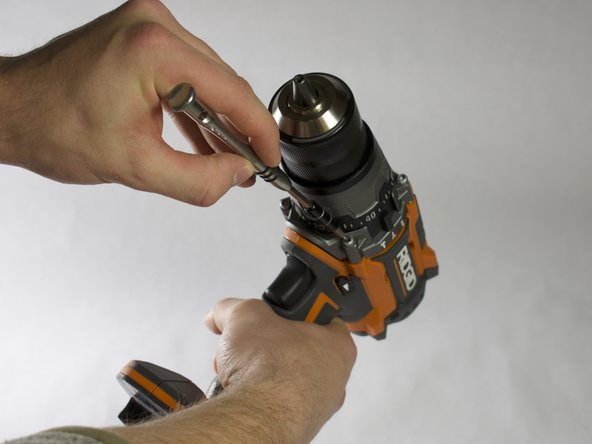
Using the Torx T10 screwdriver, remove the eight 4.0mm screws from the face of the drill.
-
-
-
Orient the drill to where the back is facing up.
-
Using a Torx T10 screwdriver, remove the four 6.0mm screws that attach the back piece to the drill.
-
Remove the back piece of the drill using the iFixit opening tool.
-
-
-
-
Orient the drill to where the chuck is facing up.
-
Using the Torx T15 screwdriver, remove the four 8.0mm screws from the front of the drill.
-
-
-
Orient the drill so the side with the screw holes is facing up.
-
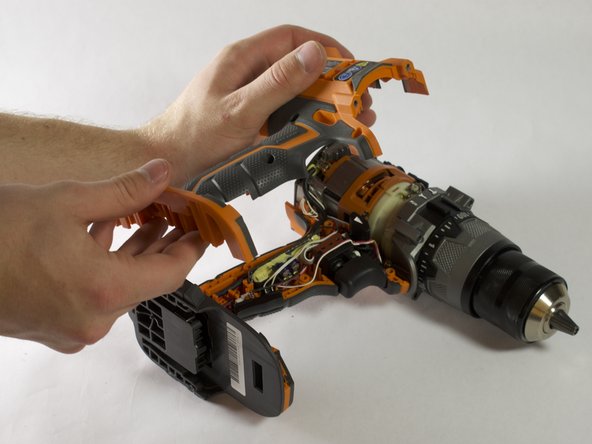
Use a plastic opening tool to gently pry the face off of the drill.
-
Remove the face completely from the drill.
-
-
-
Gently lift the trigger up.
-
Unhook the selector switch from the trigger.
-
Remove the selector switch.
-


To reassemble your device, follow these instructions in reverse order.
To reassemble your device, follow these instructions in reverse order.
Team

Appalachian State University, Team S2-G4, Menagarishvili Spring 2019 Mitglied von Appalachian State University, Team S2-G4, Menagarishvili Spring 2019
APSU-MENAGARISHVILI-S19S2G4
3 Mitglieder
12 Anleitungen geschrieben