Einleitung
Use this guide if your drill’s gears are broken. You will need the tools listed below in order to complete this guide.
Was du brauchst
-
-
Orient the drill to have the side with the screws facing up.
-
Using the Torx T10 screwdriver, remove the eight 4.0mm screws from the face of the drill.
-
-
-
Orient the drill to where the back is facing up.
-
Using a Torx T10 screwdriver, remove the four 6.0mm screws that attach the back piece to the drill.
-
Remove the back piece of the drill using the iFixit opening tool.
-
-
-
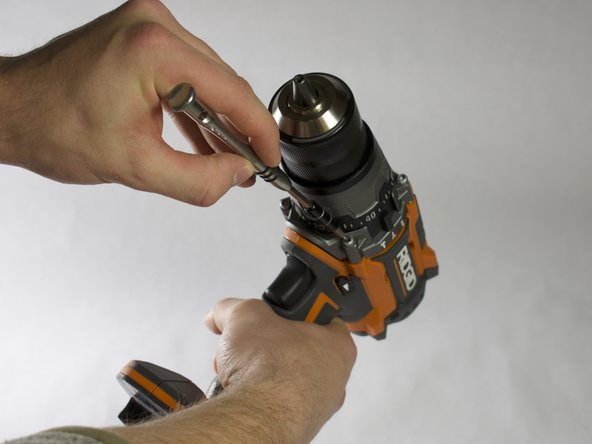
Orient the drill to where the chuck is facing up.
-
Using the Torx T15 screwdriver, remove the four 8.0mm screws from the front of the drill.
-
-
-
-
Orient the drill so the side with the screw holes is facing up.
-
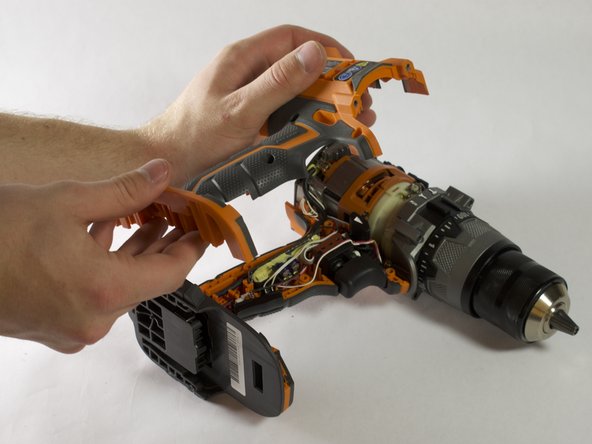
Use a plastic opening tool to gently pry the face off of the drill.
-
Remove the face completely from the drill.
-
-
-
Locate the selector switch.
-
Unhook the selector switch from the small silver wire located near the top of the drill.
-
-
-
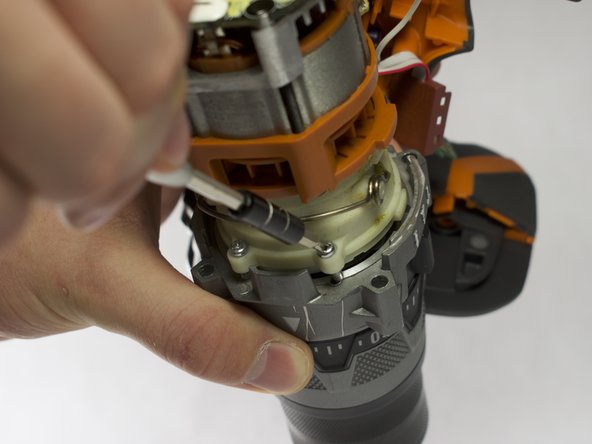
Orient the motor and chuck to where the back of the motor is facing up.
-
Using a Phillips #0 screwdriver, remove the four 5.0mm screws that connect the motor to the chuck.
-
-
-
Pull apart the motor from the chuck to expose the gears.
-
Remove the four gears located within the motor/chuck housing.
-


To reassemble your device, follow these instructions in reverse order.
To reassemble your device, follow these instructions in reverse order.
Rückgängig: Ich habe diese Anleitung nicht absolviert.
2 weitere Personen haben diese Anleitung absolviert.
Team

Appalachian State University, Team S2-G4, Menagarishvili Spring 2019 Mitglied von Appalachian State University, Team S2-G4, Menagarishvili Spring 2019
APSU-MENAGARISHVILI-S19S2G4
3 Mitglieder
12 Anleitungen geschrieben