Zum Hauptinhalt wechseln

Roland KC-300 Stereo Mixing Keyboard Amplifier Disassembly

Was du brauchst

  1. Roland KC-300 Stereo Mixing Keyboard Amplifier Disassembly, Preparation: Schritt 1, Bild 1 von 1
    • Switch off and unplug the amplifier.

    • With the amplifier on the work bench, turn it around so that you have the rear panel facing you.

    • If the amplifier has recently been used the metal cooling fins may be hot.

    • Do not attempt to remove any of the small crews on the rear panel unless you need to after removing the rear panel from the case.

  2. Roland KC-300 Stereo Mixing Keyboard Amplifier Disassembly, Removing fixing screws - 1: Schritt 2, Bild 1 von 1
    • Remove two Phillips #2 screws from the bottom of the rear panel.

    • Note that these are different from the remaining screws to be removed and should be stored separately.

  3. Roland KC-300 Stereo Mixing Keyboard Amplifier Disassembly, Removing fixing screws - 2: Schritt 3, Bild 1 von 3 Roland KC-300 Stereo Mixing Keyboard Amplifier Disassembly, Removing fixing screws - 2: Schritt 3, Bild 2 von 3 Roland KC-300 Stereo Mixing Keyboard Amplifier Disassembly, Removing fixing screws - 2: Schritt 3, Bild 3 von 3
    • Remove 2 Phillips #3 screws from the left hand side.

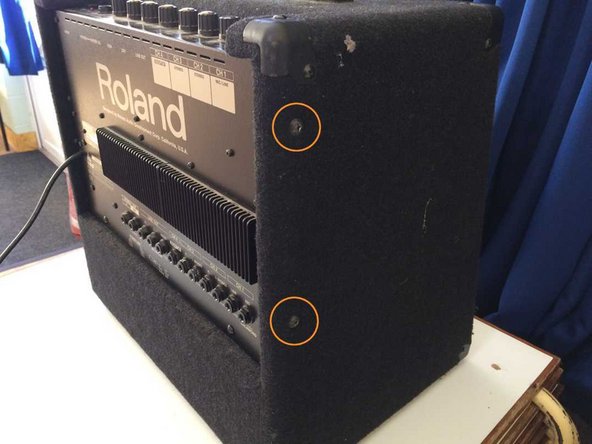
    • Remove 2 Phillips #3 screws from the right hand side.

    • On reassembly it may be necessary to lift the rear panel by inserting a small flat screwdriver under the bottom edge in order to catch the screw thread. If the screws go in crooked they will be hard to tighten and you are likely to damage the threads.

  4. Roland KC-300 Stereo Mixing Keyboard Amplifier Disassembly, Removing fixing screws - 3: Schritt 4, Bild 1 von 1
    • Remove 2 Phillips #3 screws from the top of the case between the carry handle and the top control panel.

  5. Roland KC-300 Stereo Mixing Keyboard Amplifier Disassembly, Rear panel removal: Schritt 5, Bild 1 von 2 Roland KC-300 Stereo Mixing Keyboard Amplifier Disassembly, Rear panel removal: Schritt 5, Bild 2 von 2
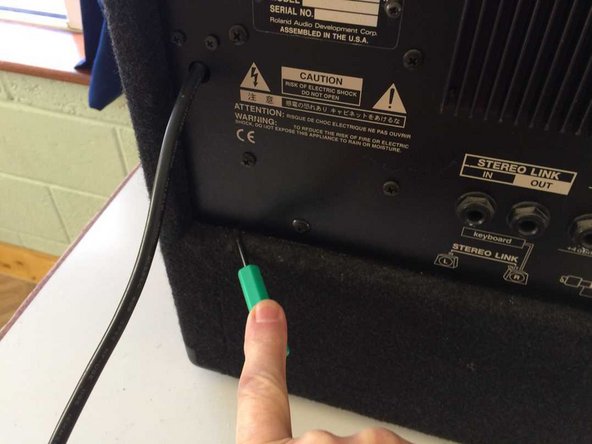
    • It should now be possible to remove the rear panel away from the case, if necessary easing it away from the case by inserting a small flat screwdriver between the panel and the wooden case along the top and/or the bottom.

  6. Roland KC-300 Stereo Mixing Keyboard Amplifier Disassembly, Inspection: Schritt 6, Bild 1 von 2 Roland KC-300 Stereo Mixing Keyboard Amplifier Disassembly, Inspection: Schritt 6, Bild 2 von 2
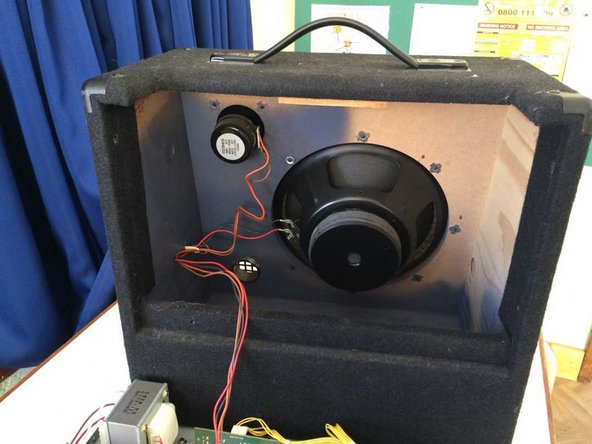
    • Lay the rear panel on the bench behind the case. You now have access to the electronics and the speakers.

  7. Roland KC-300 Stereo Mixing Keyboard Amplifier Disassembly, Jack board removal: Schritt 7, Bild 1 von 3 Roland KC-300 Stereo Mixing Keyboard Amplifier Disassembly, Jack board removal: Schritt 7, Bild 2 von 3 Roland KC-300 Stereo Mixing Keyboard Amplifier Disassembly, Jack board removal: Schritt 7, Bild 3 von 3
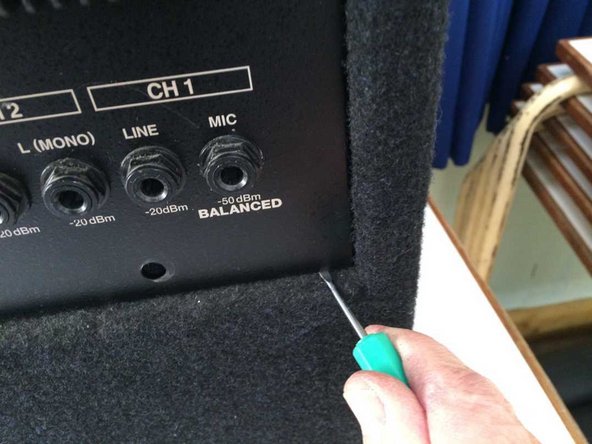
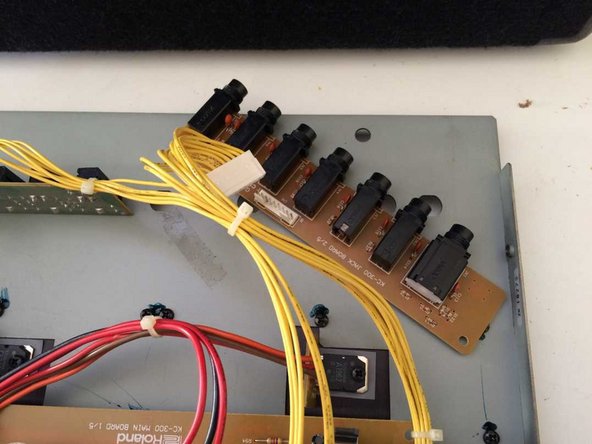
    • To remove either jack board, first disconnect the multi-way connector by releasing the locking bar with a small flat screwdriver.

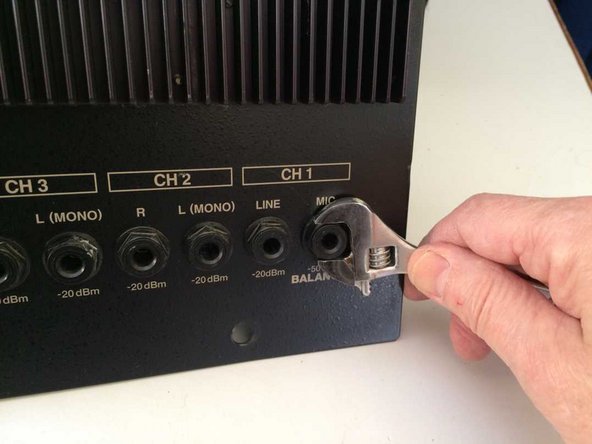
    • Remove the plastic nuts on the rear panel from all the jack sockets on the board you wish to remove.

    • Lift the jack board away from the rear panel.

    • On tightening the plastic nuts on reassembly, hold the body of the jack socket to stop it being twisted, possibly damaging the contacts.

Abschluss

To reassemble your device, follow these instructions in reverse order.

3 weitere Nutzer:innen haben diese Anleitung absolviert.

Philip Le Riche

Mitglied seit: 02/18/14

30.080 Reputation

47 Anleitungen geschrieben

Team

Restart Project Mitglied von Restart Project

Community

18 Mitglieder

492 Anleitungen geschrieben

0 Kommentare

Kommentar hinzufügen

Seitenaufrufe:

Letzte 24 Stunden: 1

Letzte 7 Tage: 17

Letzte 30 Tage: 67

Insgesamt: 2,244