Einleitung
If your heater or fan will not turn on, you might need to replace the Power/Fan Switch. The process of replacing the switch is a bit difficult because there is quite a bit of soldering involved. If you are experienced with soldering, than this should be a breeze for you!
Was du brauchst
-
-
Flip the device over so the bottom is facing up.
-
Remove the two 10mm screws holding the back panel using a Phillips #2 screwdriver.
-
-
-
Place the Flathead Screw driver parallel with the gap between the back and the heater body, then twist until the two parts of panel are separated. You may have to do this on four sides of the panel.
-
Remove the front panel by pulling them apart. The front panel should come out easily.
-
-
-
Remove the two 10 mm Phillips screws using a #2 Phillips screw driver. One attaches the gold metal bracket to the heater coil housing and the other attaches the fuse holder to heater coil housing.
-
-
-
-
Unplug the wire that goes from the bottom of the power switch to the heater coils. To unplug pull down on the wire until it breaks free.
-
-
-
Unplug the wire that goes from the bottom of the power switch to the fuse holder. To unplug the wire, pull the wire away from the fuse holder.
-
-
-
Unplug the wires located on the right side of the heat coil housing. Both plugs will come off together. To unplug the wires, pull down on the wire until it breaks free.
-
-
-
Grab the Switch and Circuit Board Assembly with one hand and slide it up. You will need to wiggle it to break it loose. While wiggling it, slide it up until it is clear of the plastic rails.
-
-
-
Unplug the two wires, with blue ends, that go from the Power/Fan switch and from the bottom of the Circuit Board to the fan. To unplug the wires, pull them away from the fan assembly until they break free.
-
-
-
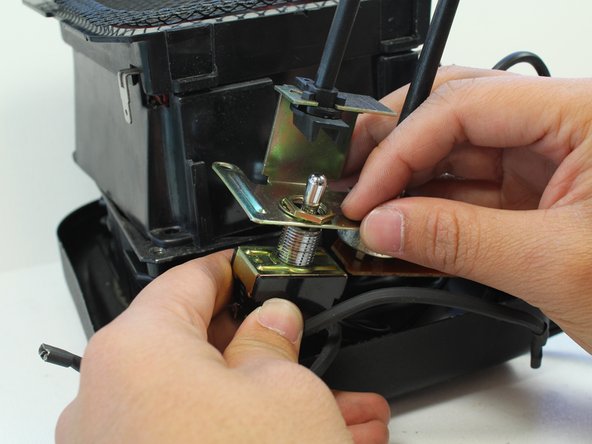
Use an adjustable wrench to loosen the nut holding the switch to the metal bracket. Place the wrench around the nut and turn it counter-clockwise.
-
-
-
Remove the nut by spinning it with your finger and slide the switch off of the gold metal bracket.
-
-
-
Use the soldering iron to remove solder from wires and remove wires from switch.
-


To reassemble your device, follow these instructions in reverse order.
To reassemble your device, follow these instructions in reverse order.
Team

Cal Poly, Team 11-35, Amido Fall 2013 Mitglied von Cal Poly, Team 11-35, Amido Fall 2013
CPSU-AMIDO-F13S11G35
4 Mitglieder
13 Anleitungen geschrieben