Zum Hauptinhalt wechseln

SAMSUNG ATIV Book 9 Plus NP930X5J-S01US Screen Replacement

Was du brauchst

  1. SAMSUNG ATIV Book 9 Plus NP930X5J-S01US Screen Replacement, Battery: Schritt 1, Bild 1 von 2 SAMSUNG ATIV Book 9 Plus NP930X5J-S01US Screen Replacement, Battery: Schritt 1, Bild 2 von 2
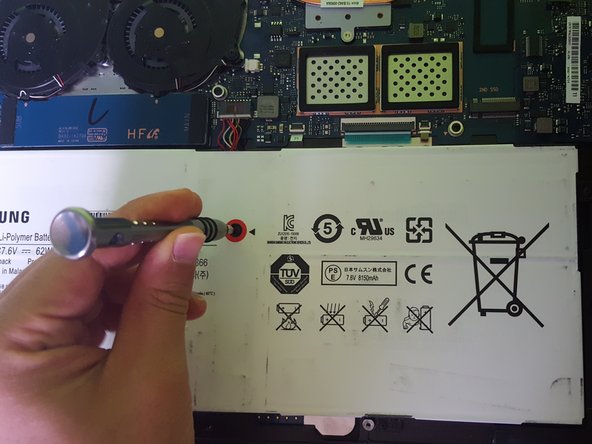
    • Remove the ten 4.3mm Phillips #00 screws from the bottom cover of the laptop.

  2. SAMSUNG ATIV Book 9 Plus NP930X5J-S01US Screen Replacement: Schritt 2, Bild 1 von 3 SAMSUNG ATIV Book 9 Plus NP930X5J-S01US Screen Replacement: Schritt 2, Bild 2 von 3 SAMSUNG ATIV Book 9 Plus NP930X5J-S01US Screen Replacement: Schritt 2, Bild 3 von 3
    • Press the button to release the bottom cover.

  3. SAMSUNG ATIV Book 9 Plus NP930X5J-S01US Screen Replacement: Schritt 3, Bild 1 von 2 SAMSUNG ATIV Book 9 Plus NP930X5J-S01US Screen Replacement: Schritt 3, Bild 2 von 2
    • Remove the five 4.3mm Phillips #00 screws from the battery.

  4. SAMSUNG ATIV Book 9 Plus NP930X5J-S01US Screen Replacement: Schritt 4, Bild 1 von 2 SAMSUNG ATIV Book 9 Plus NP930X5J-S01US Screen Replacement: Schritt 4, Bild 2 von 2
    • Lift the battery with both hands and remove.

  5. SAMSUNG ATIV Book 9 Plus NP930X5J-S01US Screen Replacement, Screen: Schritt 5, Bild 1 von 3 SAMSUNG ATIV Book 9 Plus NP930X5J-S01US Screen Replacement, Screen: Schritt 5, Bild 2 von 3 SAMSUNG ATIV Book 9 Plus NP930X5J-S01US Screen Replacement, Screen: Schritt 5, Bild 3 von 3
    • Disconnect the display cable from the motherboard.

  6. SAMSUNG ATIV Book 9 Plus NP930X5J-S01US Screen Replacement: Schritt 6, Bild 1 von 2 SAMSUNG ATIV Book 9 Plus NP930X5J-S01US Screen Replacement: Schritt 6, Bild 2 von 2
    • Disconnect the black and white antenna cables from the Wi-Fi card.

  7. SAMSUNG ATIV Book 9 Plus NP930X5J-S01US Screen Replacement: Schritt 7, Bild 1 von 2 SAMSUNG ATIV Book 9 Plus NP930X5J-S01US Screen Replacement: Schritt 7, Bild 2 von 2
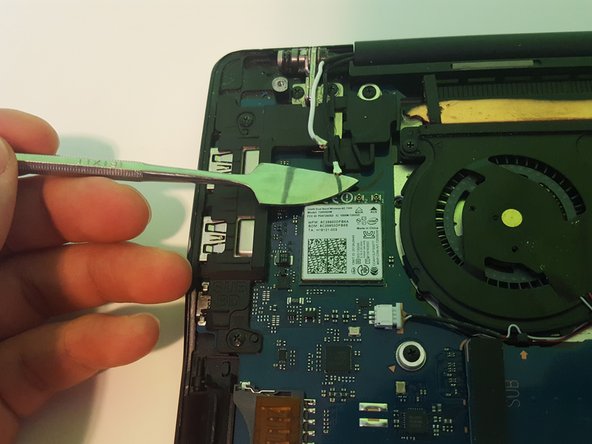
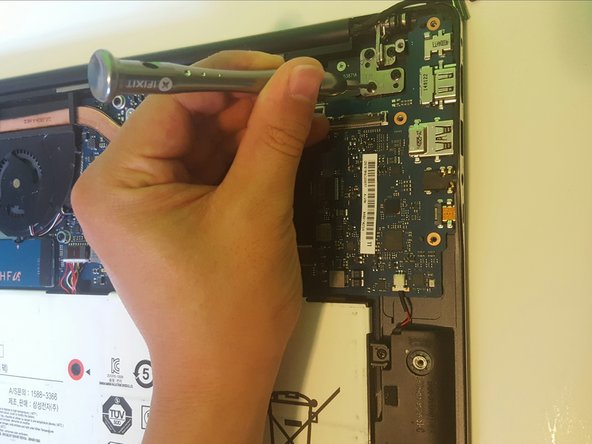
    • Remove the five 4mm Phillips #00 screws from the motherboard retaining brackets.

  8. SAMSUNG ATIV Book 9 Plus NP930X5J-S01US Screen Replacement: Schritt 8, Bild 1 von 2 SAMSUNG ATIV Book 9 Plus NP930X5J-S01US Screen Replacement: Schritt 8, Bild 2 von 2
    • Remove the eight silver 4.2mm Phillips #00 screws from the corner.

  9. SAMSUNG ATIV Book 9 Plus NP930X5J-S01US Screen Replacement: Schritt 9, Bild 1 von 3 SAMSUNG ATIV Book 9 Plus NP930X5J-S01US Screen Replacement: Schritt 9, Bild 2 von 3 SAMSUNG ATIV Book 9 Plus NP930X5J-S01US Screen Replacement: Schritt 9, Bild 3 von 3
    • Pry up the metal hinges from the laptop.

  10. SAMSUNG ATIV Book 9 Plus NP930X5J-S01US Screen Replacement: Schritt 10, Bild 1 von 3 SAMSUNG ATIV Book 9 Plus NP930X5J-S01US Screen Replacement: Schritt 10, Bild 2 von 3 SAMSUNG ATIV Book 9 Plus NP930X5J-S01US Screen Replacement: Schritt 10, Bild 3 von 3
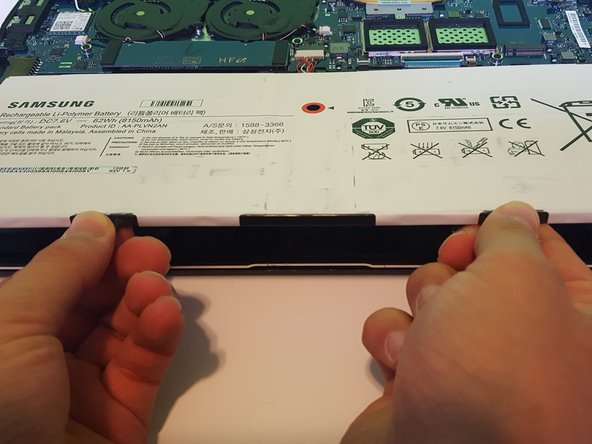
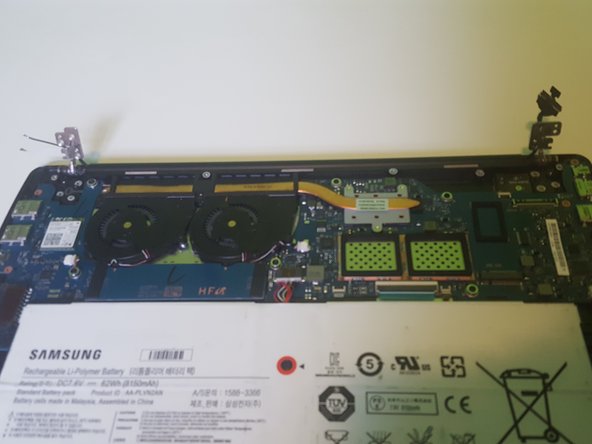
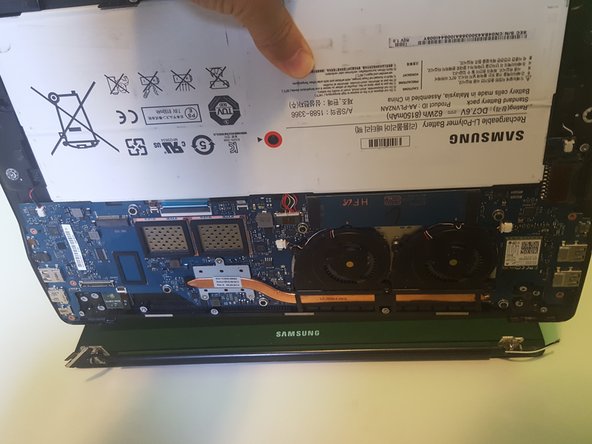
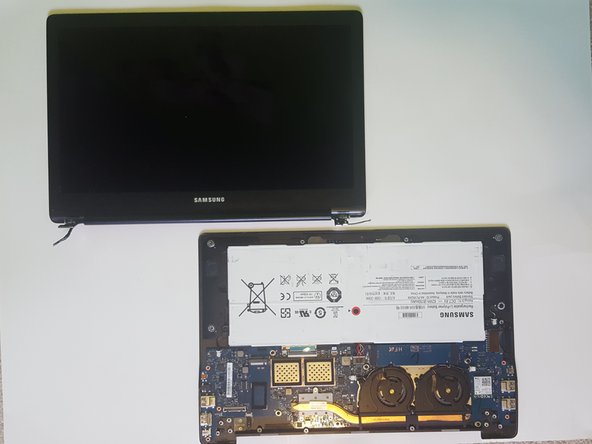
    • Place the screen on its back side and hold the battery-side of the laptop. In an upward motion, remove the back set off and set it aside.

Abschluss

To reassemble your device, follow these instructions in reverse order.

Eine weitere Person hat diese Anleitung absolviert.

Sean Kim

Mitglied seit: 04/12/18

640 Reputation

4 Anleitungen geschrieben

Team

UW Tacoma, Team S1-G2, Liner Spring 2018 Mitglied von UW Tacoma, Team S1-G2, Liner Spring 2018

UWT-LINER-S18S1G2

5 Mitglieder

4 Anleitungen geschrieben

Ein Kommentar

There’s no need to remove the battery. Just disconnect its power socket if you want to be ‘careful’.

Steerpike - Antwort

Kommentar hinzufügen

Seitenaufrufe:

Letzte 24 Stunden: 0

Letzte 7 Tage: 1

Letzte 30 Tage: 13

Insgesamt: 614