Zum Hauptinhalt wechseln

SG 552-1 Commando Gearbox Replacement

Was du brauchst

  1. SG 552-1 Commando Gearbox Replacement, Gearbox: Schritt 1, Bild 1 von 2 SG 552-1 Commando Gearbox Replacement, Gearbox: Schritt 1, Bild 2 von 2
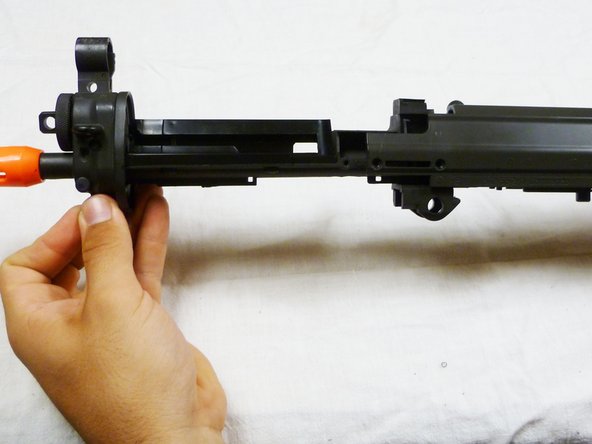
    • Using a flathead screwdriver, remove the pin holding the hand guard in place.

    • To remove this, turn the pin clockwise and push it through at the same time.

    • Remove the hand guard.

  2. SG 552-1 Commando Gearbox Replacement: Schritt 2, Bild 1 von 2 SG 552-1 Commando Gearbox Replacement: Schritt 2, Bild 2 von 2
    • Using a Phillips #1 screwdriver, remove the two 8mm screws above the hand guard on both sides of the gun.

    • There should be four total.

  3. SG 552-1 Commando Gearbox Replacement: Schritt 3, Bild 1 von 2 SG 552-1 Commando Gearbox Replacement: Schritt 3, Bild 2 von 2
    • Turn the gun over so that you are facing the bottom of the gun.

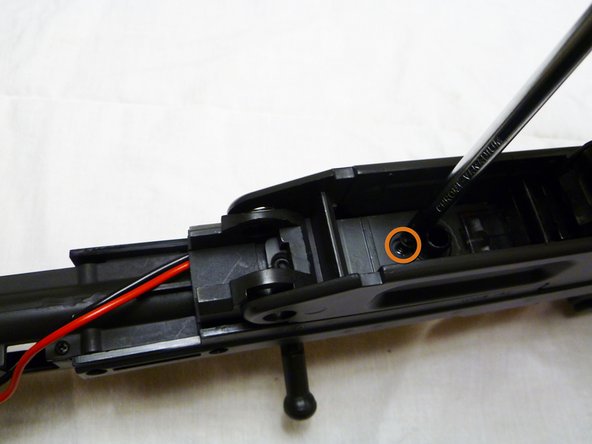
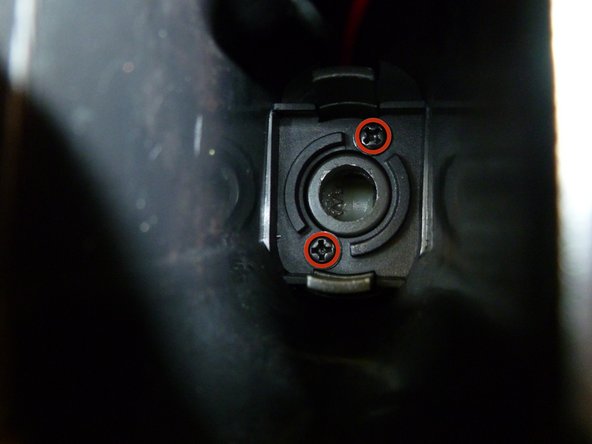
    • Using a Phillips #1 screwdriver, remove the following screws:

    • Remove the 8mm screw that is located directly underneath the cocking lever.

    • Remove the 8mm screw located beside the screw you just removed.

  4. SG 552-1 Commando Gearbox Replacement: Schritt 4, Bild 1 von 2 SG 552-1 Commando Gearbox Replacement: Schritt 4, Bild 2 von 2
    • Carefully tug on the tip of the gun and pull the barrel and its cover out.

  5. SG 552-1 Commando Gearbox Replacement: Schritt 5, Bild 1 von 3 SG 552-1 Commando Gearbox Replacement: Schritt 5, Bild 2 von 3 SG 552-1 Commando Gearbox Replacement: Schritt 5, Bild 3 von 3
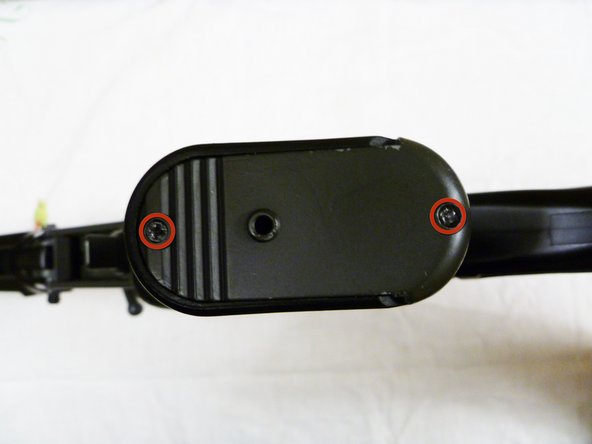
    • Locate the hand grip.

    • Using a Phillips #0 screwdriver, remove the two 6mm screws at the bottom of the hand grip.

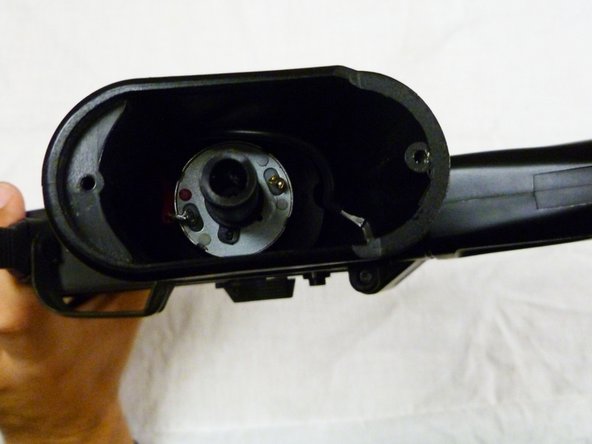
    • Slide the cover off.

  6. SG 552-1 Commando Gearbox Replacement: Schritt 6, Bild 1 von 2 SG 552-1 Commando Gearbox Replacement: Schritt 6, Bild 2 von 2
    • Pull the motor out of the hand grip.

    • Using a Phillips #1 screwdriver, remove the two 5mm screws inside of the hand grip.

  7. SG 552-1 Commando Gearbox Replacement: Schritt 7, Bild 1 von 2 SG 552-1 Commando Gearbox Replacement: Schritt 7, Bild 2 von 2
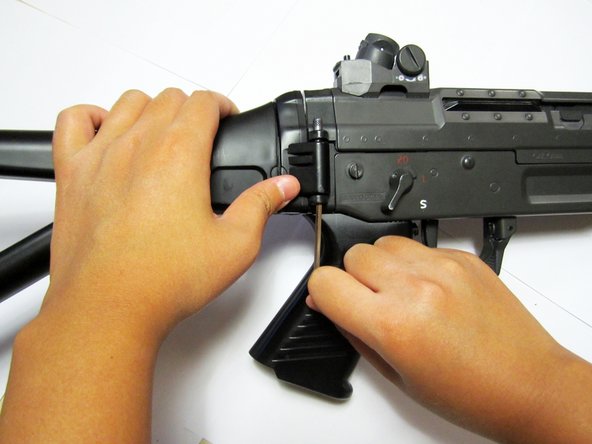
    • Locate the pin holding the folding stock in place.

    • Using an allen wrench or something small, carefully push the pin out.

  8. SG 552-1 Commando Gearbox Replacement: Schritt 8, Bild 1 von 2 SG 552-1 Commando Gearbox Replacement: Schritt 8, Bild 2 von 2
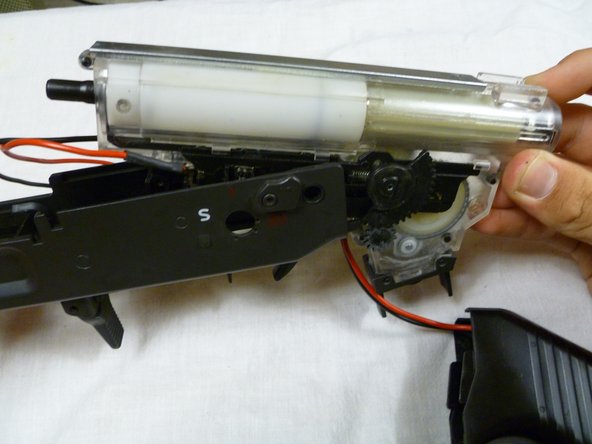
    • Using a Phillips #1 screwdriver, remove the 20mm screw behind the folding stock and above the gearbox.

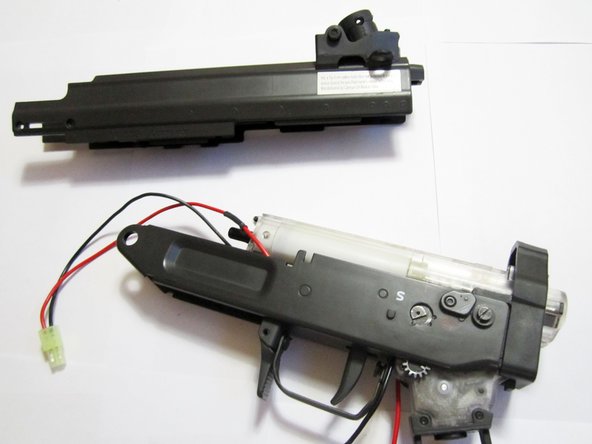
    • Remove the cover that was held on by the screw.

  9. SG 552-1 Commando Gearbox Replacement: Schritt 9, Bild 1 von 3 SG 552-1 Commando Gearbox Replacement: Schritt 9, Bild 2 von 3 SG 552-1 Commando Gearbox Replacement: Schritt 9, Bild 3 von 3
    • Using a flathead screwdriver, remove the two 5mm screws beside the safety switch on both sides of the gun.

    • Slide off the piece that was held on by those screws.

  10. SG 552-1 Commando Gearbox Replacement: Schritt 10, Bild 1 von 2 SG 552-1 Commando Gearbox Replacement: Schritt 10, Bild 2 von 2
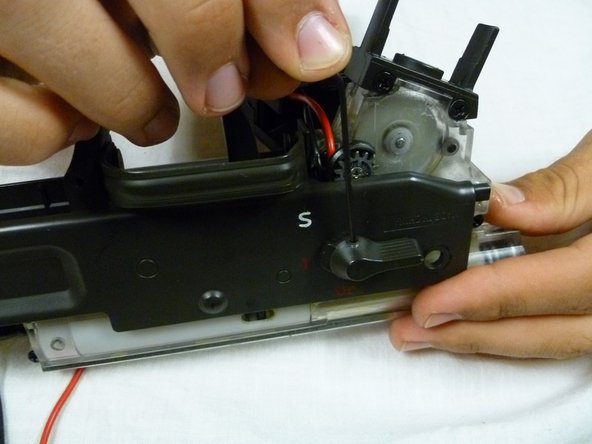
    • Using a small allen wrench, carefully unscrew the screws holding the safety switch in place on both sides of the gun.

    • The screws do not have to be taken out all the way, just slightly loosen them until you are able to pull the switch off.

  11. SG 552-1 Commando Gearbox Replacement: Schritt 11, Bild 1 von 2 SG 552-1 Commando Gearbox Replacement: Schritt 11, Bild 2 von 2
    • Using a Phillips #0 screwdriver, remove the two 6mm screws that were underneath the safety switch on both sides of the gun.

    • Carefully remove the pieces that were held on by the screws.

  12. SG 552-1 Commando Gearbox Replacement: Schritt 12, Bild 1 von 3 SG 552-1 Commando Gearbox Replacement: Schritt 12, Bild 2 von 3 SG 552-1 Commando Gearbox Replacement: Schritt 12, Bild 3 von 3
    • Pull apart the cover when pulling the gearbox out.

    • Pull the gearbox out.

    • The gears will fall out when taking the gearbox out. Careful not to lose them.

Abschluss

To reassemble your device, follow these instructions in reverse order.

3 weitere Nutzer:innen haben diese Anleitung absolviert.

Amanda Toan

Mitglied seit: 10/05/12

283 Reputation

1 Anleitung geschrieben

Team

Cal Poly, Team 18-41, Regan Fall 2012 Mitglied von Cal Poly, Team 18-41, Regan Fall 2012

CPSU-REGAN-F12S18G41

6 Mitglieder

6 Anleitungen geschrieben

0 Kommentare

Kommentar hinzufügen

Seitenaufrufe:

Letzte 24 Stunden: 0

Letzte 7 Tage: 0

Letzte 30 Tage: 1

Insgesamt: 2,527