Einleitung
This guide illustrates the steps required to replace the fuse in a SOMNObalance and SOMNOcomfort ventilator. The page numbers included stem from the service repair guide (linked on the device page). Only use fuses mentioned in the Replacement parts list in the servicing repair guide (pg. 35, WM 13422).
Was du brauchst
-
-
Remove the covering cap. (pg. 23)
-
-
-
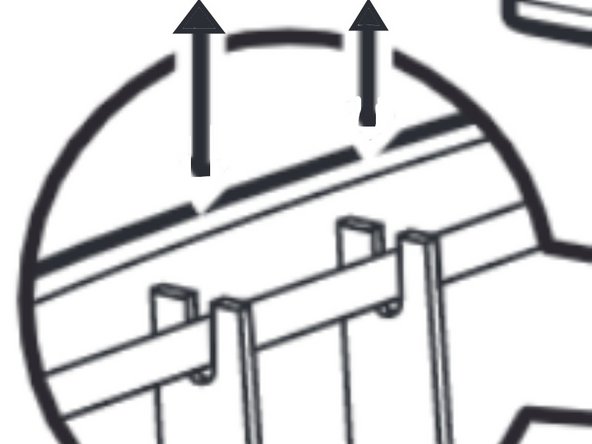
Place the unit upside down on a non-slip surface and remove the six screws. (pg. 23)
-
-
-
Remove the lower part of the housing with a swiveling motion away to the side. Note the SOMNOcomfort series uses a shorter circuit board than the balance series ventilator. (pg. 23)
-
-
-
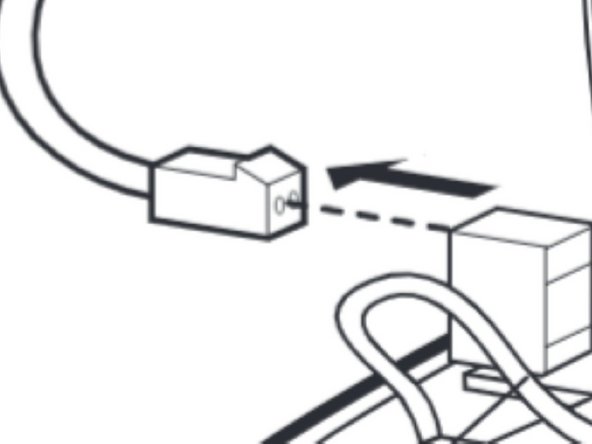
Remove the connector (X1) from the circuit board.
-
Pull the connecting cable (64) from its mount.
-
Now set aside the lower part of the housing. (pg. 23)
-
-
-
Next, how to close the compartment and reverse the process.
-
Hold the lower part of the housing to the upper part at an angle
-
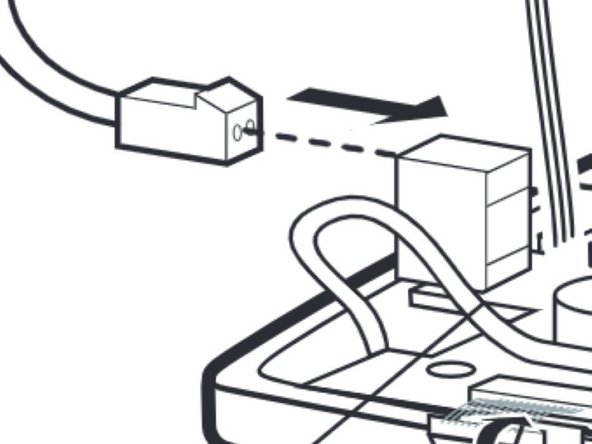
Attach the connector (X1) to the main circuit board. When doing so the connector’s nub has to point towards the lock. (pg. 24)
-
-
-
Properly align the main circuit board inside the unit.
-
Attach the connecting cable (64) to its mount (pg. 24)
-
-
-
Place the lower part of the housing on the upper part (47). Please make sure the main circuit board (44) is aligned properly, and that the connecting cable (64) is not being squeezed anywhere. (pg. 24)
-
-
-
Now reattach the upper part of the housing by tightening the six screws. (pg. 24)
-
-
-
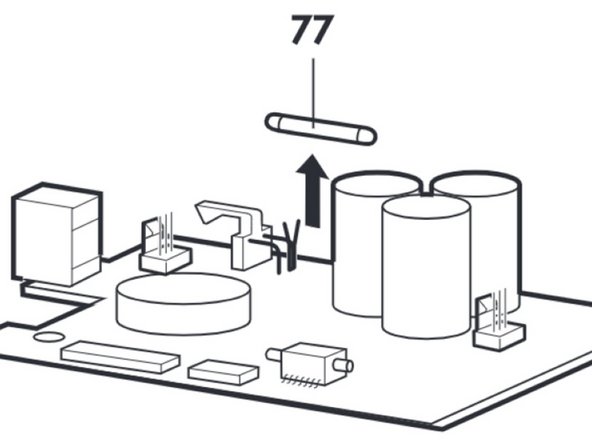
Remove the defective fuse(76 or 77) and replace with a new one. (pg. 27)
-
Ensure the correct amperage is used. Use fuses mentioned in the Replacement parts list only. Using other fuses may cause damage to the main circuit board.
-
76 refers to the fuse in SOMNObalance. 77 refers to the fuse in SOMNOcomfort.
-


Check that everything is working properly after having successfully replaced the fuse.
Check that everything is working properly after having successfully replaced the fuse.
Team

Cal Poly, Team S1-G3, Zimmerman Spring 2020 Mitglied von Cal Poly, Team S1-G3, Zimmerman Spring 2020
CPSU-ZIMMERMAN-S20S1G3
5 Mitglieder
10 Anleitungen geschrieben