Einleitung
Here's a step-by-step tutorial to dismount each piece of the NAS until you reach the motherboard.
This NAS integrates 2 Go of soldered memory, an INTEL Celeron J4025 64-bit two-core processor, two slots for SATA drive (HDD or SSD) 2,5" or 3,5".
'Note: the interest of this tutorial is however limited.'
Indeed, most of the components that a user can be brought to add or change are now accessible directly, without disassembly (storage disks, memory expansion).
The BIOS battery, and the fan remain inaccessible directly and require the disassembly of the NAS described in this tutorial to be changed (whether they are HS or replace them not the best).
The dismantling time is estimated 15 (a single experiment on the meter). That said, it is certainly achievable in 10 minutes.
The photographs were taken with an iPhone Xr and a Canon 7D using a portable LED studio.
FACOM screwdrivers have been used. Becarrefull the screws are not cruciform anymore …
Was du brauchst
-
-
power button
-
2 x RJ45 Gb ports
-
Disk and system activity LEDs
-
Kensington security slot (K-lock)
-
1 x power supply port
-
2 x USB 3 ports (1 front and 1 back)
-
1 x reset button
-
-
-
nothing complicated ... remove the cage from the SIN while pressing the push button
-
-
-
2 x SATA port
-
Only the empty memory slot is accessible.
-
-
-
Use a screwdriver (flat tool) to unlock the two plastic lugs.
-
then slide the two parts of the shell parallel to each other, as shown in the pictures.
-
then separate the two parts from each other perpendicularly.
-
-
-
orange : internal SATA ports
-
yellow : fan connector
-
blue : fan
-
green : free memory slot
-
-
-
-
simply unscrew the screw to remove the spacer.
-
-
-
same as above ... unscrew the screw to remove the plastic spacer
-
-
-
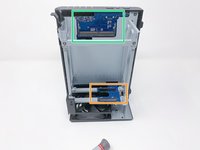
to remove the motherboard from the case, unscrew the 4 screws as follows ...
-
-
-
once the screws are removed, pull the front panel (at the USB port) slightly outwards ...
-
then lift up the motherboard with the disk cage.
-
-
-
Remove the yellow marked screws (x4)
-
-
-
1 - motherboard on the processor side
-
2 - motherboard memory side
-
3 - empty case
-


To reassemble your device, follow the instructions in reverse order.
To reassemble your device, follow the instructions in reverse order.
Rückgängig: Ich habe diese Anleitung nicht absolviert.
2 weitere Personen haben diese Anleitung absolviert.
Besonderer Dank geht an diese Übersetzer:innen:
100%


Diese Übersetzer:innen helfen uns, die Welt zu reparieren! Wie kann ich mithelfen?
Hier starten ›
Angehängte Dokumente

Team

AEM (ANIMA EX MACHINA) Mitglied von AEM (ANIMA EX MACHINA)
Business
1 Mitglied
14 Anleitungen geschrieben
2 Kommentare
Bonjour,
Savez-vous s'il est possible d'acheter la Carte Mère de ce model?
Merci d'avance pour votre réponse
Bonjour,
N'oubliez pas qu'en mettant les disques dans une baie plus récente,
le NAS va migrer le système avec les données.
De fait, sauf pour une application très particulière,
il ne semble pas y avoir un intérêt économique à racheter une carte mère de 2020 …
Sinon il faudrait l'acheter / la trouver très peu cher …
D'ailleurs, pas certain qu'elle soit encore produite (j'en doute fortement même).
Cela dit, demandez à Synology directement (leur site n'en parle pas : https://www.synology.com/fr-fr/products/...)
Ils ont leur réseau de distributeur et depuis que maintenant ils proposent de la maintenance c'est possible qu'il le reste du stock (ca reste un modèle grand public donc pas certain).
Sinon il reste l'occasion … avec les risques associés …
Bref pas si simple …