Diese Version enthält möglicherweise inkorrekte Änderungen. Wechsle zur letzten geprüften Version.
Was du brauchst
-
Dieser Schritt ist noch nicht übersetzt. Hilf mit, ihn zu übersetzen!
-
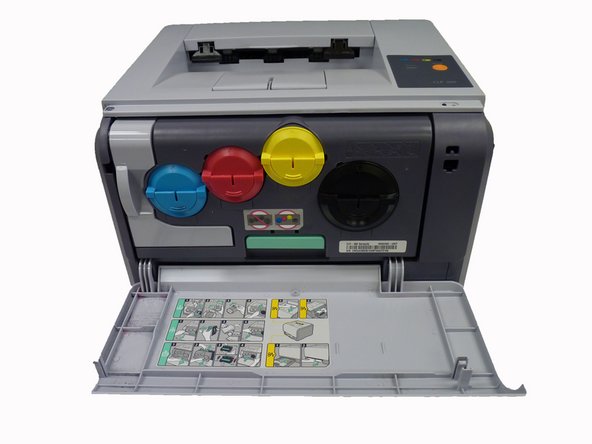
Turn the printer off and wait a few minutes for it to cool.
-
-
Dieser Schritt ist noch nicht übersetzt. Hilf mit, ihn zu übersetzen!
-
Pull paper tray out and set aside.
-
-
Dieser Schritt ist noch nicht übersetzt. Hilf mit, ihn zu übersetzen!
-
Pull the waste toner container out of the printer using the handle.
-
-
-
Dieser Schritt ist noch nicht übersetzt. Hilf mit, ihn zu übersetzen!
-
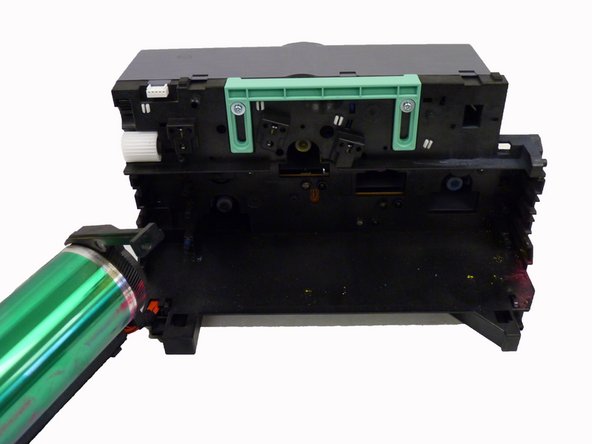
Pull the imaging unit out of the printer using bottom handle.
-
Use green handle on top of imaging unit to steady unit as you pull it out.
-
-
Dieser Schritt ist noch nicht übersetzt. Hilf mit, ihn zu übersetzen!
-
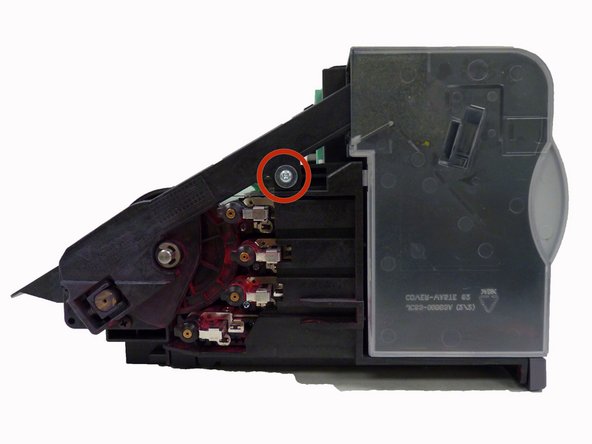
Carefully pry plastic arm away from main unit.
-
-
Dieser Schritt ist noch nicht übersetzt. Hilf mit, ihn zu übersetzen!
-
Carefully pry plastic from screw base so that the entire organic photo conductor piece slides open to the left.
-
-
Dieser Schritt ist noch nicht übersetzt. Hilf mit, ihn zu übersetzen!
-
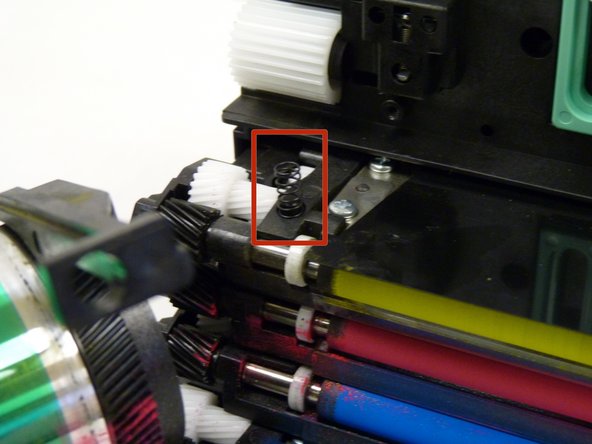
Slide each toner transfer unit out separately, placing all aside except for the black toner transfer unit.
-
-
Dieser Schritt ist noch nicht übersetzt. Hilf mit, ihn zu übersetzen!
-
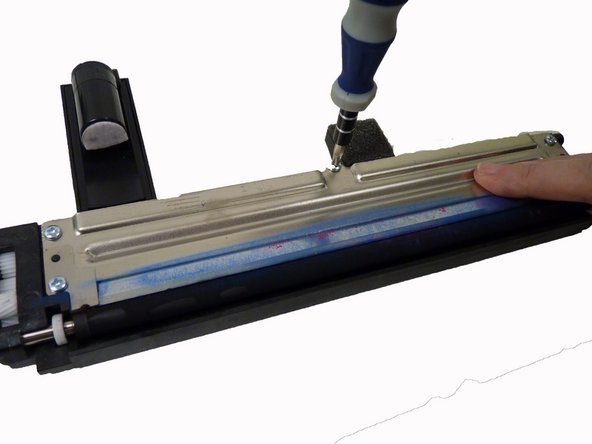
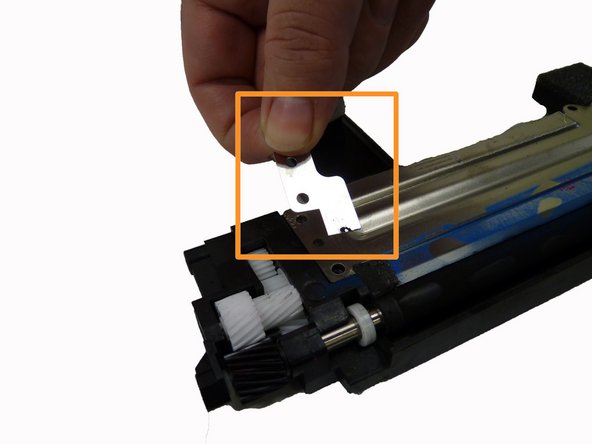
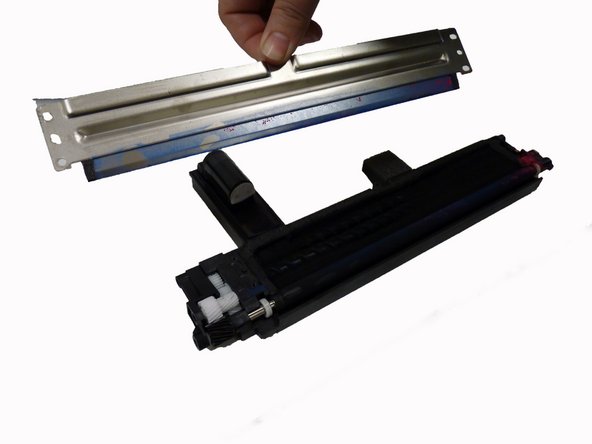
Remove these five screws from the top of the black toner transfer unit.
-
Remove main and smaller z-shaped plates.
-
-
Dieser Schritt ist noch nicht übersetzt. Hilf mit, ihn zu übersetzen!
-
Remove these three screws from the right end of the toner transfer unit.
-
-
Dieser Schritt ist noch nicht übersetzt. Hilf mit, ihn zu übersetzen!
-
Remove plastic end piece.
-
Gently pull out black toner roller.
-
Insert new roller in place of old roller turning slightly to fit.
-
Cover new roller with toner by rotating roller by hand.
-


Rückgängig: Ich habe diese Anleitung nicht absolviert.
2 weitere Nutzer:innen haben diese Anleitung absolviert.
Team

University of Maine, Team 1-1, Diaz Fall 2014 Mitglied von University of Maine, Team 1-1, Diaz Fall 2014
UMAINE-DIAZ-F14S1G1
3 Mitglieder
8 Anleitungen geschrieben
2 Kommentare
I need more information pertaining step 8. In order to separate the parts, in which directions should the be moved first and where is the best point to apply force ?
I need more information for step 12: I removed the old roller. Unfortunately I don't know anymore how exactly the metal discs and the white plastic rings are placed.