Zum Hauptinhalt wechseln

Samsung CLP-300 Fuser Unit Replacement

Was du brauchst

  1. Samsung CLP-300 Fuser Unit Replacement, Fuser Unit: Schritt 1, Bild 1 von 2 Samsung CLP-300 Fuser Unit Replacement, Fuser Unit: Schritt 1, Bild 2 von 2
    • Turn the printer off and wait a few minutes for it to cool.

    • Turn printer around so that you are looking at the rear panel.

  2. Samsung CLP-300 Fuser Unit Replacement: Schritt 2, Bild 1 von 1
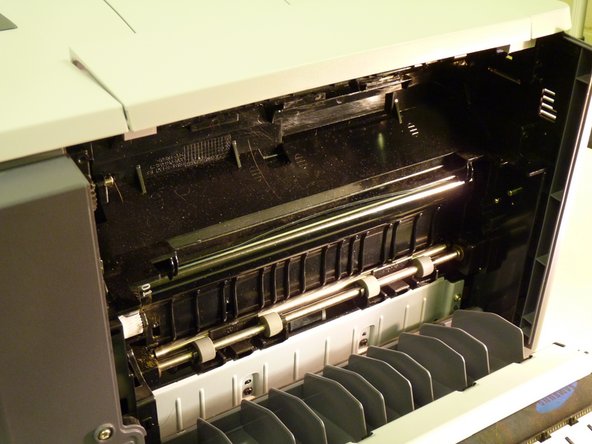
    • Open back of printer by pushing down handle.

  3. Samsung CLP-300 Fuser Unit Replacement: Schritt 3, Bild 1 von 2 Samsung CLP-300 Fuser Unit Replacement: Schritt 3, Bild 2 von 2
    • Remove the four screws that attach the fuser unit to the printer.

  4. Samsung CLP-300 Fuser Unit Replacement: Schritt 4, Bild 1 von 2 Samsung CLP-300 Fuser Unit Replacement: Schritt 4, Bild 2 von 2
    • Slide fuser unit out of the printer.

    • Remove packaging from new fuser unit.

    • Insert new fuser unit.

Abschluss

To reassemble your device, follow these instructions in reverse order.

2 weitere Nutzer:innen haben diese Anleitung absolviert.

Heather Howard

Mitglied seit: 10/15/14

586 Reputation

4 Anleitungen geschrieben

Team

University of Maine, Team 1-1, Diaz Fall 2014 Mitglied von University of Maine, Team 1-1, Diaz Fall 2014

UMAINE-DIAZ-F14S1G1

3 Mitglieder

8 Anleitungen geschrieben

2 Kommentare

how do you unplug the old fuser unit and plug in the new fuser unit - you don’t show how to do that.

Dianne Martin - Antwort

The plug in on the left side, no need to unplug it because it is part of the fuser unit.

Michael R. Glatfelter, Jr. - Antwort

Kommentar hinzufügen

Seitenaufrufe:

Letzte 24 Stunden: 0

Letzte 7 Tage: 4

Letzte 30 Tage: 16

Insgesamt: 9,853