Zum Hauptinhalt wechseln

Samsung Chromebook 3 XE500C13-K02US Display Screen Replacement

Was du brauchst

  1. Samsung Chromebook 3 XE500C13-K02US Display Screen Replacement, Bottom Case: Schritt 1, Bild 1 von 2 Samsung Chromebook 3 XE500C13-K02US Display Screen Replacement, Bottom Case: Schritt 1, Bild 2 von 2
    • Place the laptop back cover facing up to expose the screws.

    • Using a Phillips #00 screwdriver, remove nine 4.6mm screws from the back casing.

  2. Samsung Chromebook 3 XE500C13-K02US Display Screen Replacement: Schritt 2, Bild 1 von 2 Samsung Chromebook 3 XE500C13-K02US Display Screen Replacement: Schritt 2, Bild 2 von 2
    • Use an iFixit opening tool to wedge in between the case and body of the laptop.

    • Once the tool is wedged in between the case and laptop, slide it around the entire laptop's edge to disengage the retaining clips.

    • You should hear a popping sound as you slide the iFixit opening tool around the laptop.

  3. Samsung Chromebook 3 XE500C13-K02US Display Screen Replacement: Schritt 3, Bild 1 von 2 Samsung Chromebook 3 XE500C13-K02US Display Screen Replacement: Schritt 3, Bild 2 von 2
    • Remove the cover exposing the inside of the laptop.

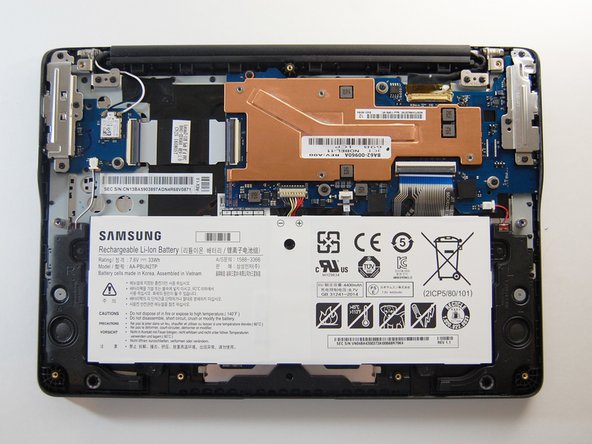
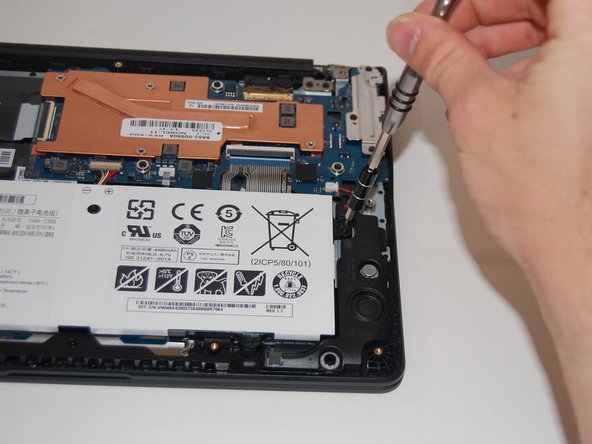
  4. Samsung Chromebook 3 XE500C13-K02US Display Screen Replacement, Battery: Schritt 4, Bild 1 von 2 Samsung Chromebook 3 XE500C13-K02US Display Screen Replacement, Battery: Schritt 4, Bild 2 von 2
    • Remove the four 4.6mm screws with the Phillips #00 screwdriver.

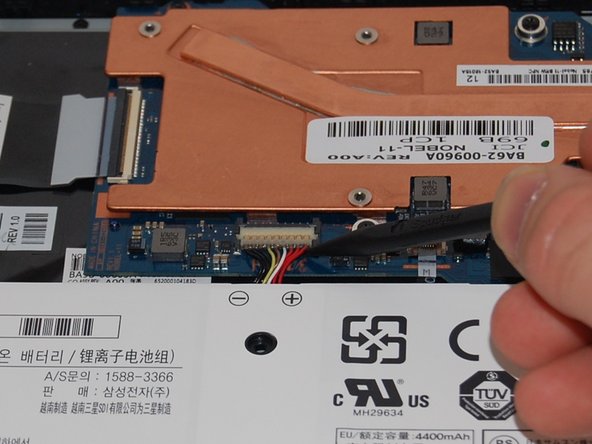
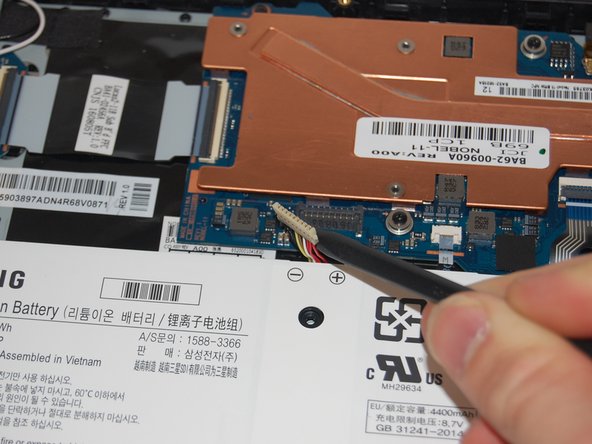
  5. Samsung Chromebook 3 XE500C13-K02US Display Screen Replacement: Schritt 5, Bild 1 von 3 Samsung Chromebook 3 XE500C13-K02US Display Screen Replacement: Schritt 5, Bild 2 von 3 Samsung Chromebook 3 XE500C13-K02US Display Screen Replacement: Schritt 5, Bild 3 von 3
    • Use the spudger to pry underneath the cable and gently lift the connector up.

  6. Samsung Chromebook 3 XE500C13-K02US Display Screen Replacement: Schritt 6, Bild 1 von 1
    • Lift the battery up and out of the case.

  7. Samsung Chromebook 3 XE500C13-K02US Display Screen Replacement, Display Screen: Schritt 7, Bild 1 von 3 Samsung Chromebook 3 XE500C13-K02US Display Screen Replacement, Display Screen: Schritt 7, Bild 2 von 3 Samsung Chromebook 3 XE500C13-K02US Display Screen Replacement, Display Screen: Schritt 7, Bild 3 von 3
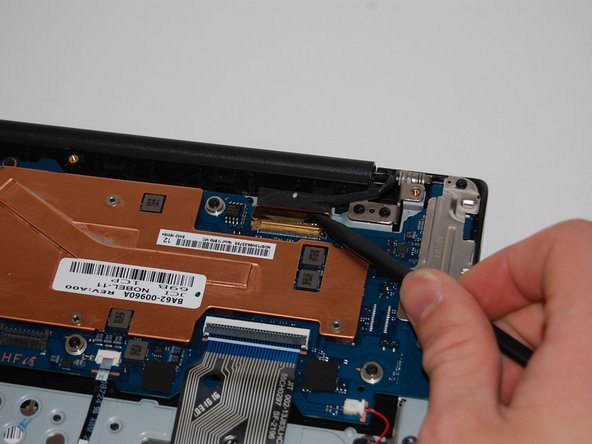
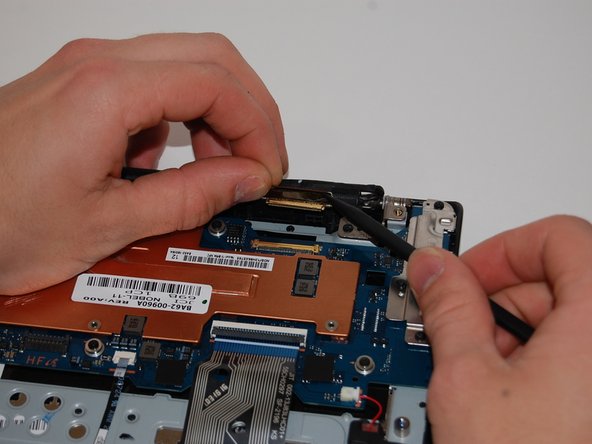
    • Use the spudger to lift the hinge locking the gold colored display cable in place.

    • Slide the cable out to remove it from the motherboard.

  8. Samsung Chromebook 3 XE500C13-K02US Display Screen Replacement: Schritt 8, Bild 1 von 3 Samsung Chromebook 3 XE500C13-K02US Display Screen Replacement: Schritt 8, Bild 2 von 3 Samsung Chromebook 3 XE500C13-K02US Display Screen Replacement: Schritt 8, Bild 3 von 3
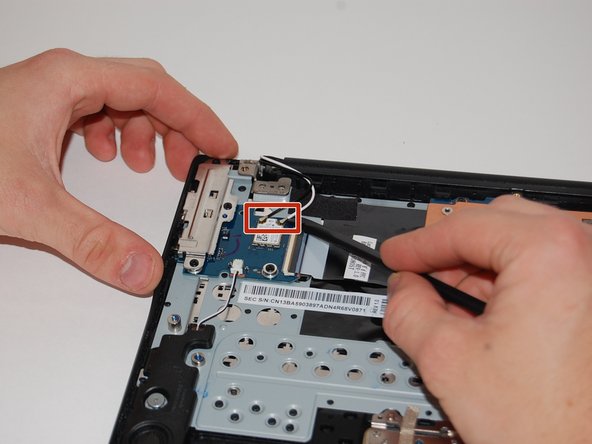
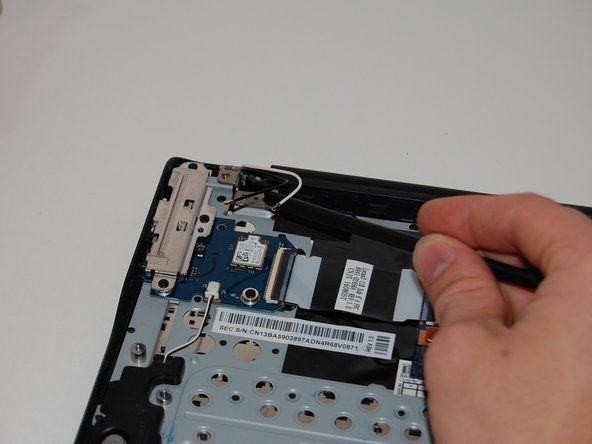
    • Using the spudger, lift the adhesive securing the wireless card antenna wires.

    • Lift the white and black antenna wires with the spudger.

  9. Samsung Chromebook 3 XE500C13-K02US Display Screen Replacement: Schritt 9, Bild 1 von 3 Samsung Chromebook 3 XE500C13-K02US Display Screen Replacement: Schritt 9, Bild 2 von 3 Samsung Chromebook 3 XE500C13-K02US Display Screen Replacement: Schritt 9, Bild 3 von 3
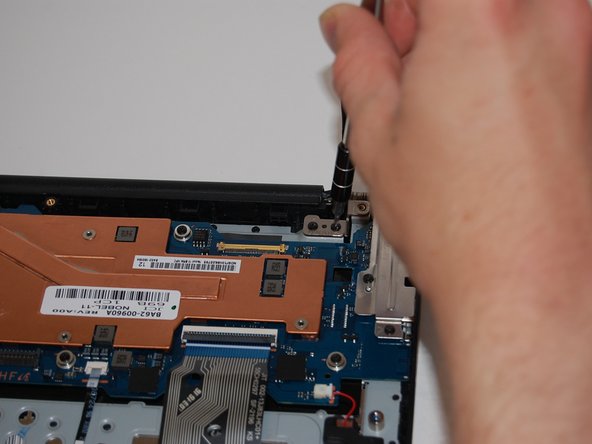
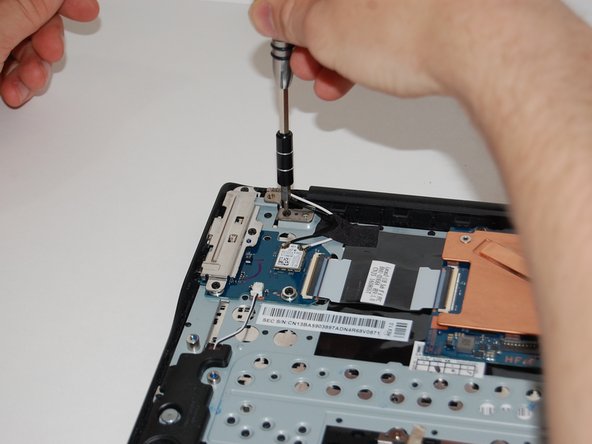
    • Remove the four 4.6mm screws from the display mounts using a Phillips #00 screwdriver.

  10. Samsung Chromebook 3 XE500C13-K02US Display Screen Replacement: Schritt 10, Bild 1 von 3 Samsung Chromebook 3 XE500C13-K02US Display Screen Replacement: Schritt 10, Bild 2 von 3 Samsung Chromebook 3 XE500C13-K02US Display Screen Replacement: Schritt 10, Bild 3 von 3
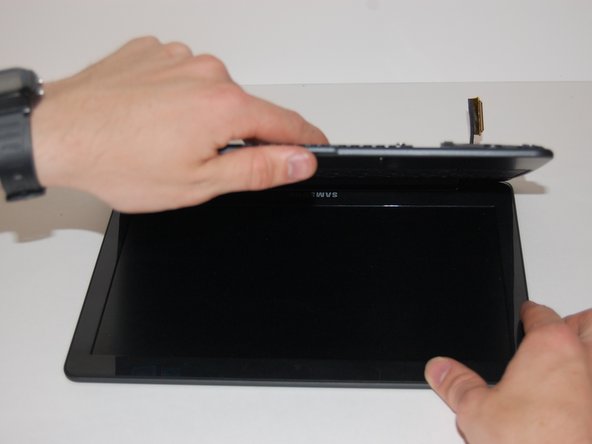
    • Once the hinge screws have been removed, open the laptop.

    • The laptop bottom will separate from the screen once you open it a certain amount.

  11. Samsung Chromebook 3 XE500C13-K02US Display Screen Replacement: Schritt 11, Bild 1 von 3 Samsung Chromebook 3 XE500C13-K02US Display Screen Replacement: Schritt 11, Bild 2 von 3 Samsung Chromebook 3 XE500C13-K02US Display Screen Replacement: Schritt 11, Bild 3 von 3
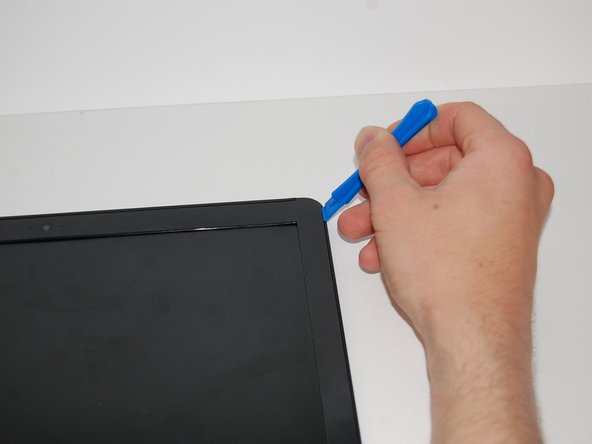
    • Use the iFixit opening tool to pry in between the bezel and screen.

    • You will hear a snapping sound as you work your way around the bezel with the iFixit opening tool.

  12. Samsung Chromebook 3 XE500C13-K02US Display Screen Replacement: Schritt 12, Bild 1 von 2 Samsung Chromebook 3 XE500C13-K02US Display Screen Replacement: Schritt 12, Bild 2 von 2
    • Remove the four 4.6mm screws from the display mounts using a Phillips #00 screwdriver.

  13. Samsung Chromebook 3 XE500C13-K02US Display Screen Replacement: Schritt 13, Bild 1 von 2 Samsung Chromebook 3 XE500C13-K02US Display Screen Replacement: Schritt 13, Bild 2 von 2
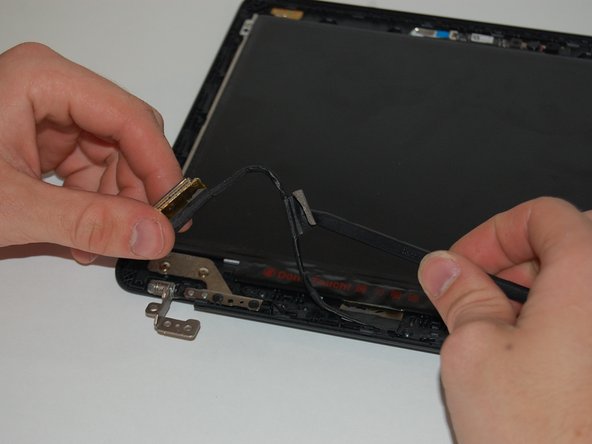
    • Using the spudger, lift the adhesive tape holding the display cable.

  14. Samsung Chromebook 3 XE500C13-K02US Display Screen Replacement: Schritt 14, Bild 1 von 3 Samsung Chromebook 3 XE500C13-K02US Display Screen Replacement: Schritt 14, Bild 2 von 3 Samsung Chromebook 3 XE500C13-K02US Display Screen Replacement: Schritt 14, Bild 3 von 3
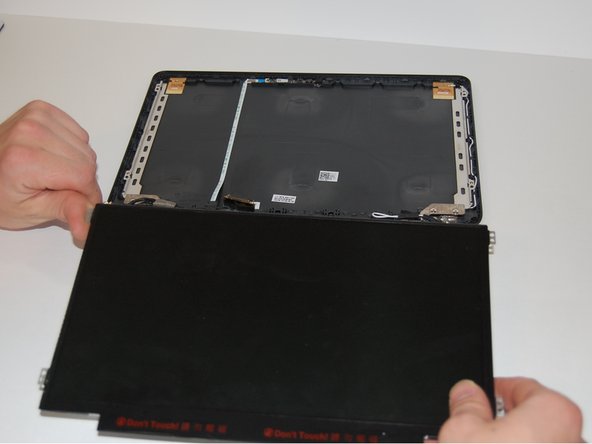
    • Gently lift the panel up and fold it over to expose the display cable on the backside of the display.

  15. Samsung Chromebook 3 XE500C13-K02US Display Screen Replacement: Schritt 15, Bild 1 von 3 Samsung Chromebook 3 XE500C13-K02US Display Screen Replacement: Schritt 15, Bild 2 von 3 Samsung Chromebook 3 XE500C13-K02US Display Screen Replacement: Schritt 15, Bild 3 von 3
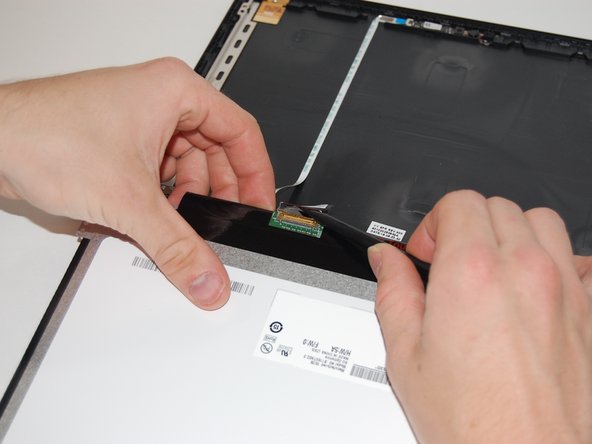
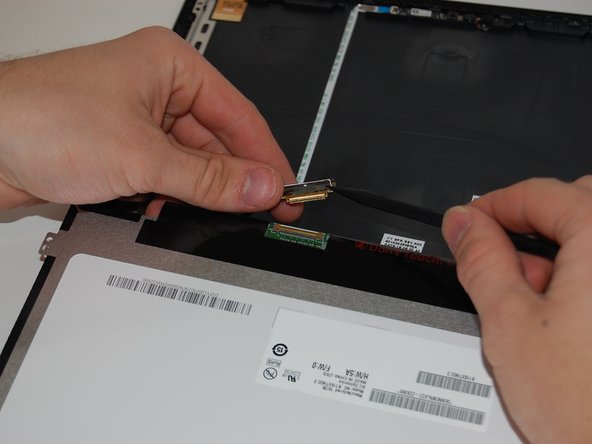
    • Use the spudger, lift the hinge locking the gold colored display cable in place.

    • Pull the cable away from you to slide it out of the monitor.

    • Be gentle around the display circuit board. It is labeled "Do not touch."

  16. Samsung Chromebook 3 XE500C13-K02US Display Screen Replacement: Schritt 16, Bild 1 von 1
    • Once the display cable has been removed, lift the screen up and out of the case.

Abschluss

To reassemble your device, follow these instructions in reverse order.

8 weitere Nutzer:innen haben diese Anleitung absolviert.

Mick McCarty

Mitglied seit: 03/18/19

980 Reputation

6 Anleitungen geschrieben

Team

4 Kommentare

This also works for the XE500C13-K04US

Jonathan - Antwort

It was more challenging than I thought. Reconnecting the antenna wires wasn’t easy. I needed better vision and dexterity to find it easier. Don’t forget to reuse the adhesive tape or you may be disappointed.

Bill Watson - Antwort

Great guide!

Very accurate!

Joshua McVey - Antwort

Just to confirm. You have to tear apart the bottom just to replace the led screen? Can't just remove the bezel?

Xe501c13-k02us

Trisha Kurtz - Antwort

Kommentar hinzufügen

Seitenaufrufe:

Letzte 24 Stunden: 0

Letzte 7 Tage: 0

Letzte 30 Tage: 2

Insgesamt: 1,952