Zum Hauptinhalt wechseln

Samsung Chromebook XE550C22 Back Panel Replacement

Was du brauchst

  1. Samsung Chromebook XE550C22 Back Panel Replacement, Back Panel: Schritt 1, Bild 1 von 3 Samsung Chromebook XE550C22 Back Panel Replacement, Back Panel: Schritt 1, Bild 2 von 3 Samsung Chromebook XE550C22 Back Panel Replacement, Back Panel: Schritt 1, Bild 3 von 3
    • Turn the power off before beginning this step.

    • Using the spudger, remove the four 1/2 inch skid pads from the back of the laptop.

  2. Samsung Chromebook XE550C22 Back Panel Replacement: Schritt 2, Bild 1 von 2 Samsung Chromebook XE550C22 Back Panel Replacement: Schritt 2, Bild 2 von 2
    • Remove the eight 7mm screws using the J0 Screwdriver.

  3. Samsung Chromebook XE550C22 Back Panel Replacement: Schritt 3, Bild 1 von 3 Samsung Chromebook XE550C22 Back Panel Replacement: Schritt 3, Bild 2 von 3 Samsung Chromebook XE550C22 Back Panel Replacement: Schritt 3, Bild 3 von 3
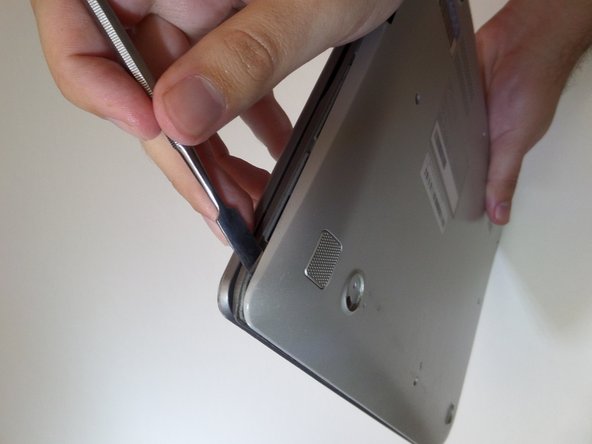
    • Starting at the center front of the laptop, insert the metal spudger between the keyboard panel and the bottom panel, separating the bottom panel from the laptop.

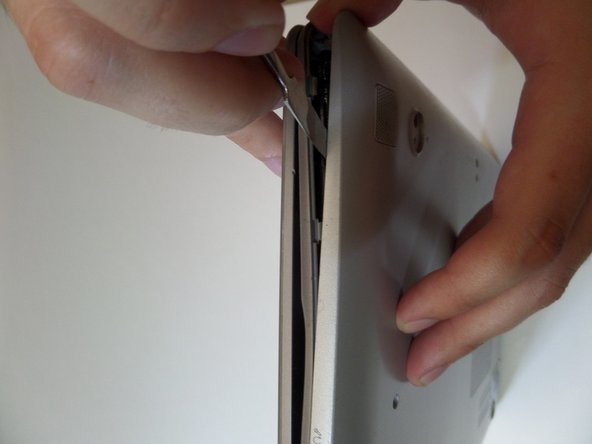
    • Continue prying around the sides to release more brackets.

  4. Samsung Chromebook XE550C22 Back Panel Replacement: Schritt 4, Bild 1 von 2 Samsung Chromebook XE550C22 Back Panel Replacement: Schritt 4, Bild 2 von 2
    • After deconnecting all the brackets, pull the back panel away from the laptop.

    • Note: The back panel has some flex to it, don't be afraid to use some force.

Abschluss

To reassemble your device, follow these instructions in reverse order.

3 weitere Nutzer:innen haben diese Anleitung absolviert.

Brenna Wolfe

Mitglied seit: 09/11/17

541 Reputation

3 Anleitungen geschrieben

Team

CSU Fullerton, Team S2-G7, Bruce Fall 2017 Mitglied von CSU Fullerton, Team S2-G7, Bruce Fall 2017

CSUF-BRUCE-F17S2G7

3 Mitglieder

14 Anleitungen geschrieben

0 Kommentare

Kommentar hinzufügen

Seitenaufrufe:

Letzte 24 Stunden: 1

Letzte 7 Tage: 1

Letzte 30 Tage: 7

Insgesamt: 446