Einleitung
Step-by-step guild to replacing your old worn out keyboard buttons.
Was du brauchst
-
-
Press button on back of phone below camera.
-
While button is depressed, remove the back panel of the phone by it sliding off (not shown in picture).
-
-
-
Using an iPod opening tool, remove the screw cover in the top left corner by lifting it up.
-
-
-
-
Use the Phillips #00 screwdriver to remove the six screws on the back of the phone. Three are evenly spaced on each side.
-
-
-
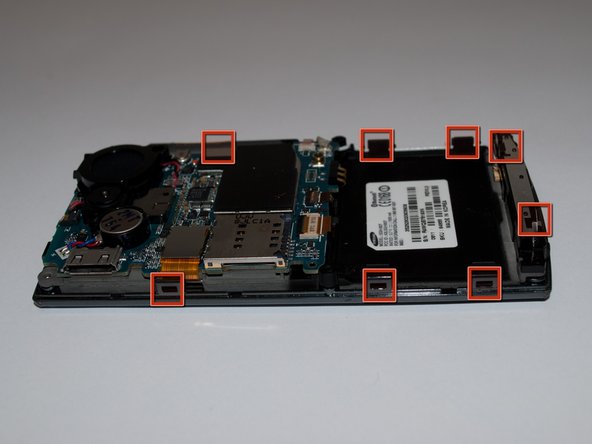
Slide the iPod opening tool into the seam on the side of the phone and turn it slightly to unhook the eight clips.
-
-
-
Once all eight of the clips have been unhooked, lift the back panel off of the phone.
-
-
-
Using an iPod opening tool, unlatch the ribbon cable located in the lower right corner of the motherboard.
-
Carefully remove the ribbon.
-


To reassemble your device, follow these instructions in reverse order.
To reassemble your device, follow these instructions in reverse order.
Rückgängig: Ich habe diese Anleitung nicht absolviert.
Eine weitere Person hat diese Anleitung absolviert.
Team

Cal Poly, Team 15-15, Regan Spring 2011 Mitglied von Cal Poly, Team 15-15, Regan Spring 2011
CPSU-REGAN-S11S15G15
5 Mitglieder
5 Anleitungen geschrieben