Zum Hauptinhalt wechseln

Samsung Galaxy A10 Charging Port Replacement

Einführungsvideo

  1. Samsung Galaxy A10 Charging Port Replacement, Remove the back cover: Schritt 1, Bild 1 von 3 Samsung Galaxy A10 Charging Port Replacement, Remove the back cover: Schritt 1, Bild 2 von 3 Samsung Galaxy A10 Charging Port Replacement, Remove the back cover: Schritt 1, Bild 3 von 3
    • Remove the SIM Tray.

    • Use plastic tools to separate the back cover.

  2. Samsung Galaxy A10 Charging Port Replacement: Schritt 2, Bild 1 von 3 Samsung Galaxy A10 Charging Port Replacement: Schritt 2, Bild 2 von 3 Samsung Galaxy A10 Charging Port Replacement: Schritt 2, Bild 3 von 3
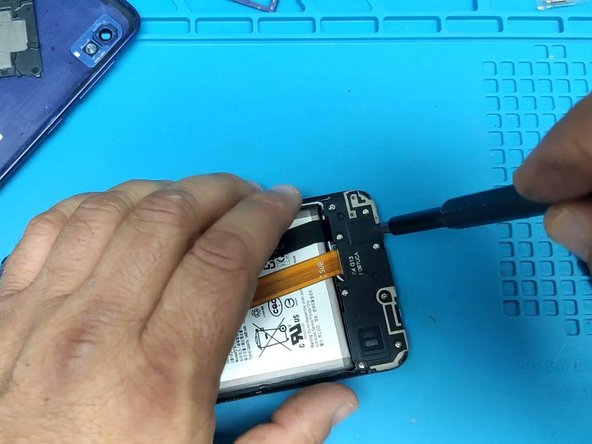
    • Remove the silver Phillips screws to be able to disassemble the motherboard shields.

  3. Samsung Galaxy A10 Charging Port Replacement: Schritt 3, Bild 1 von 3 Samsung Galaxy A10 Charging Port Replacement: Schritt 3, Bild 2 von 3 Samsung Galaxy A10 Charging Port Replacement: Schritt 3, Bild 3 von 3
    • Disconnect the battery.

    • Remove the screws and the charging board shield.

  4. Samsung Galaxy A10 Charging Port Replacement, Remove the charging board: Schritt 4, Bild 1 von 2 Samsung Galaxy A10 Charging Port Replacement, Remove the charging board: Schritt 4, Bild 2 von 2
    • Disconnect the Main flex cable and the coaxial antenna cables and remove the charging board.

  5. Samsung Galaxy A10 Charging Port Replacement: Schritt 5, Bild 1 von 3 Samsung Galaxy A10 Charging Port Replacement: Schritt 5, Bild 2 von 3 Samsung Galaxy A10 Charging Port Replacement: Schritt 5, Bild 3 von 3
    • Cover the microphone hole to prevent microphone damage.

    • Use hot air to remove the Micro USB connector.

  6. Samsung Galaxy A10 Charging Port Replacement: Schritt 6, Bild 1 von 3 Samsung Galaxy A10 Charging Port Replacement: Schritt 6, Bild 2 von 3 Samsung Galaxy A10 Charging Port Replacement: Schritt 6, Bild 3 von 3
    • Clean the tin and install the new charging connector.

  7. Samsung Galaxy A10 Charging Port Replacement: Schritt 7, Bild 1 von 2 Samsung Galaxy A10 Charging Port Replacement: Schritt 7, Bild 2 von 2
    • Clean the board and test the device.

Abschluss

To reassemble your device, follow these instructions in reverse order.

11 weitere Nutzer:innen haben diese Anleitung absolviert.

ZFix

Mitglied seit: 12/09/13

191.470 Reputation

330 Anleitungen geschrieben

Team

Master Techs Mitglied von Master Techs

Community

321 Mitglieder

1.485 Anleitungen geschrieben

Ein Kommentar

Waste of time unless you're obsessed with soldering. Just buy a complete board. Cheaper, easier and quicker.

[deleted] - Antwort

Kommentar hinzufügen

Seitenaufrufe:

Letzte 24 Stunden: 6

Letzte 7 Tage: 31

Letzte 30 Tage: 187

Insgesamt: 7,175