Diese Version enthält möglicherweise inkorrekte Änderungen. Wechsle zur letzten geprüften Version.
Was du brauchst
-
Dieser Schritt ist noch nicht übersetzt. Hilf mit, ihn zu übersetzen!
-
Start by removing the back cover by using your thumbnail to pry the cover off the midframe.
-
-
Dieser Schritt ist noch nicht übersetzt. Hilf mit, ihn zu übersetzen!
-
Remove the five 4 mm screws with a Phillips#00 screwdriver.
-
-
-
Dieser Schritt ist noch nicht übersetzt. Hilf mit, ihn zu übersetzen!
-
Remove the battery with plastic opening tool
-
-
Dieser Schritt ist noch nicht übersetzt. Hilf mit, ihn zu übersetzen!
-
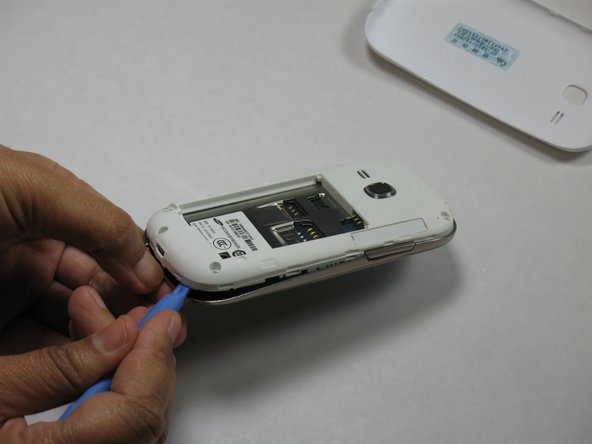
Using the plastic opening tool pry into the bezel to remove the mid-frame
-
Continue moving the plastic opening tool around the mid-frame to separate it from the display assembly.
-
-
Dieser Schritt ist noch nicht übersetzt. Hilf mit, ihn zu übersetzen!
-
Once you have separated the mid-frame it should look like this.
-
Replace the old mid-frame with the new one and follow the steps in reverse.
-


Rückgängig: Ich habe diese Anleitung nicht absolviert.
Ein:e weitere:r Nutzer:in hat diese Anleitung absolviert.
Team

USF Tampa, Team 8-2, Leahy Fall 2014 Mitglied von USF Tampa, Team 8-2, Leahy Fall 2014
USFT-LEAHY-F14S8G2
4 Mitglieder
5 Anleitungen geschrieben