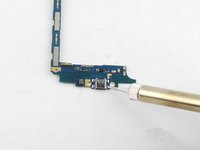
Zum Hauptinhalt wechseln

Samsung Galaxy Grand Prime Micro USB Port Replacement

Was du brauchst

  1. Samsung Galaxy Grand Prime Micro USB Port Replacement, Battery: Schritt 1, Bild 1 von 3 Samsung Galaxy Grand Prime Micro USB Port Replacement, Battery: Schritt 1, Bild 2 von 3 Samsung Galaxy Grand Prime Micro USB Port Replacement, Battery: Schritt 1, Bild 3 von 3
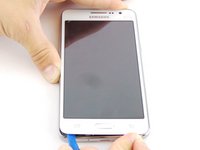
    • Remove the back cover of phone by lifting up on the back cover tab with the blue plastic opening tool.

    • Go around the edge of the back cover to completely remove it.

  2. Samsung Galaxy Grand Prime Micro USB Port Replacement, Remove the battery.: Schritt 2, Bild 1 von 3 Samsung Galaxy Grand Prime Micro USB Port Replacement, Remove the battery.: Schritt 2, Bild 2 von 3 Samsung Galaxy Grand Prime Micro USB Port Replacement, Remove the battery.: Schritt 2, Bild 3 von 3
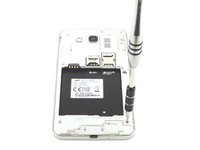
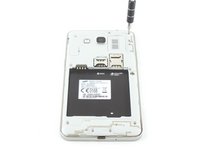
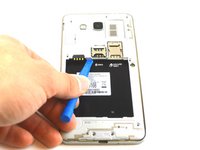
    • Remove the old battery by lifting up on the thumb tab.

    • Periodically clean the brass terminals on the battery and the phone. Place a minute amount of ISO on a Q-tip and gingerly clean the connections.

  3. Samsung Galaxy Grand Prime Micro USB Port Replacement, Midframe: Schritt 3, Bild 1 von 3 Samsung Galaxy Grand Prime Micro USB Port Replacement, Midframe: Schritt 3, Bild 2 von 3 Samsung Galaxy Grand Prime Micro USB Port Replacement, Midframe: Schritt 3, Bild 3 von 3
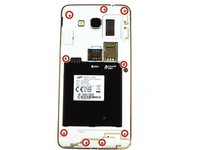
    • Remove the nine 4mm screws screws from the midframe with a Phillips #000 screwdriver.

  4. Samsung Galaxy Grand Prime Micro USB Port Replacement: Schritt 4, Bild 1 von 2 Samsung Galaxy Grand Prime Micro USB Port Replacement: Schritt 4, Bild 2 von 2
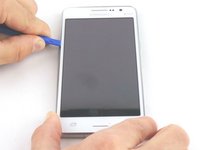
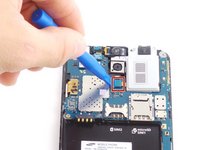
    • Wedge the blue plastic opening tool in between the front and side panel.

    • Move the blue plastic opening tool around the edges between the front and side panel.

  5. Samsung Galaxy Grand Prime Micro USB Port Replacement: Schritt 5, Bild 1 von 2 Samsung Galaxy Grand Prime Micro USB Port Replacement: Schritt 5, Bild 2 von 2
    • Make sure that you detach the mid-frame from the inside too.

  6. Samsung Galaxy Grand Prime Micro USB Port Replacement, Headphone Jack/Speaker Assembly: Schritt 6, Bild 1 von 2 Samsung Galaxy Grand Prime Micro USB Port Replacement, Headphone Jack/Speaker Assembly: Schritt 6, Bild 2 von 2
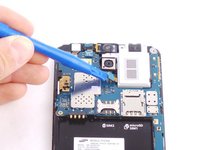
    • Unhook the ribbon cable clip with the plastic opening tool and remove the audio jack.

  7. Samsung Galaxy Grand Prime Micro USB Port Replacement, Earpiece Speaker: Schritt 7, Bild 1 von 2 Samsung Galaxy Grand Prime Micro USB Port Replacement, Earpiece Speaker: Schritt 7, Bild 2 von 2
    • Use the plastic opening tool to unhook the ribbon cable clip.

  8. Samsung Galaxy Grand Prime Micro USB Port Replacement: Schritt 8, Bild 1 von 2 Samsung Galaxy Grand Prime Micro USB Port Replacement: Schritt 8, Bild 2 von 2
    • Gently pull on the connector with the tweezers until the speaker comes off.

  9. Samsung Galaxy Grand Prime Micro USB Port Replacement, Motherboard: Schritt 9, Bild 1 von 2 Samsung Galaxy Grand Prime Micro USB Port Replacement, Motherboard: Schritt 9, Bild 2 von 2
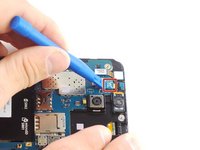
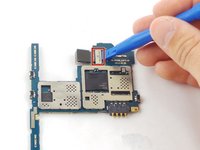
    • Unhook the other ribbon cable clip to the screen with the blue plastic opening tool.

  10. Samsung Galaxy Grand Prime Micro USB Port Replacement: Schritt 10, Bild 1 von 3 Samsung Galaxy Grand Prime Micro USB Port Replacement: Schritt 10, Bild 2 von 3 Samsung Galaxy Grand Prime Micro USB Port Replacement: Schritt 10, Bild 3 von 3
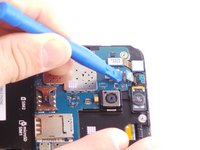
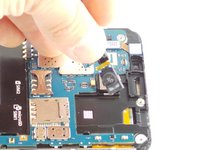
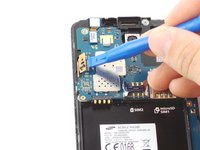
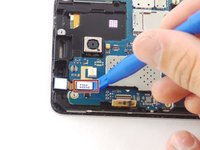
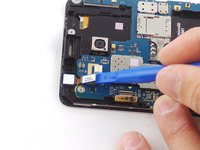
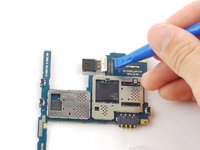
    • Unhook the ribbon cable clip to the front camera.

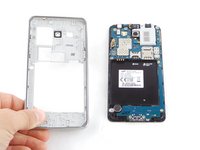
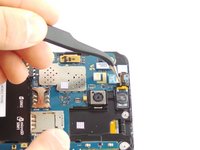
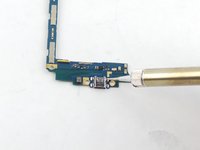
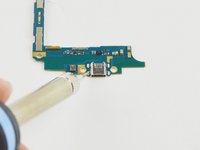
    • Lift the motherboard up and out of the device.

  11. Samsung Galaxy Grand Prime Micro USB Port Replacement: Schritt 11, Bild 1 von 2 Samsung Galaxy Grand Prime Micro USB Port Replacement: Schritt 11, Bild 2 von 2
    • Remove the motherboard and unhook the ribbon cable clip to the back camera.

  12. Samsung Galaxy Grand Prime Micro USB Port Replacement, Micro USB Port: Schritt 12, Bild 1 von 3 Samsung Galaxy Grand Prime Micro USB Port Replacement, Micro USB Port: Schritt 12, Bild 2 von 3 Samsung Galaxy Grand Prime Micro USB Port Replacement, Micro USB Port: Schritt 12, Bild 3 von 3
    • Using a soldering iron to solder off the charging port.

    • Be careful soldering iron gets extremely hot.

Abschluss

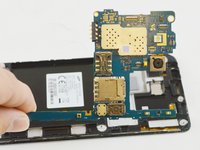
To reassemble your device, follow these instructions in reverse order.

33 weitere Nutzer:innen haben diese Anleitung absolviert.

Kyle Ruff

Mitglied seit: 02/04/16

6.725 Reputation

5 Anleitungen geschrieben

Team

USF Tampa, Team 17-3, Blackwell Winter 2016 Mitglied von USF Tampa, Team 17-3, Blackwell Winter 2016

USFT-BLACKWELL-W16S17G3

3 Mitglieder

12 Anleitungen geschrieben

0 Kommentare

Kommentar hinzufügen

Seitenaufrufe:

Letzte 24 Stunden: 1

Letzte 7 Tage: 18

Letzte 30 Tage: 41

Insgesamt: 34,757