Zum Hauptinhalt wechseln

Samsung Galaxy J3 Emerge Motherboard Replacement

Was du brauchst

  1. Samsung Galaxy J3 Emerge Motherboard Replacement, Screen: Schritt 1, Bild 1 von 3 Samsung Galaxy J3 Emerge Motherboard Replacement, Screen: Schritt 1, Bild 2 von 3 Samsung Galaxy J3 Emerge Motherboard Replacement, Screen: Schritt 1, Bild 3 von 3
    • Heat up the edges of the screen with a hair dryer.

    • Put the iFixit Opening Tool between the screen and body to open the edge of the screen up.

    • Work the iFixit Opening Tools around the whole screen to break the glue.

  2. Samsung Galaxy J3 Emerge Motherboard Replacement: Schritt 2, Bild 1 von 2 Samsung Galaxy J3 Emerge Motherboard Replacement: Schritt 2, Bild 2 von 2
    • Lift the screen up from the bottom.

    • The screen could crack when lifting it up.

    • Pry the gray cover open.

  3. Samsung Galaxy J3 Emerge Motherboard Replacement: Schritt 3, Bild 1 von 2 Samsung Galaxy J3 Emerge Motherboard Replacement: Schritt 3, Bild 2 von 2
    • Pry the connector off of the motherboard by using a clean nail or the iFixit opening tool.

  4. Samsung Galaxy J3 Emerge Motherboard Replacement, Motherboard: Schritt 4, Bild 1 von 2 Samsung Galaxy J3 Emerge Motherboard Replacement, Motherboard: Schritt 4, Bild 2 von 2
    • Remove the eleven Phillips #00 3.5mm screws.

    • If the screws get stuck when removing, try using tape to get them out. Place the adhesive side of tape on the screws and pull the tape off the spot.

  5. Samsung Galaxy J3 Emerge Motherboard Replacement: Schritt 5, Bild 1 von 1
    • Turn the phone over and push down where the battery was.

    • There will be a loud clicking noise when applying pressure.

  6. Samsung Galaxy J3 Emerge Motherboard Replacement: Schritt 6, Bild 1 von 1
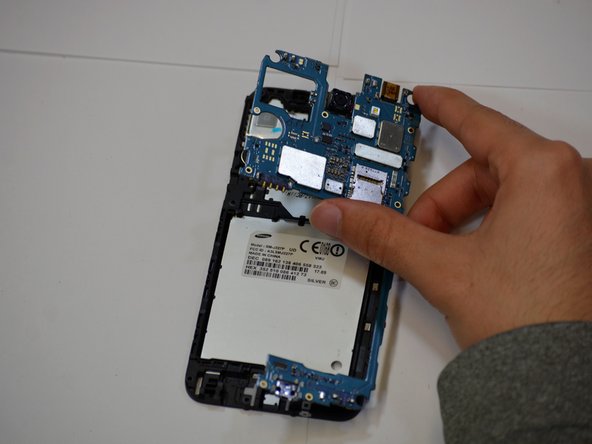
    • Insert the iFixit Opening Pick between the motherboard and the panel.

    • Work the iFixit Opening Pick around the outside of the motherboard.

  7. Samsung Galaxy J3 Emerge Motherboard Replacement: Schritt 7, Bild 1 von 2 Samsung Galaxy J3 Emerge Motherboard Replacement: Schritt 7, Bild 2 von 2
    • Pry the motherboard away from the phone using your hand.

Abschluss

To reassemble your device, follow these instructions in reverse order.

Team

Cal Poly, Team S19-G2, White Winter 2019 Mitglied von Cal Poly, Team S19-G2, White Winter 2019

CPSU-WHITE-W19S19G2

4 Mitglieder

5 Anleitungen geschrieben

0 Kommentare

Kommentar hinzufügen

Seitenaufrufe:

Letzte 24 Stunden: 1

Letzte 7 Tage: 3

Letzte 30 Tage: 6

Insgesamt: 1,264