Zum Hauptinhalt wechseln

Samsung Galaxy J3 Luna Pro Front and Back Camera Replacement

Was du brauchst

  1. Samsung Galaxy J3 Luna Pro Front and Back Camera  Replacement, Motherboard Change: Schritt 1, Bild 1 von 1
    • Turn off the phone.

    • Remove the back cover and battery

  2. Samsung Galaxy J3 Luna Pro Front and Back Camera  Replacement: Schritt 2, Bild 1 von 3 Samsung Galaxy J3 Luna Pro Front and Back Camera  Replacement: Schritt 2, Bild 2 von 3 Samsung Galaxy J3 Luna Pro Front and Back Camera  Replacement: Schritt 2, Bild 3 von 3
    • Attach a suction cup to the screen and pry upwards.

    • Insert the plastic opening tool into the gap under the screen and work your way around the perimeter.

    • Don't remove the screen completely as there are cables still connection the two pieces.

  3. Samsung Galaxy J3 Luna Pro Front and Back Camera  Replacement: Schritt 3, Bild 1 von 3 Samsung Galaxy J3 Luna Pro Front and Back Camera  Replacement: Schritt 3, Bild 2 von 3 Samsung Galaxy J3 Luna Pro Front and Back Camera  Replacement: Schritt 3, Bild 3 von 3
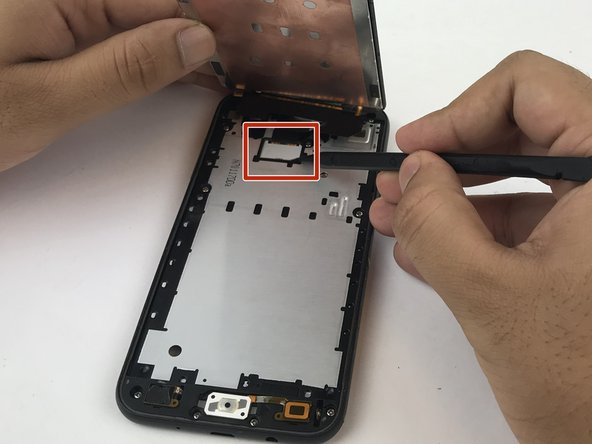
    • Use the pointy end of a spudger to remove the white plastic cover from the display cover.

    • Use the spudger to pry up the display cable from the motherboard.

    • Remove the screen.

  4. Samsung Galaxy J3 Luna Pro Front and Back Camera  Replacement: Schritt 4, Bild 1 von 3 Samsung Galaxy J3 Luna Pro Front and Back Camera  Replacement: Schritt 4, Bild 2 von 3 Samsung Galaxy J3 Luna Pro Front and Back Camera  Replacement: Schritt 4, Bild 3 von 3
    • Remove the eleven JIS 00 screws from the mid-frame.

    • Using a spudger, pry the mid-frame from the screen.

  5. Samsung Galaxy J3 Luna Pro Front and Back Camera  Replacement: Schritt 5, Bild 1 von 3 Samsung Galaxy J3 Luna Pro Front and Back Camera  Replacement: Schritt 5, Bild 2 von 3 Samsung Galaxy J3 Luna Pro Front and Back Camera  Replacement: Schritt 5, Bild 3 von 3
    • Remove the motherboard from the mid-frame.

  6. Samsung Galaxy J3 Luna Pro Front and Back Camera  Replacement, Front and Back Camera: Schritt 6, Bild 1 von 3 Samsung Galaxy J3 Luna Pro Front and Back Camera  Replacement, Front and Back Camera: Schritt 6, Bild 2 von 3 Samsung Galaxy J3 Luna Pro Front and Back Camera  Replacement, Front and Back Camera: Schritt 6, Bild 3 von 3
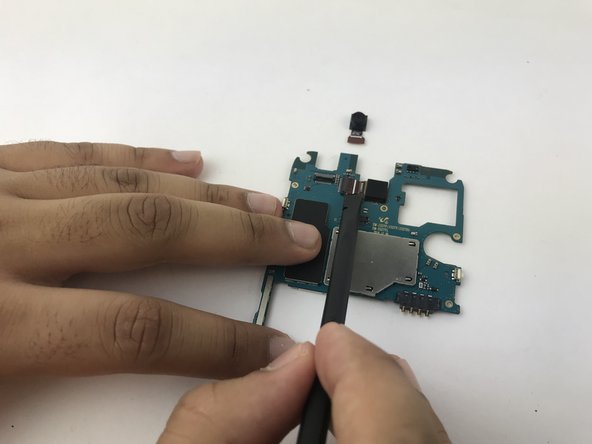
    • Use a spudger to flip up the retaining flaps on the front and rear camera ribbon cable ZIF sockets.

    • Pull the cables outs of the ZIF sockets.

Abschluss

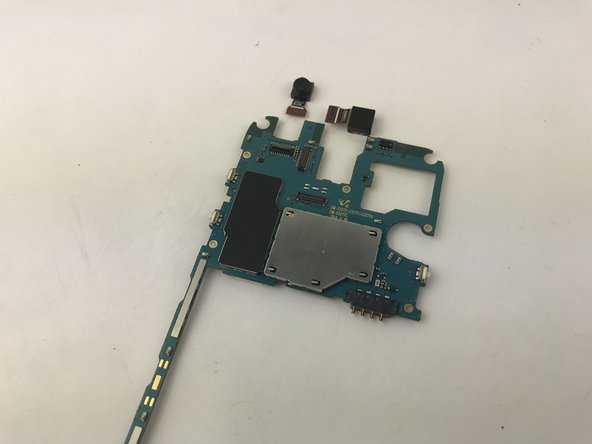
To reassemble your device, follow these instructions in reverse order.

2 weitere Nutzer:innen haben diese Anleitung absolviert.

Jay Patel

Mitglied seit: 01/29/18

150 Reputation

1 Anleitung geschrieben

Team

USF Tampa, Team S5-G5, Passmore Spring 2018 Mitglied von USF Tampa, Team S5-G5, Passmore Spring 2018

USFT-PASSMORE-S18S5G5

5 Mitglieder

5 Anleitungen geschrieben

0 Kommentare

Kommentar hinzufügen

Seitenaufrufe:

Letzte 24 Stunden: 1

Letzte 7 Tage: 3

Letzte 30 Tage: 9

Insgesamt: 1,329