Zum Hauptinhalt wechseln
Gemeinsam reparieren - Jetzt registrieren

Samsung Galaxy Note Vibrator Replacement

Was du brauchst

  1. Samsung Galaxy Note Vibrator Replacement, Stylus: Schritt 1, Bild 1 von 2 Samsung Galaxy Note Vibrator Replacement, Stylus: Schritt 1, Bild 2 von 2
    • Grasp the cap of the stylus and remove it from its slot in the midframe.

    Frag FixBot

    Kommentar hinzufügen

  2. Samsung Galaxy Note Vibrator Replacement, Rear Case: Schritt 2, Bild 1 von 2 Samsung Galaxy Note Vibrator Replacement, Rear Case: Schritt 2, Bild 2 von 2
    • Pry with a plastic opening tool, or your fingernail, in the divot to the right of the rear-facing camera, near the volume rocker.

    Frag FixBot

    Kommentar hinzufügen

  3. Samsung Galaxy Note Vibrator Replacement: Schritt 3, Bild 1 von 2 Samsung Galaxy Note Vibrator Replacement: Schritt 3, Bild 2 von 2
    • Lift and remove the rear case from the phone.

    Frag FixBot

    Kommentar hinzufügen

  4. Samsung Galaxy Note Vibrator Replacement, Battery: Schritt 4, Bild 1 von 2 Samsung Galaxy Note Vibrator Replacement, Battery: Schritt 4, Bild 2 von 2
    • Insert your finger in the notch of the battery compartment.

    • Press the battery toward the rear facing camera while pulling outward.

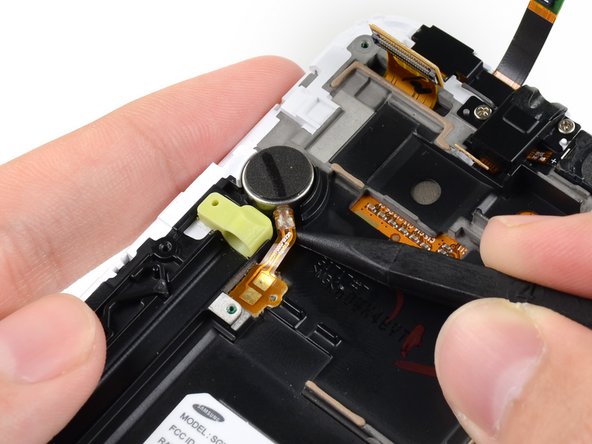
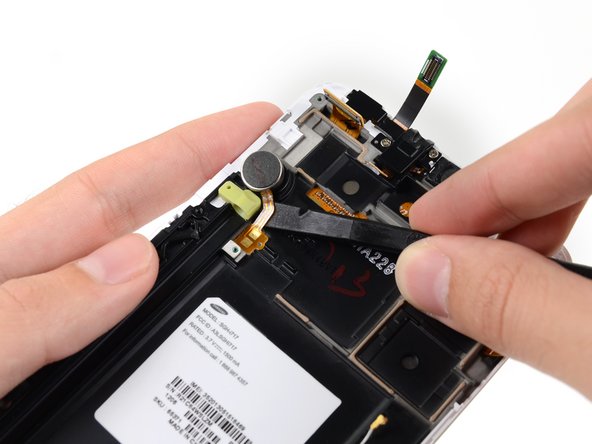
    Frag FixBot

    Kommentar hinzufügen

  5. Samsung Galaxy Note Vibrator Replacement, MicroSD Card: Schritt 5, Bild 1 von 3 Samsung Galaxy Note Vibrator Replacement, MicroSD Card: Schritt 5, Bild 2 von 3 Samsung Galaxy Note Vibrator Replacement, MicroSD Card: Schritt 5, Bild 3 von 3
    • Use the flat end of a spudger, or your fingernail, to press the microSD card slightly deeper into its slot until you hear a click.

    • After the click, release the card and it will pop out of its slot.

    • For reassembly, push the microSD card into the slot until it clicks in place.

    Frag FixBot

    Kommentar hinzufügen

  6. Samsung Galaxy Note Vibrator Replacement: Schritt 6, Bild 1 von 1
    • Remove the microSD card from its slot in the midframe.

    Frag FixBot

    Kommentar hinzufügen

  7. Samsung Galaxy Note Vibrator Replacement, SIM Card: Schritt 7, Bild 1 von 2 Samsung Galaxy Note Vibrator Replacement, SIM Card: Schritt 7, Bild 2 von 2
    • Use a plastic opening tool, or your fingernail, to push the SIM card out of its compartment.

    Frag FixBot

    Kommentar hinzufügen

  8. Samsung Galaxy Note Vibrator Replacement: Schritt 8, Bild 1 von 2 Samsung Galaxy Note Vibrator Replacement: Schritt 8, Bild 2 von 2
    • Slide the SIM card out the rest of the way with your thumb and remove it from the device.

    Frag FixBot

    Kommentar hinzufügen

  9. Samsung Galaxy Note Vibrator Replacement, Midframe: Schritt 9, Bild 1 von 1
    • Remove the nine 3.4 mm Phillips #00 screws securing the midframe to the display assembly.

    Frag FixBot

    Kommentar hinzufügen

  10. Samsung Galaxy Note Vibrator Replacement: Schritt 10, Bild 1 von 2 Samsung Galaxy Note Vibrator Replacement: Schritt 10, Bild 2 von 2
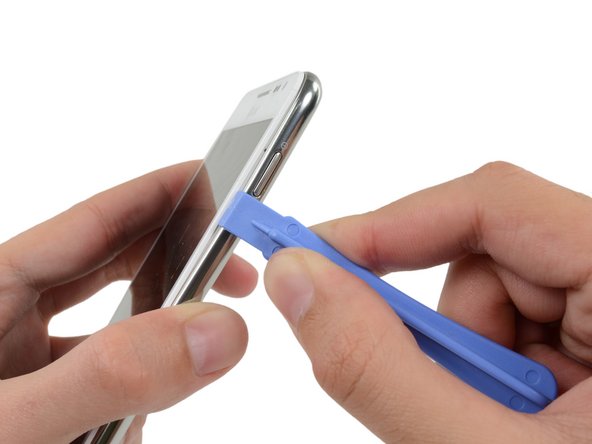
    • Insert your plastic opening tool to the left of the power button between the midframe and the front panel assembly and pry.

    Frag FixBot

    Kommentar hinzufügen

  11. Samsung Galaxy Note Vibrator Replacement: Schritt 11, Bild 1 von 3 Samsung Galaxy Note Vibrator Replacement: Schritt 11, Bild 2 von 3 Samsung Galaxy Note Vibrator Replacement: Schritt 11, Bild 3 von 3
    • Slide the plastic opening tool down the seam.

    Frag FixBot

    Kommentar hinzufügen

  12. Samsung Galaxy Note Vibrator Replacement: Schritt 12, Bild 1 von 3 Samsung Galaxy Note Vibrator Replacement: Schritt 12, Bild 2 von 3 Samsung Galaxy Note Vibrator Replacement: Schritt 12, Bild 3 von 3
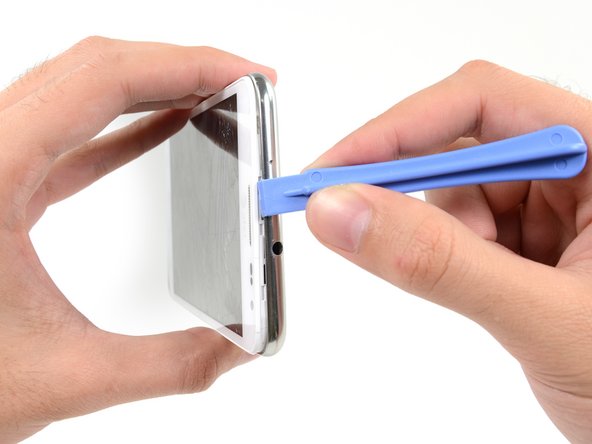
    • Insert your plastic opening tool to the left of the headphone jack between the midframe and the display assembly.

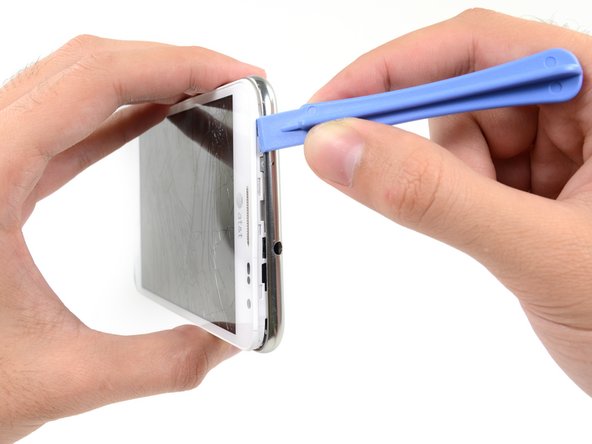
    • Slide the opening tool along the top edge of the phone.

    • Continue to run the plastic opening tool around the perimeter of the phone until the midframe is separated.

    Frag FixBot

    Kommentar hinzufügen

  13. Samsung Galaxy Note Vibrator Replacement: Schritt 13, Bild 1 von 2 Samsung Galaxy Note Vibrator Replacement: Schritt 13, Bild 2 von 2
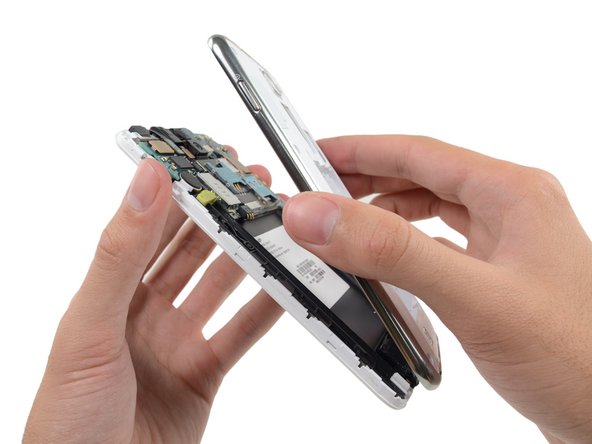
    • Remove the midframe from the display assembly.

    Frag FixBot

    Kommentar hinzufügen

  14. Samsung Galaxy Note Vibrator Replacement, Motherboard Assembly: Schritt 14, Bild 1 von 2 Samsung Galaxy Note Vibrator Replacement, Motherboard Assembly: Schritt 14, Bild 2 von 2
    • Use the flat end of a spudger to carefully disconnect the display cable connector.

    Frag FixBot

    Kommentar hinzufügen

  15. Samsung Galaxy Note Vibrator Replacement: Schritt 15, Bild 1 von 3 Samsung Galaxy Note Vibrator Replacement: Schritt 15, Bild 2 von 3 Samsung Galaxy Note Vibrator Replacement: Schritt 15, Bild 3 von 3
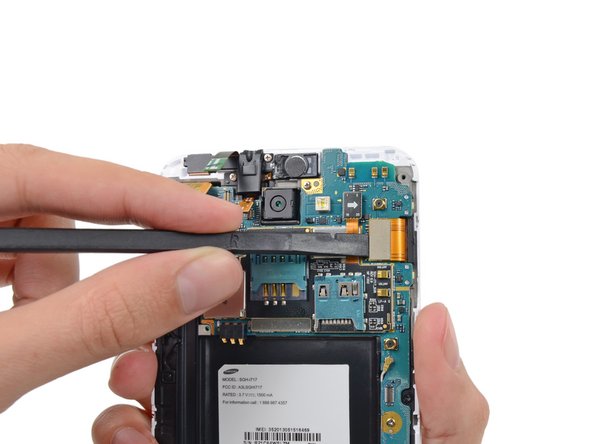
    • Use a spudger to disconnect the front-facing camera assembly cable connector.

    • Disconnect the headphone jack/earpiece speaker assembly cable connector.

    • Disconnect the digitizer cable connector.

    Frag FixBot

    Kommentar hinzufügen

  16. Samsung Galaxy Note Vibrator Replacement: Schritt 16, Bild 1 von 3 Samsung Galaxy Note Vibrator Replacement: Schritt 16, Bild 2 von 3 Samsung Galaxy Note Vibrator Replacement: Schritt 16, Bild 3 von 3
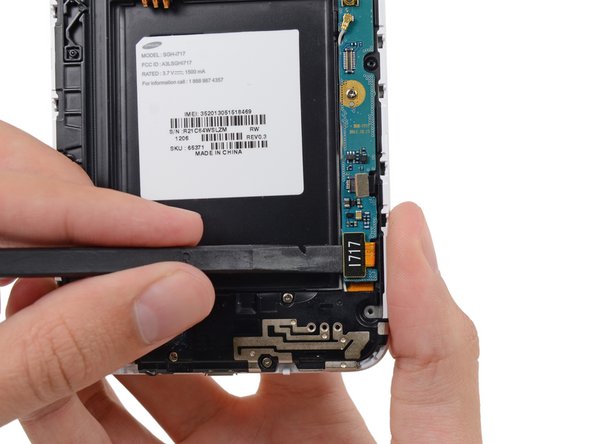
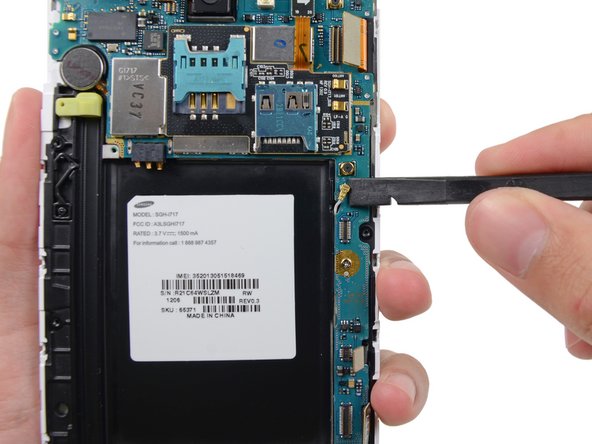
    • Disconnect the soft button cable connector with the flat end of a spudger.

    • Use a spudger to disconnect the USB board cable connector.

    • Disconnect the antenna cable connector.

    Frag FixBot

    Kommentar hinzufügen

  17. Samsung Galaxy Note Vibrator Replacement: Schritt 17, Bild 1 von 1
    • Remove the two 3.4 mm Phillips #00 screws securing the motherboard to the display assembly.

    Frag FixBot

    Kommentar hinzufügen

  18. Samsung Galaxy Note Vibrator Replacement: Schritt 18, Bild 1 von 2 Samsung Galaxy Note Vibrator Replacement: Schritt 18, Bild 2 von 2
    • Remove the motherboard assembly from the display assembly.

    Frag FixBot

    Kommentar hinzufügen

  19. Samsung Galaxy Note Vibrator Replacement, Vibrator: Schritt 19, Bild 1 von 3 Samsung Galaxy Note Vibrator Replacement, Vibrator: Schritt 19, Bild 2 von 3 Samsung Galaxy Note Vibrator Replacement, Vibrator: Schritt 19, Bild 3 von 3
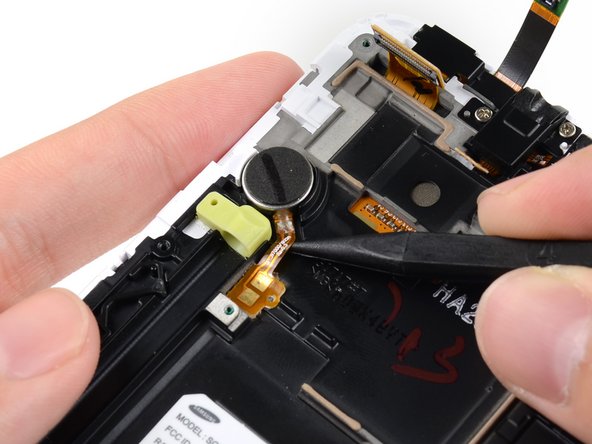
    • Insert the tip of a spudger under the vibrator connector cable near the contacts then slide it toward the vibrator itself.

    Frag FixBot

    Kommentar hinzufügen

  20. Samsung Galaxy Note Vibrator Replacement: Schritt 20, Bild 1 von 2 Samsung Galaxy Note Vibrator Replacement: Schritt 20, Bild 2 von 2
    • Insert the flat end of a spudger under the vibrator connector cable and pry it up from the adhesive.

    Frag FixBot

    Kommentar hinzufügen

  21. Samsung Galaxy Note Vibrator Replacement: Schritt 21, Bild 1 von 1
    • Remove the vibrator from the display assembly.

    Frag FixBot

    Kommentar hinzufügen

Abschluss

To reassemble your device, follow these instructions in reverse order.

Rückgängig: Ich habe diese Anleitung nicht absolviert.

7 weitere Personen haben diese Anleitung absolviert.

Sam Goldheart

Mitglied seit: 10/18/12

477.643 Reputation

538 Anleitungen geschrieben

Team

iFixit Mitglied von iFixit

Staff

122 Mitglieder

27.514 Anleitungen geschrieben

0 Kommentare zur Anleitung

Kommentar hinzufügen

Seitenaufrufe:

Letzte 24 Stunden: 1

Letzte 7 Tage: 9

Letzte 30 Tage: 54

Insgesamt: 6,616