Zum Hauptinhalt wechseln

Samsung Galaxy S4 Active Microphone Replacement

Was du brauchst

  1. Samsung Galaxy S4 Active Microphone Replacement, Open Back Cover: Schritt 1, Bild 1 von 2 Samsung Galaxy S4 Active Microphone Replacement, Open Back Cover: Schritt 1, Bild 2 von 2
    • Use plastic opening tool to pry open back cover.

  2. Samsung Galaxy S4 Active Microphone Replacement, Pull Out Battery: Schritt 2, Bild 1 von 1
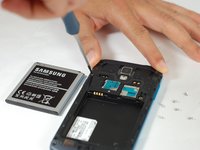
    • Use the plastic opening tool to take out the battery.

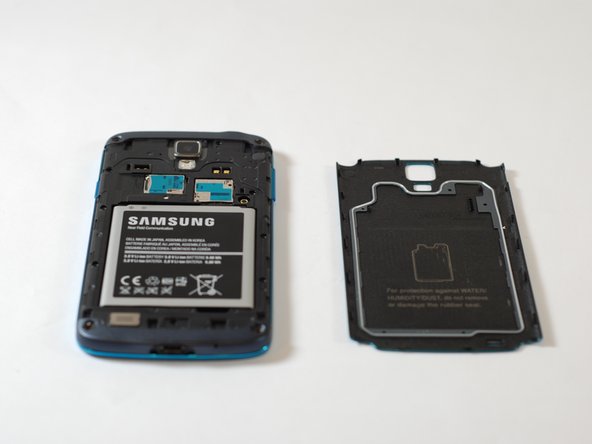
    • Remove SD card and SIM card.

  3. Samsung Galaxy S4 Active Microphone Replacement, Remove Plastic Midframe: Schritt 3, Bild 1 von 3 Samsung Galaxy S4 Active Microphone Replacement, Remove Plastic Midframe: Schritt 3, Bild 2 von 3 Samsung Galaxy S4 Active Microphone Replacement, Remove Plastic Midframe: Schritt 3, Bild 3 von 3
    • Unscrew all screws.

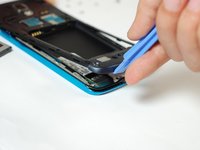
    • Pry off midframe with plastic opening tool.

  4. Samsung Galaxy S4 Active Microphone Replacement, Remove Daughterboard: Schritt 4, Bild 1 von 3 Samsung Galaxy S4 Active Microphone Replacement, Remove Daughterboard: Schritt 4, Bild 2 von 3 Samsung Galaxy S4 Active Microphone Replacement, Remove Daughterboard: Schritt 4, Bild 3 von 3
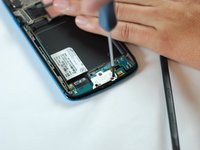
    • Unscrew screws holding daughterboard in place.

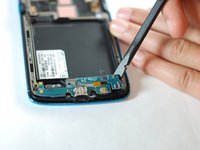
    • Carefully remove daughterboard with plastic opening tool.

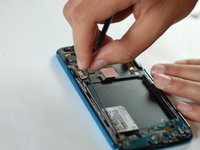
    • The microphone is embedded in the daughterboard. This means the entire daughterboard must be replaced.

Abschluss

To reassemble your device, follow these instructions in reverse order.

10 weitere Personen haben diese Anleitung absolviert.

Team

USF Tampa, Team 12-3, Blackwell Fall 2014 Mitglied von USF Tampa, Team 12-3, Blackwell Fall 2014

USFT-BLACKWELL-F14S12G3

3 Mitglieder

3 Anleitungen geschrieben

0 Kommentare

Kommentar hinzufügen

Seitenaufrufe:

Letzte 24 Stunden: 2

Letzte 7 Tage: 9

Letzte 30 Tage: 9

Insgesamt: 2,487