Zum Hauptinhalt wechseln

Samsung Galaxy S4 Active Microphone Replacement

Was du brauchst

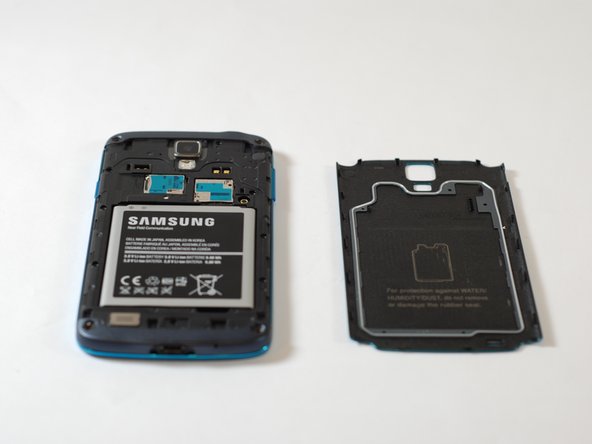
  1. Samsung Galaxy S4 Active Microphone Replacement, Open Back Cover: Schritt 1, Bild 1 von 2 Samsung Galaxy S4 Active Microphone Replacement, Open Back Cover: Schritt 1, Bild 2 von 2
    • Use plastic opening tool to pry open back cover.

  2. Samsung Galaxy S4 Active Microphone Replacement, Pull Out Battery: Schritt 2, Bild 1 von 1
    • Use the plastic opening tool to take out the battery.

    • Remove SD card and SIM card.

  3. Samsung Galaxy S4 Active Microphone Replacement, Remove Plastic Midframe: Schritt 3, Bild 1 von 3 Samsung Galaxy S4 Active Microphone Replacement, Remove Plastic Midframe: Schritt 3, Bild 2 von 3 Samsung Galaxy S4 Active Microphone Replacement, Remove Plastic Midframe: Schritt 3, Bild 3 von 3
    • Unscrew all screws.

    • Pry off midframe with plastic opening tool.

  4. Samsung Galaxy S4 Active Microphone Replacement, Remove Daughterboard: Schritt 4, Bild 1 von 3 Samsung Galaxy S4 Active Microphone Replacement, Remove Daughterboard: Schritt 4, Bild 2 von 3 Samsung Galaxy S4 Active Microphone Replacement, Remove Daughterboard: Schritt 4, Bild 3 von 3
    • Unscrew screws holding daughterboard in place.

    • Carefully remove daughterboard with plastic opening tool.

    • The microphone is embedded in the daughterboard. This means the entire daughterboard must be replaced.

Abschluss

To reassemble your device, follow these instructions in reverse order.

10 weitere Nutzer:innen haben diese Anleitung absolviert.

Team

USF Tampa, Team 12-3, Blackwell Fall 2014 Mitglied von USF Tampa, Team 12-3, Blackwell Fall 2014

USFT-BLACKWELL-F14S12G3

3 Mitglieder

3 Anleitungen geschrieben

0 Kommentare

Kommentar hinzufügen

Seitenaufrufe:

Letzte 24 Stunden: 0

Letzte 7 Tage: 1

Letzte 30 Tage: 2

Insgesamt: 2,454