Einleitung
Once the back panel of the device has been removed, replacing the rear camera is very straightforward. Make sure you disconnect the correct cable and you'll be fine!
Was du brauchst
-
-
Screen side facing you, rotate device 180 degrees so the "SAMSUNG" logo is upside down.
-
-
-
Using the plastic opening tool, start in the center near the charge port and wedge the angled tip between the plastic back and the glass screen.
-
Create a wedge and apply pressure. Use the tool to separate the screen from the back until you hear an audible “pop."
-
Continue to wedge the tool about every inch along the current edge.
-
-
-
Once the bottom edge has been loosened, work towards a bottom corner from the other edge and continue to wedge gently until you can “pop” the corner out.
-
Continue this process on the other bottom corner until it can be popped out as well.
-
-
-
-
Place your hand between the device and the back panel. Then continue the wedging motion along the top edge of the device until the back panel comes loose.
-
-
-
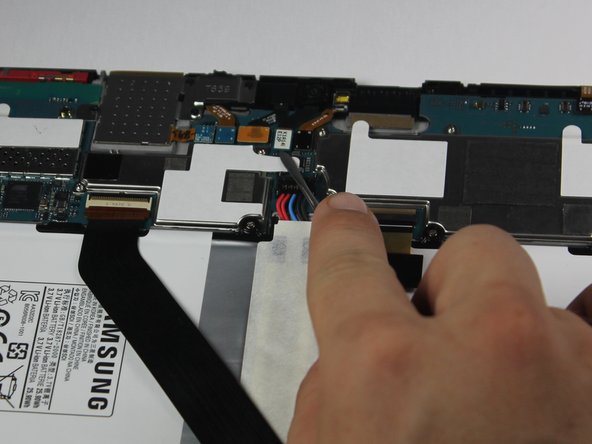
The connection between the battery and motherboard is a group of four wires in black housing that can be found near the top middle of the device. Using a plastic spudger or a flat, slim tool, lift the black connector housing upwards to disconnect it.
-
-
-
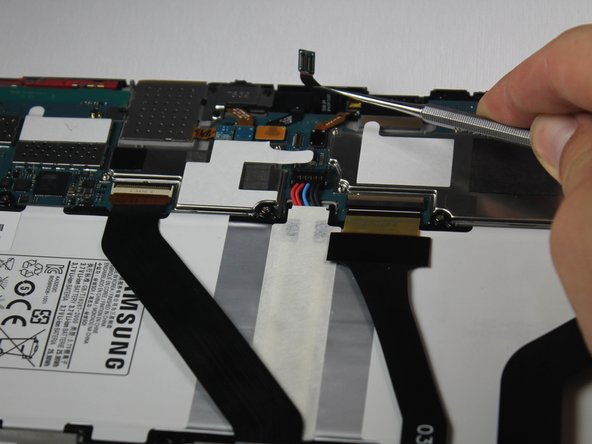
Disconnect the rectangular connection from the rear camera to the motherboard.
-
A group of five connections are all together. Starting from the left, the fourth connection is the one you want to remove.
-


To reassemble your device, follow these instructions in reverse order.
To reassemble your device, follow these instructions in reverse order.
Rückgängig: Ich habe diese Anleitung nicht absolviert.
2 weitere Personen haben diese Anleitung absolviert.
Team

Baylor, Team 10-11, Williams Fall 2015 Mitglied von Baylor, Team 10-11, Williams Fall 2015
BU-WILLIAMS-F15S10G11
3 Mitglieder
16 Anleitungen geschrieben