Einleitung
This replacement guide will show you how to replace the battery in your Samsung Galaxy Tab 3 Lite. In doing so, you will need to follow some specific instructions as to not damage any of the tiny ZIF (zero insertion force) connectors. Please follow all instructions carefully.
Was du brauchst
-
-
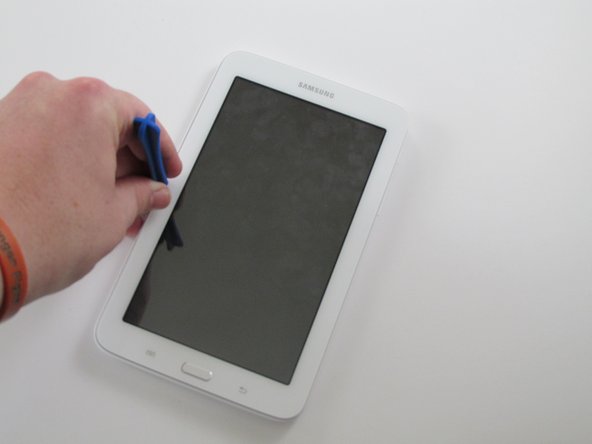
Using a plastic opening tool, wedge in the seam between the screen and the case.
-
Rock the tool by moving it towards and away from the middle of the screen, trying to separate the tape holding the screen and case together.
-
This is a long process, so don't try and rush it. Also, be careful about applying pressure.
-
-
-
After separating the tape holding the screen and case together, slowly start taking the screen off the case from the opposite side of the side with the buttons
-
-
-
-
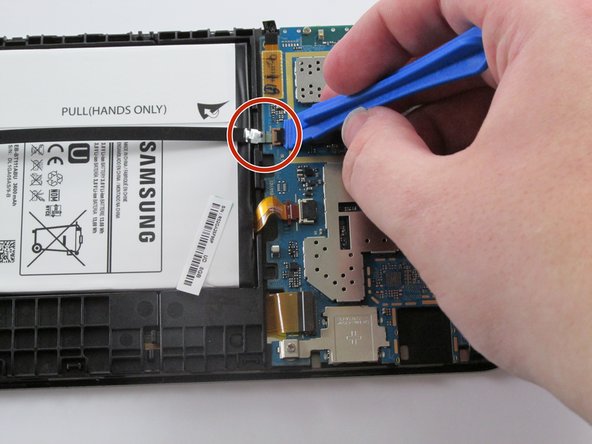
Locate the ZIF ( zero insertion force) connector highlighted by the red circle, as shown in the provided picture.
-
Use the plastic opening tool to gently lift the black ZIF connector shown within the red circle. It should just pop out with relative ease.
-
Use the precision tweezers and gently pull out the black cable out of its slot.
-
-
-
Use the plastic opening tool to gently lift black flap shown within the red circle. It should just pop out with relative ease.
-
Now gently pull out the yellowish orange ribbon cable, similar to how you did in Step 1.
-
-
-
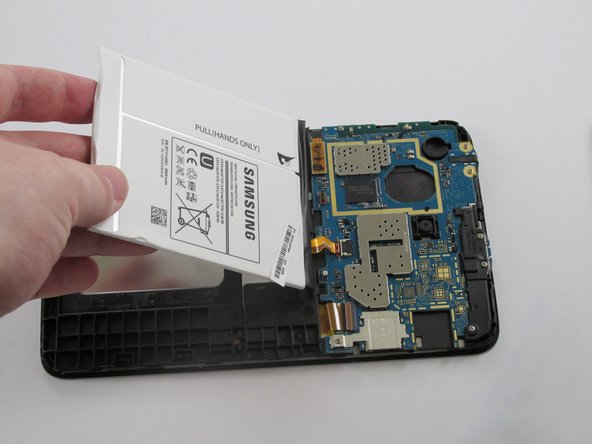
Use the plastic opening tool and gently pry out the battery from the left-hand side.
-
Grab the battery and lift it up.
-
It should come off with no extra effort, since both the black and yellowish orange cables have been pulled out.
-


To reassemble your device, follow these instructions in reverse order.
To reassemble your device, follow these instructions in reverse order.
Rückgängig: Ich habe diese Anleitung nicht absolviert.
15 weitere Nutzer:innen haben diese Anleitung absolviert.
Team

USF Tampa, Team 11-1, Cheng Spring 2016 Mitglied von USF Tampa, Team 11-1, Cheng Spring 2016
USFT-CHENG-S16S11G1
4 Mitglieder
12 Anleitungen geschrieben