Zum Hauptinhalt wechseln

Samsung Galaxy Tab 4 8.0 Verizon Speaker Replacement

Was du brauchst

  1. Samsung Galaxy Tab 4 8.0 Verizon Speaker  Replacement, Motherboard: Schritt 1, Bild 1 von 3 Samsung Galaxy Tab 4 8.0 Verizon Speaker  Replacement, Motherboard: Schritt 1, Bild 2 von 3 Samsung Galaxy Tab 4 8.0 Verizon Speaker  Replacement, Motherboard: Schritt 1, Bild 3 von 3
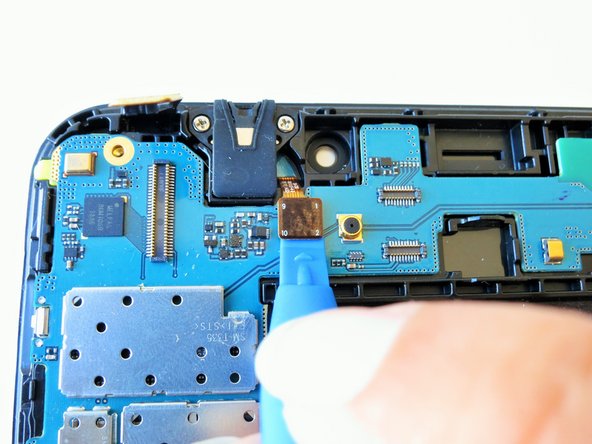
    • Slightly apply pressure and move the blue plastic opening tool downwards to pop the metallic rectangular connector from its socket on the mother board.

  2. Samsung Galaxy Tab 4 8.0 Verizon Speaker  Replacement: Schritt 2, Bild 1 von 3 Samsung Galaxy Tab 4 8.0 Verizon Speaker  Replacement: Schritt 2, Bild 2 von 3 Samsung Galaxy Tab 4 8.0 Verizon Speaker  Replacement: Schritt 2, Bild 3 von 3
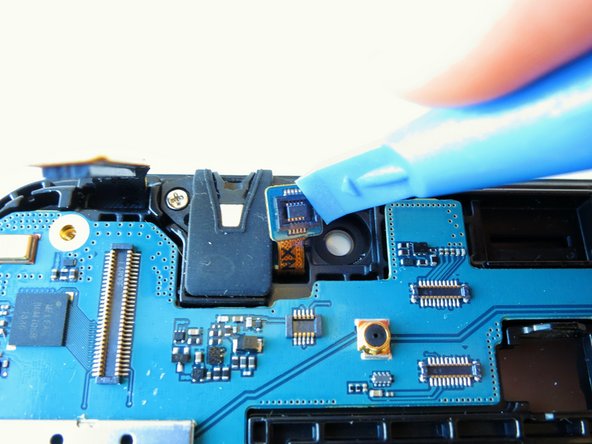
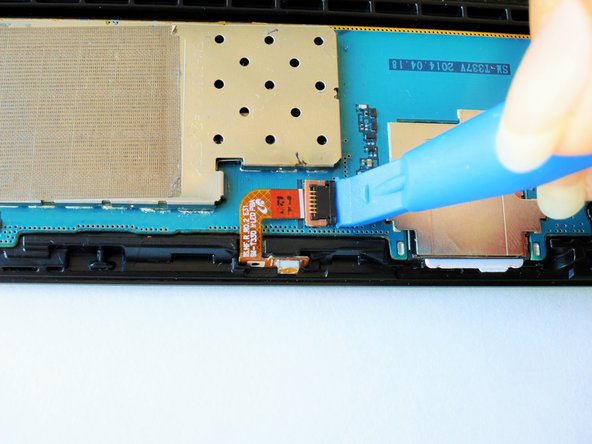
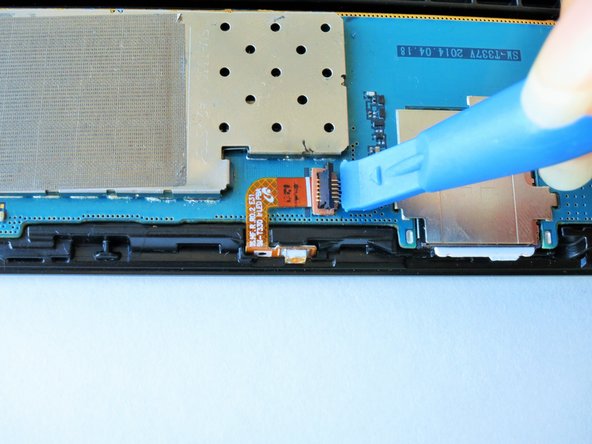
    • Slightly apply pressure and move the blue plastic opening tool downwards to pop the gold rectangular connector from its socket on the mother board.

  3. Samsung Galaxy Tab 4 8.0 Verizon Speaker  Replacement: Schritt 3, Bild 1 von 3 Samsung Galaxy Tab 4 8.0 Verizon Speaker  Replacement: Schritt 3, Bild 2 von 3 Samsung Galaxy Tab 4 8.0 Verizon Speaker  Replacement: Schritt 3, Bild 3 von 3
    • Slightly apply pressure and move the blue plastic opening tool downwards to pop the gold square connector from its socket on the mother board.

  4. Samsung Galaxy Tab 4 8.0 Verizon Speaker  Replacement: Schritt 4, Bild 1 von 3 Samsung Galaxy Tab 4 8.0 Verizon Speaker  Replacement: Schritt 4, Bild 2 von 3 Samsung Galaxy Tab 4 8.0 Verizon Speaker  Replacement: Schritt 4, Bild 3 von 3
    • Using the spudger gently wedge the blue wire out of its compartment.

  5. Samsung Galaxy Tab 4 8.0 Verizon Speaker  Replacement: Schritt 5, Bild 1 von 1
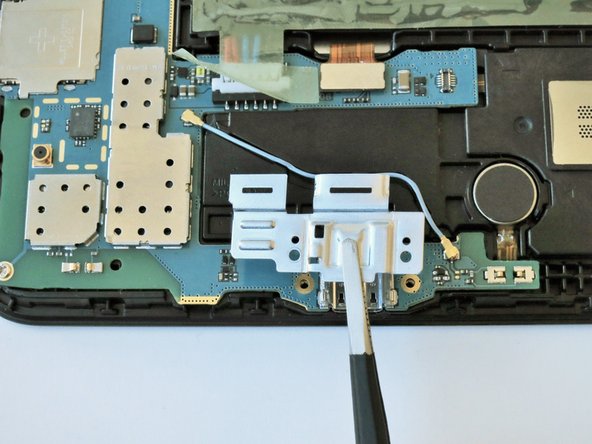
    • Remove two 2 mm #000 Phillips screws securing the metallic charger port cover to both the logic board and the front panel.

  6. Samsung Galaxy Tab 4 8.0 Verizon Speaker  Replacement: Schritt 6, Bild 1 von 3 Samsung Galaxy Tab 4 8.0 Verizon Speaker  Replacement: Schritt 6, Bild 2 von 3 Samsung Galaxy Tab 4 8.0 Verizon Speaker  Replacement: Schritt 6, Bild 3 von 3
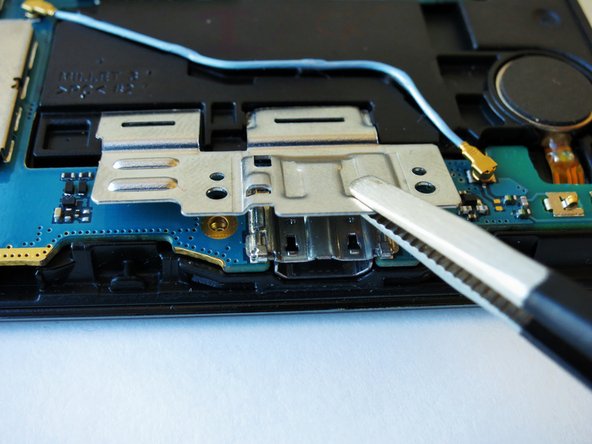
    • Squeeze the metal charger port cover piece with the tweezers to gently lift it from it's place.

  7. Samsung Galaxy Tab 4 8.0 Verizon Speaker  Replacement: Schritt 7, Bild 1 von 3 Samsung Galaxy Tab 4 8.0 Verizon Speaker  Replacement: Schritt 7, Bild 2 von 3 Samsung Galaxy Tab 4 8.0 Verizon Speaker  Replacement: Schritt 7, Bild 3 von 3
    • Carefully insert the flat end of the blue plastic opening tool under the black plastic fastener and lift.

    • Rotate your tablet counter clockwise to facilitate the process.

  8. Samsung Galaxy Tab 4 8.0 Verizon Speaker  Replacement: Schritt 8, Bild 1 von 2 Samsung Galaxy Tab 4 8.0 Verizon Speaker  Replacement: Schritt 8, Bild 2 von 2
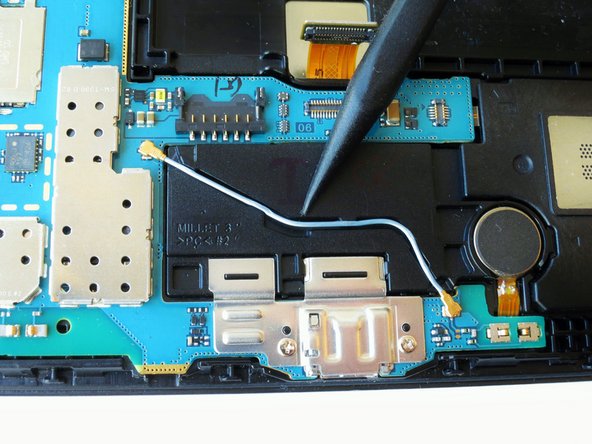
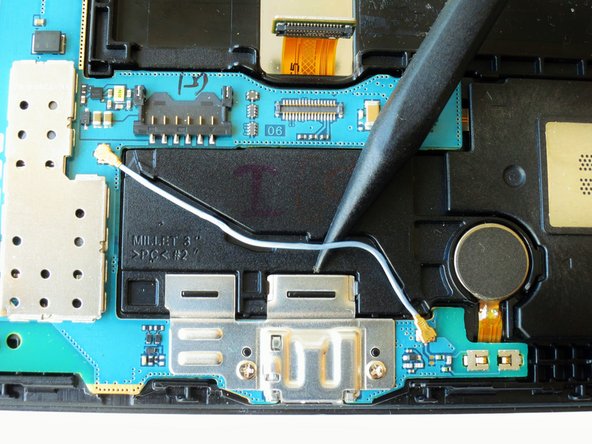
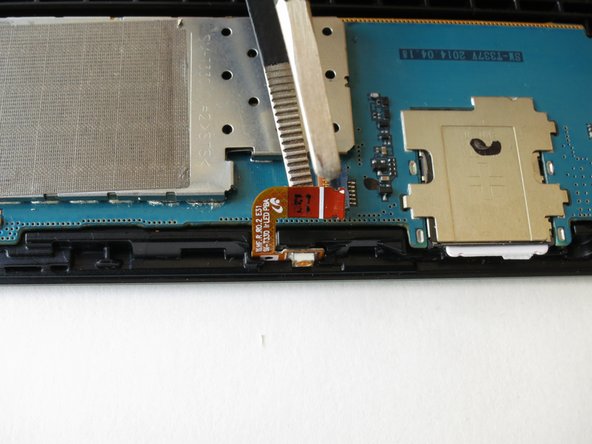
    • Squeeze the golden cable with the tweezers and gently pull the cable to the left to free the end of the golden cable.

    • The golden cable is delicate so use gentle force.

  9. Samsung Galaxy Tab 4 8.0 Verizon Speaker  Replacement: Schritt 9, Bild 1 von 1
    • Remove three 2 mm #000 Phillips screws securing the mother board to the front panel.

  10. Samsung Galaxy Tab 4 8.0 Verizon Speaker  Replacement: Schritt 10, Bild 1 von 2 Samsung Galaxy Tab 4 8.0 Verizon Speaker  Replacement: Schritt 10, Bild 2 von 2
    • Using your hands, hold the opposite ends of the mother board corners, and lift.

  11. Samsung Galaxy Tab 4 8.0 Verizon Speaker  Replacement, Speaker: Schritt 11, Bild 1 von 1
    • Insert the opening tool tip into the crack between the speaker and device.

  12. Samsung Galaxy Tab 4 8.0 Verizon Speaker  Replacement: Schritt 12, Bild 1 von 1
    • Gently pry up on the speaker to disconnect the speaker from the device.

Abschluss

To reassemble your device, follow these instructions in reverse order.

0 Kommentare

Kommentar hinzufügen

Seitenaufrufe:

Letzte 24 Stunden: 0

Letzte 7 Tage: 0

Letzte 30 Tage: 0

Insgesamt: 122