Diese Version enthält möglicherweise inkorrekte Änderungen. Wechsle zur letzten geprüften Version.
Was du brauchst
-
Dieser Schritt ist noch nicht übersetzt. Hilf mit, ihn zu übersetzen!
-
At the top portion of the memory card slot, use the small metal spudger to create separation between the back cover and the rest of the device.
-
-
Dieser Schritt ist noch nicht übersetzt. Hilf mit, ihn zu übersetzen!
-
Use the intermediate metal spudger in place of the small metal spudger to remove the back cover. This is done by sliding the intermediate metal spudger around the perimeter of the device, beginning at the top portion of the memory card slot.
-
The second picture shows the internal portion of the device once the back cover is removed.
-
-
-
Dieser Schritt ist noch nicht übersetzt. Hilf mit, ihn zu übersetzen!
-
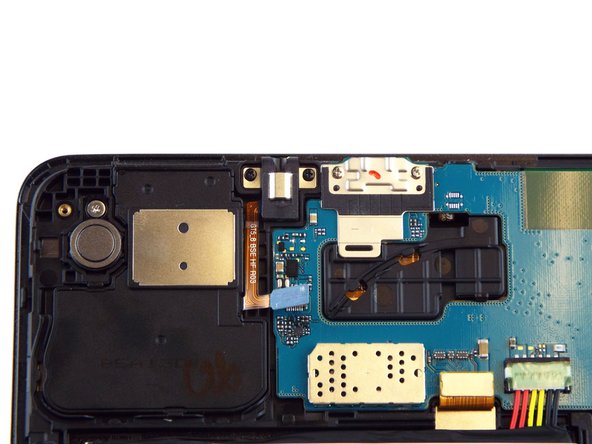
Use the spudger to disconnect the earphone jack from the motherboard.
-
The connected and disconnected earphone jack is shown in the first and second picture, respectively.
-
-
Dieser Schritt ist noch nicht übersetzt. Hilf mit, ihn zu übersetzen!
-
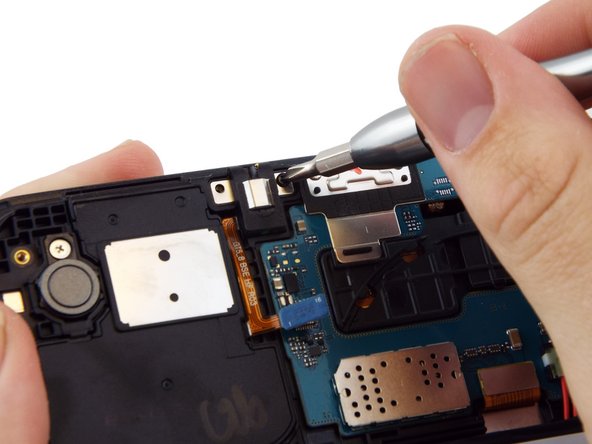
Use the PH0 screwdriver bit to remove the 2.5 mm screws attaching earphone jack to the rest of the device.
-
The second picture shows this process in action.
-
-
Dieser Schritt ist noch nicht übersetzt. Hilf mit, ihn zu übersetzen!
-
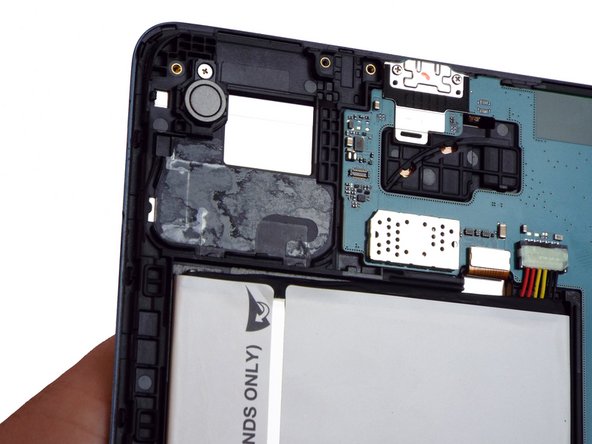
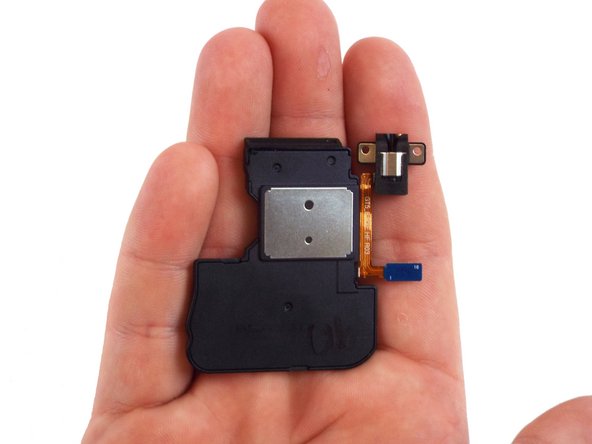
Use the spudger to fully remove the earphone jack from the rest of the device.
-
The second picture shows what the device should look like once the earphone jack has been removed.
-


Rückgängig: Ich habe diese Anleitung nicht absolviert.
3 weitere Nutzer:innen haben diese Anleitung absolviert.
Team

USF Tampa, Team 17-4, Blackwell Winter 2016 Mitglied von USF Tampa, Team 17-4, Blackwell Winter 2016
USFT-BLACKWELL-W16S17G4
4 Mitglieder
11 Anleitungen geschrieben