Zum Hauptinhalt wechseln

Samsung Galaxy Tab E Lite 7 Kids Camera Replacement

Was du brauchst

  1. Samsung Galaxy Tab E Lite 7 Kids Camera Replacement, Rear Case: Schritt 1, Bild 1 von 3 Samsung Galaxy Tab E Lite 7 Kids Camera Replacement, Rear Case: Schritt 1, Bild 2 von 3 Samsung Galaxy Tab E Lite 7 Kids Camera Replacement, Rear Case: Schritt 1, Bild 3 von 3
    • Make sure the device is turned off before attempting to disassemble it.

    • Using a plastic opening tool, wedge in the seam between the screen and the case.

    • Rock the tool by moving it towards and away from the middle of the screen, trying to separate the tape holding the screen and case together.

  2. Samsung Galaxy Tab E Lite 7 Kids Camera Replacement: Schritt 2, Bild 1 von 2 Samsung Galaxy Tab E Lite 7 Kids Camera Replacement: Schritt 2, Bild 2 von 2
    • After separating the latches holding the screen and case together, slowly take the screen off the case.

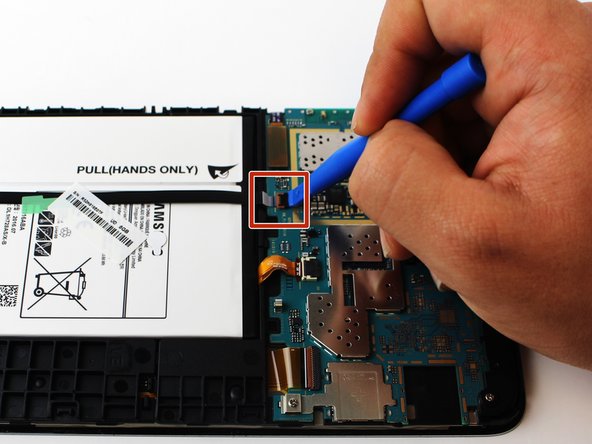
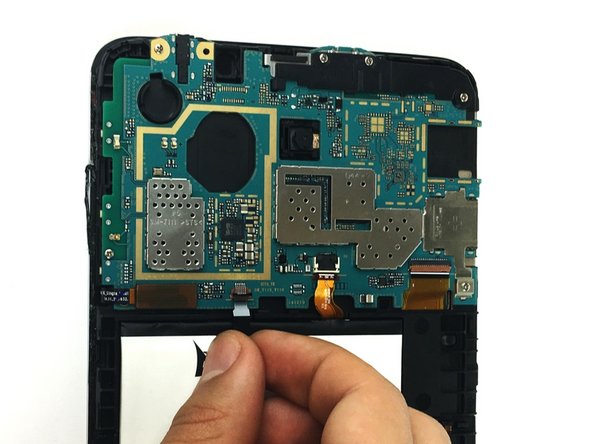
  3. Samsung Galaxy Tab E Lite 7 Kids Camera Replacement, Motherboard: Schritt 3, Bild 1 von 3 Samsung Galaxy Tab E Lite 7 Kids Camera Replacement, Motherboard: Schritt 3, Bild 2 von 3 Samsung Galaxy Tab E Lite 7 Kids Camera Replacement, Motherboard: Schritt 3, Bild 3 von 3
    • Use the plastic opening tool to lift up the black ZIF (zero insertion force) connector.

    • Use your hands to pull the black cable out of its slot.

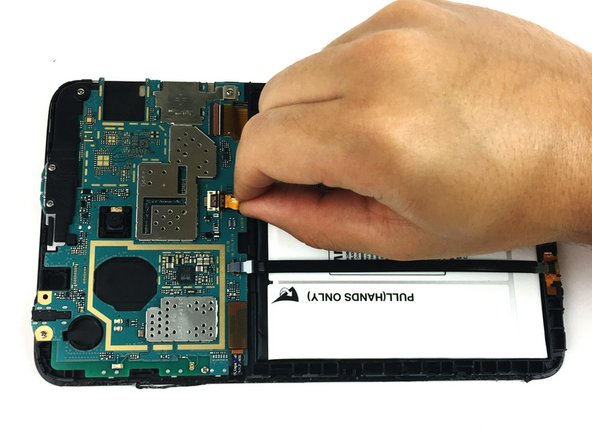
  4. Samsung Galaxy Tab E Lite 7 Kids Camera Replacement: Schritt 4, Bild 1 von 2 Samsung Galaxy Tab E Lite 7 Kids Camera Replacement: Schritt 4, Bild 2 von 2
    • Use the plastic opening tool to lift the ZIF (zero insertion force) connector holding the ribbon cable.

    • Pull out the battery's ribbon cable.

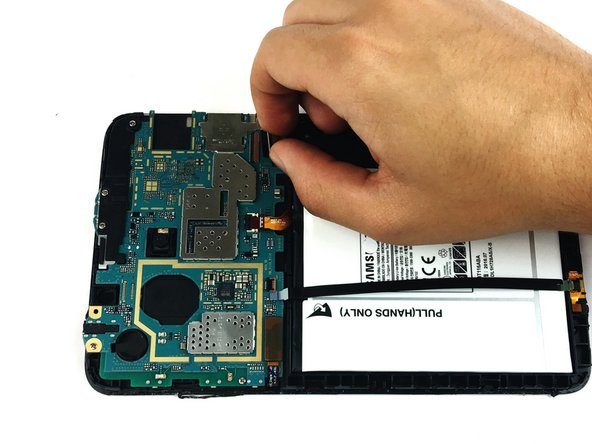
  5. Samsung Galaxy Tab E Lite 7 Kids Camera Replacement: Schritt 5, Bild 1 von 2 Samsung Galaxy Tab E Lite 7 Kids Camera Replacement: Schritt 5, Bild 2 von 2
    • Use the plastic opening tool to lift up the latch to the ribbon cable.

    • Remove the ribbon cable from the connector.

  6. Samsung Galaxy Tab E Lite 7 Kids Camera Replacement: Schritt 6, Bild 1 von 1
    • Remove the seven 4mm PH000 screws holding the motherboard in place.

  7. Samsung Galaxy Tab E Lite 7 Kids Camera Replacement: Schritt 7, Bild 1 von 1
    • Use the plastic opening tool to pry up the tab holding the motherboard in place.

  8. Samsung Galaxy Tab E Lite 7 Kids Camera Replacement: Schritt 8, Bild 1 von 3 Samsung Galaxy Tab E Lite 7 Kids Camera Replacement: Schritt 8, Bild 2 von 3 Samsung Galaxy Tab E Lite 7 Kids Camera Replacement: Schritt 8, Bild 3 von 3
    In diesem Schritt verwendetes Werkzeug:
    Tweezers
    $4.99
    Kaufen
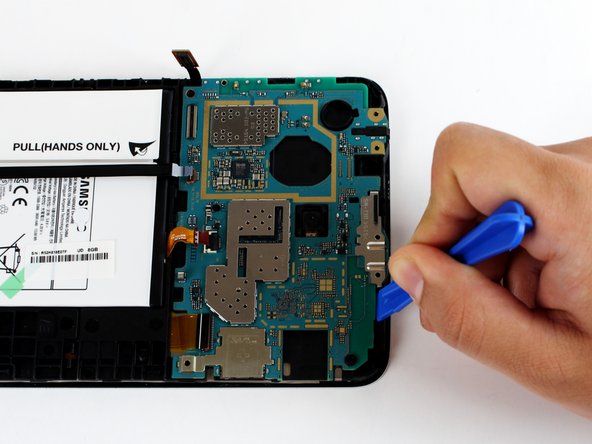
    • Use the precision tweezers to remove the black plastic corner on top of the motherboard.

    • Use the plastic opening tool to pull the motherboard out of the case.

  9. Samsung Galaxy Tab E Lite 7 Kids Camera Replacement, Camera: Schritt 9, Bild 1 von 2 Samsung Galaxy Tab E Lite 7 Kids Camera Replacement, Camera: Schritt 9, Bild 2 von 2
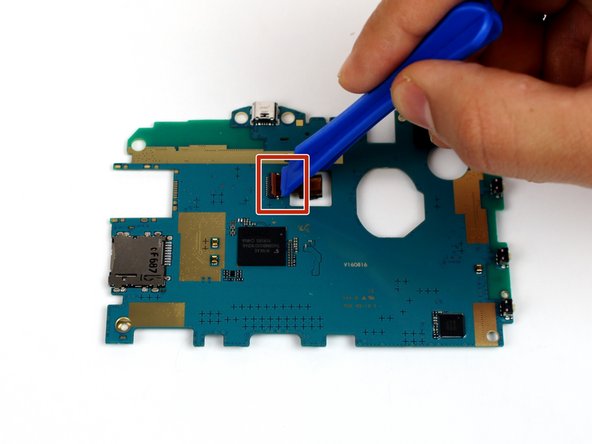
    • Flip the motherboard over.

    • Use a plastic opening tool to lift up the latch holding the camera cable.

  10. Samsung Galaxy Tab E Lite 7 Kids Camera Replacement: Schritt 10, Bild 1 von 3 Samsung Galaxy Tab E Lite 7 Kids Camera Replacement: Schritt 10, Bild 2 von 3 Samsung Galaxy Tab E Lite 7 Kids Camera Replacement: Schritt 10, Bild 3 von 3
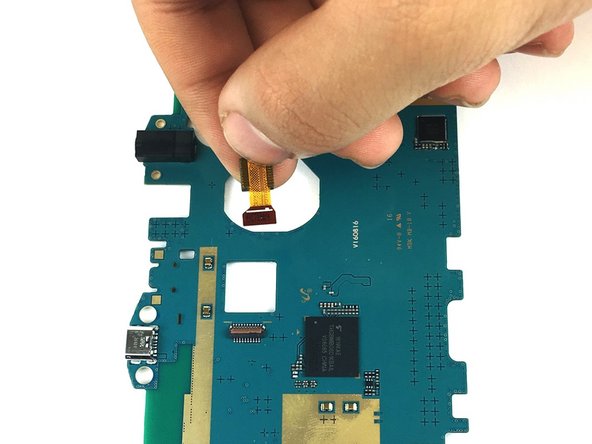
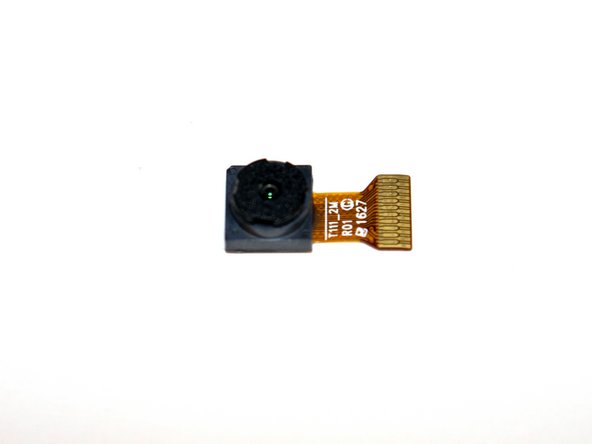
    • Pull the ribbon cable and the camera.

Abschluss

To reassemble your device, follow these instructions in reverse order.

Team

USF Tampa, Team S19-G2, Hoffman Spring 2017 Mitglied von USF Tampa, Team S19-G2, Hoffman Spring 2017

USFT-HOFFMAN-S17S19G2

4 Mitglieder

7 Anleitungen geschrieben

0 Kommentare

Kommentar hinzufügen

Seitenaufrufe:

Letzte 24 Stunden: 0

Letzte 7 Tage: 4

Letzte 30 Tage: 9

Insgesamt: 327