Diese Version enthält möglicherweise inkorrekte Änderungen. Wechsle zur letzten geprüften Version.
Was du brauchst
-
Dieser Schritt ist noch nicht übersetzt. Hilf mit, ihn zu übersetzen!
-
Apply the heat gun around the edges of the tablet to melt the adhesive glue.
-
-
Dieser Schritt ist noch nicht übersetzt. Hilf mit, ihn zu übersetzen!
-
Apply the suction to the bottom or top right corner.
-
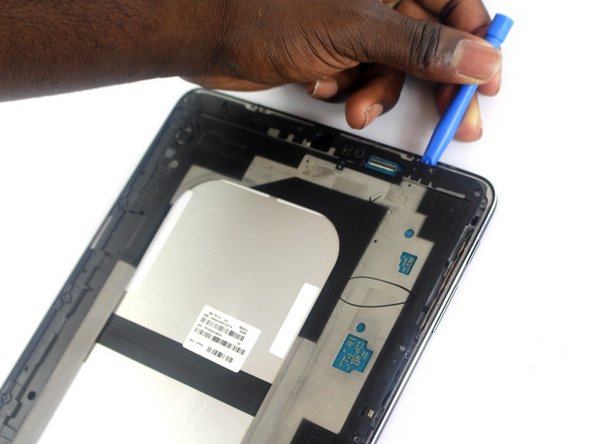
Use the plastic opening tool at several points around the screen while the suction is being applied to pop the screen out.
-
-
Dieser Schritt ist noch nicht übersetzt. Hilf mit, ihn zu übersetzen!
-
Once the screen is detached, open the tablet like a book.
-
-
Dieser Schritt ist noch nicht übersetzt. Hilf mit, ihn zu übersetzen!
-
Using the precision tweezers, remove the silver tape that is holding the orange ribbon cable connecting the two pieces.
-
-
-
Dieser Schritt ist noch nicht übersetzt. Hilf mit, ihn zu übersetzen!
-
Using the precision tweezers, remove the small press-fit connector from the body of the tablet.
-
-
Dieser Schritt ist noch nicht übersetzt. Hilf mit, ihn zu übersetzen!
-
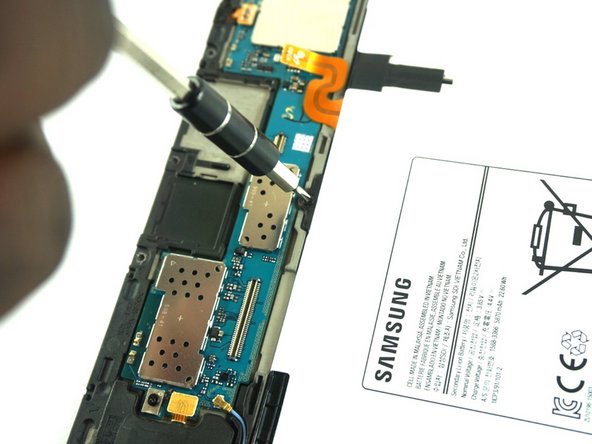
Using the Philips #000 screwdriver, remove the seventeen 2.74 mm screws around the edges.
-
Remove the two 2.74 mm black screws in the middle of the tablet with the Philips #000 screwdriver.
-
-
Dieser Schritt ist noch nicht übersetzt. Hilf mit, ihn zu übersetzen!
-
Take the plastic opening tool around the tablet to remove the motherboard from the device.
-
-
Dieser Schritt ist noch nicht übersetzt. Hilf mit, ihn zu übersetzen!
-
At the bottom left of the battery, use the plastic opening tool to detach the lower press-fit connector of the black ribbon cable.
-
Using the plastic opening tool, detach the press-fit connector on the left side of the black ribbon cable.
-
Lift up the black ribbon cable to remove it.
-
-
Dieser Schritt ist noch nicht übersetzt. Hilf mit, ihn zu übersetzen!
-
Using the plastic opening tool, detach the orange ribbon cable connecting the battery to the motherboard.
-
-
Dieser Schritt ist noch nicht übersetzt. Hilf mit, ihn zu übersetzen!
-
Using the Phillips #000 Screwdriver, remove the four 2.74mm black screws around the edge of the battery.
-
-
Dieser Schritt ist noch nicht übersetzt. Hilf mit, ihn zu übersetzen!
-
The battery is now fully detached from the motherboard.
-
Lift up the battery to remove it from the motherboard.
-


Rückgängig: Ich habe diese Anleitung nicht absolviert.
3 weitere Nutzer:innen haben diese Anleitung absolviert.
Team

USF Tampa, Team S3-G4, Sullivan Spring 2017 Mitglied von USF Tampa, Team S3-G4, Sullivan Spring 2017
USFT-SULLIVAN-S17S3G4
3 Mitglieder
14 Anleitungen geschrieben
4 Kommentare
Le tuto est parfaitement clair et précis. Un grand Merci.
Néanmoins il faut reconnaître que cette opération n’est pas simple du tout et qu’elle n’est pas sans risque, même en étant très méticuleux.
Pour ouvrir la coque, il faut obligatoirement un minimum de matériel adapté et malgré cela, c’est une galère !
Pour info sur la Galaxy tab s2 votre tuto est faux. Merci j'ai cassé le haut de mon écran. Grace à un autre site jai pu voir qu'il faut enlever le capot arrière pour accéder à la batterie