Einleitung
Hält die Ladung nicht mehr lange? Schaltet das Gerät manchmal einfach aus und lässt sich nicht mehr anschalten? Der Austausch des Akkus könnte die Probleme lösen.
Was du brauchst
-
-
Erwärme alle Nahtstellen des Geräts mit einem iFixit iOpener oder einem Heißluftgebläse, damit der Kleber rings um die Ränder des Bildschirms weich wird.
-
-
-
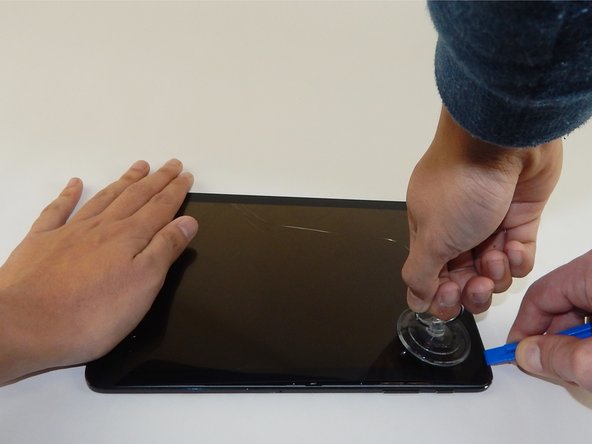
Setze das Plastiköffnungswerkzeug in den Spalt an der Seite des Tablets nahe der Ecke ein, von der aus du anfangen möchtest, den Bildschirm zu lösen.
-
Bringe einen kleinen Saugheber am Bildschirm nahe der Ecke ein, wo das Plastiköffnungswerkzeug steckt.
-
Hebe den kleinen Saugheber hoch und drücke gleichzeitig das Plastiköffnungswerkzeug nach unten, um den Bildschirm zu lösen. (Es ist gut, wenn jemand dabei das Gerät nach unten drückt, damit gut gehebelt werden kann)
-
-
-
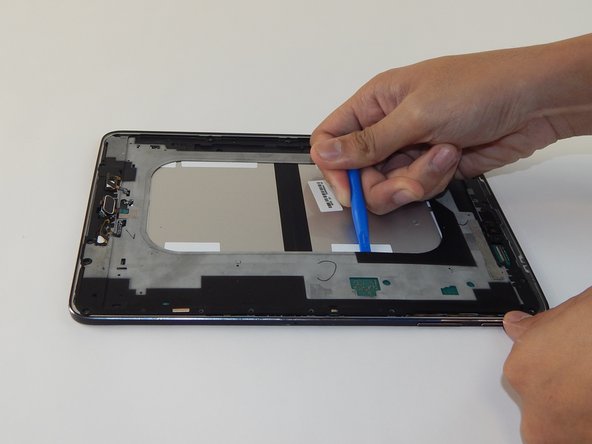
Entferne das silberfarbene Klebeband vorsichtig mit einer Pinzette.
-
-
-
-
Hebe mit dem Plastiköffnungswerkzeug vorsichtig das goldfarbige Flachbandkabel an, welches Bildschirm und Tablet verbindet, und löse es.
-
-
-
Entferne die vier schwarzen 3 mm Kreuzschlitzschrauben #1, welche den Akku befestigen.
-
-
-
Klappe den schwarzen Sicherungsbügel am ZIF Verbinder oben links am Tablet mit einem Plastiköffnungswerkzeug hoch.
-
Der Verbinder ist dadurch entsichert worden und du kannst du das Flachbandkabel mit einer Pinzette herausziehen.
-
-
-
Löse den Akkuanschluss mit einem Plastiköffnungswerkzeug.
-
Nun kannst du den Akku mit der Hand entfernen.
-


Um dein Gerät wieder zusammenzusetzen, folge den Schritten in umgekehrter Reihenfolge.
Um dein Gerät wieder zusammenzusetzen, folge den Schritten in umgekehrter Reihenfolge.
Rückgängig: Ich habe diese Anleitung nicht absolviert.
39 weitere Personen haben diese Anleitung absolviert.
Besonderer Dank geht an diese Übersetzer:innen:
100%
VauWeh hilft uns, die Welt in Ordnung zu bringen! Wie kann ich mithelfen?
Hier starten ›
Team

USF Tampa, Team 10-4, Remmell Spring 2016 Mitglied von USF Tampa, Team 10-4, Remmell Spring 2016
USFT-REMMELL-S16S10G4
4 Mitglieder
18 Anleitungen geschrieben
17 Kommentare
Thanks for the guide. At least Apple has an out-of-warranty service for the battery replacement of $99. To replace this battery, with a dubious quality 3rd party battery as I don't think it's possible to buy a OEM Samsung battery, looks like a disaster waiting to happen, not worth the effort or time, I returned mine to Samsung after seeing this guide. I'm not suggesting Apple is a saint for the $99 replacement, but at least they will do it with an OEM battery.
Can you give a link to this apple offer for an ipad ?
after I did this, my display was dead. Nothing showed. Tablet was receiving email notifications and lights worked.. just a blank screen. What happened?
You crackedbthe oled panel
The Battery is accessible from the rear panel!
**It will damage two plastic mounts on the rear panel, however an appropriate adhesive (GO2 by loctite) or bonding tape, will fix this**
1: On the back, there is a clearly visible outline of a plastic cover.
2: Starting from the side opposite the “Little round button things” on the back, run a case opening tool slowly around the seam, popping the small plastic hooks. Do all three sides EXCEPT the side with the round button things.
3: When you get to this forth side, carefully and slowly work around the round buttons, working the case up. Then flex up the back plastic from the side you have already removed, and using a long case tool, insert it in all the way past the battery to the inside edge of the round button things and gently twist here. The tabs will pop and that side will release. Repeat for the other snap button.
4: Your back cover is now removed and you have access directly to the battery !
Do this If you are not confident lifting a $350 dollar screen…