Einleitung
Wenn dein Home Button klemmt oder nicht richtig funktioniert musst du ihn möglicherweise austauschen.
Was du brauchst
-
-
Erwärme alle Nahtstellen des Geräts mit einem iFixit iOpener oder einem Heißluftgebläse, damit der Kleber rings um die Ränder des Bildschirms weich wird.
-
-
-
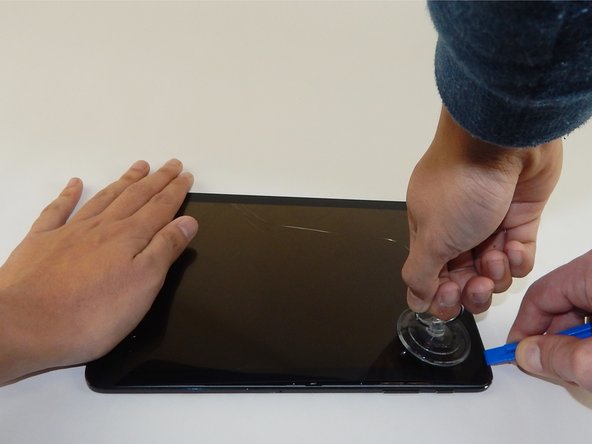
Setze das Plastiköffnungswerkzeug in den Spalt an der Seite des Tablets nahe der Ecke ein, von der aus du anfangen möchtest, den Bildschirm zu lösen.
-
Bringe einen kleinen Saugheber am Bildschirm nahe der Ecke ein, wo das Plastiköffnungswerkzeug steckt.
-
Hebe den kleinen Saugheber hoch und drücke gleichzeitig das Plastiköffnungswerkzeug nach unten, um den Bildschirm zu lösen. (Es ist gut, wenn jemand dabei das Gerät nach unten drückt, damit gut gehebelt werden kann)
The lower portion of the screen is glued to the body. The screen is unable to be completely removed.
starte oben, unten verhindert eine Nase an dem Audioanschluß das erste anheben.
start upside, downside a nose at the audio connector prevents the first lifting.
Difficile, j'ai acheté les outils nécessaires. Après avoir chauffé les côtés et essayé de les décoller, la vitre a craqué.😠
Had to use a heat gun to remove with patience and time, using a pic to "saw" into the seal, starting with the right side corners. Stopping every few seconds to reheat with heat gun. Take care on the bottom left corner, and left side. There is very little room between the edge and LCD, making it easy to stick a plastic pick or removal tool in between the LCD and front glass. The other sides have more room for prying. I nicked the bottom left corner with a prying pic, which killed the entire display :-( Good luck!
-
-
-
Entferne das silberfarbene Klebeband vorsichtig mit einer Pinzette.
-
-
-
Hebe mit dem Plastiköffnungswerkzeug vorsichtig das goldfarbige Flachbandkabel an, welches Bildschirm und Tablet verbindet, und löse es.
-
-
-
-
Entferne die neunzehn 3 mm Kreuzschlitzschrauben #1.
make sure to remove the 2 black screws on the frame. i fix it doesnt say to take those off. nearly damaged the frame
-
-
-
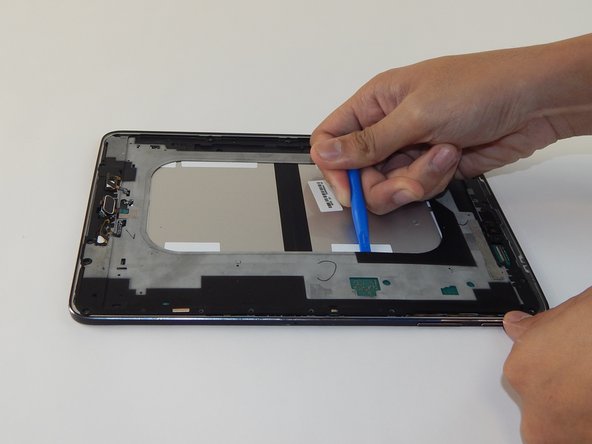
Heble die nächste Lage des Geräts mit dem Plastiköffnungswekzeug hoch.
-Zuvor unbedingt SIM Karte u microSD entfernen, sonst bleibt der Elekronikpart am Gehäuse fest und das Flachbandkabel davon kann beschädigt werden!
-Lösen des unteren Teils des Innengehäuses zum Schluss, da Ladebuchse eine Nase hat und sich erst löst wenn man es schräg nach unten abhebt.
-
-
-
Entferne die vier schwarzen 3 mm Kreuzschlitzschrauben #1, welche den Akku befestigen.
I had an issue with charging of Tab S2. When you connect it to a charger, it detects it, charges for 2 seconds, stops charging for 7-8 seconds and charges again for 2 seconds. It keeps going on in circles. It actually did charge to 100%, but it could take a whole day. I watched some videos online and there’s a way to get to it from behind. I got myself tools and a new battery, thinking it could be a battery problem. Long story short, there are flat cables reaching behind from volume buttons glued to the back cover and they use pressure from the back cover to make contact. Of course, I broke the flat cable. Most of the back cover is held in place by clips, but right next to the round metal looking “buttons” there is some extra strong glue (north of those “buttons”). Samsung didn’t want to make repairs easy and simple :/.
-
-
-
Klappe den schwarzen Sicherungsbügel am ZIF Verbinder oben links am Tablet mit einem Plastiköffnungswerkzeug hoch.
-
Der Verbinder ist dadurch entsichert worden und du kannst du das Flachbandkabel mit einer Pinzette herausziehen.
I did not find it necessary to detach this cable. The battery slid out from under it easily.
-
-
-
Löse den Akkuanschluss mit einem Plastiköffnungswerkzeug.
-
Nun kannst du den Akku mit der Hand entfernen.
I was proud of myself. It was for me as easy as this, videos online showed more difficulty . The suction cup and the jimmy was enough to open the screen. Do watch some videos online to see all the parts you could damage and on how to open the different cable connectors as they are and work different.
-
-
-
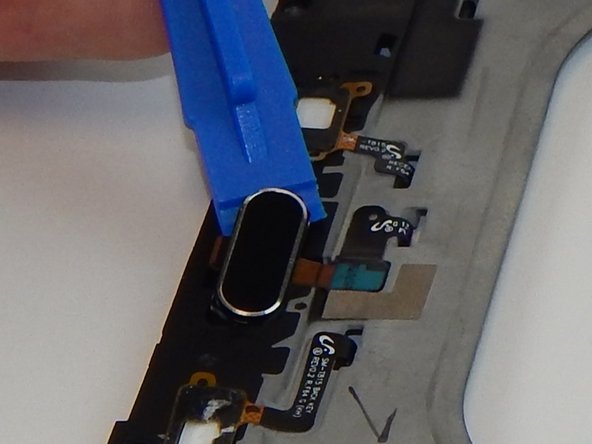
Löse den hinteren Stecker des Home Buttons mit einem Plastiköffnungswerkzeug vom Gerät.
-
-
-
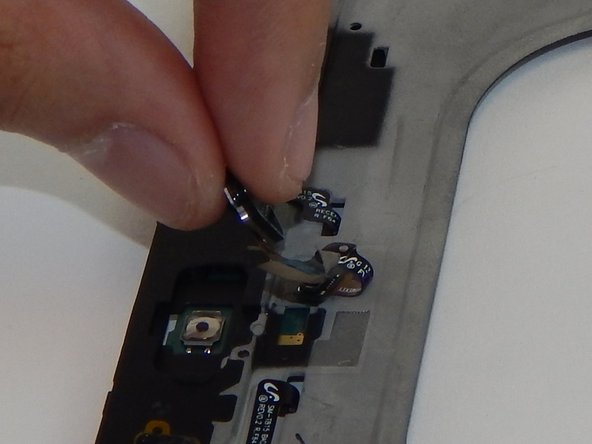
Klappe das Gerät auf und hebele den Home Button vorsichtig mit dem Plastiköffnungswerkzeug heraus.
-


Um dein Gerät wieder zusammenzusetzen, folge den Schritten in umgekehrter Reihenfolge.
Um dein Gerät wieder zusammenzusetzen, folge den Schritten in umgekehrter Reihenfolge.
Rückgängig: Ich habe diese Anleitung nicht absolviert.
2 weitere Nutzer:innen haben diese Anleitung absolviert.
Besonderer Dank geht an diese Übersetzer:innen:
100%
VauWeh hilft uns, die Welt in Ordnung zu bringen! Wie kann ich mithelfen?
Hier starten ›
Team

USF Tampa, Team 10-4, Remmell Spring 2016 Mitglied von USF Tampa, Team 10-4, Remmell Spring 2016
USFT-REMMELL-S16S10G4
4 Mitglieder
18 Anleitungen geschrieben
2 Kommentare
Nice writeup, but I can't seem to find where to buy the home button. Anyone know?
Mais, où acheter le bouton????
m.E. wichtig vorher die Kartenhalter für SIM und SD entfernen, sonst löst sich der Kontakt unkontrolliert bei Schritt 6.
Frank Huebner - Antwort
You make no mention of re-Glueing the screen, just applying the steps in reverse order - does that mean simply applying heat again will re-glue the components from the residue?
Robin Penny - Antwort
i replaced the battery, the sticky tape did hold up again, but if you replace the screen it depends on whate side the tape sticks to. On ine the most part of the tape stuck to the screen.
Steffen Hahn -
I know its 2020 but i cracked my screen and idk if its on or not
benjamin burkowski_FaZe - Antwort