Diese Version enthält möglicherweise inkorrekte Änderungen. Wechsle zur letzten geprüften Version.
Was du brauchst
-
Dieser Schritt ist noch nicht übersetzt. Hilf mit, ihn zu übersetzen!
-
Remove the wrist strap by peeling back the rubber starting from one corner of the watch face. Continue peeling the rubber away from the watch face until the strap is completely off.
-
-
Dieser Schritt ist noch nicht übersetzt. Hilf mit, ihn zu übersetzen!
-
Starting from an edge, wedge a metal spudger in between the screen and the chrome trim ring and pry, lifting the screen outwards.
-
-
Dieser Schritt ist noch nicht übersetzt. Hilf mit, ihn zu übersetzen!
-
Use a plastic opening tool to gently pry upwards on the plastic motherboard assembly.
-
-
Dieser Schritt ist noch nicht übersetzt. Hilf mit, ihn zu übersetzen!
-
Locate the ribbon assembly attaching the display to the motherboard.
-
-
-
Dieser Schritt ist noch nicht übersetzt. Hilf mit, ihn zu übersetzen!
-
Use a plastic opening tool to detach the glass screen/ LED Display ribbon connector from the motherboard.
-
-
Dieser Schritt ist noch nicht übersetzt. Hilf mit, ihn zu übersetzen!
-
Now the watch should be in three separate pieces.
-
-
Dieser Schritt ist noch nicht übersetzt. Hilf mit, ihn zu übersetzen!
-
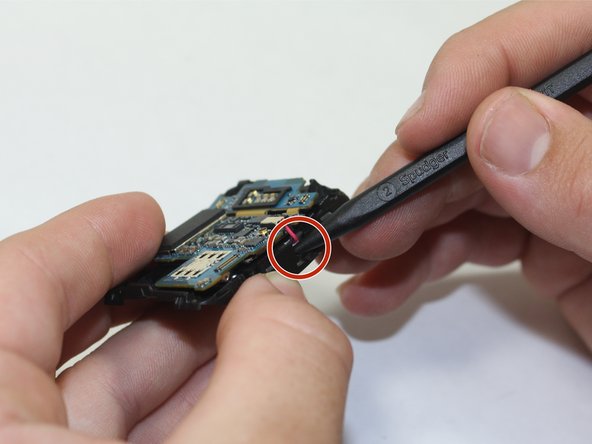
Locate the tabs on the motherboard and unclasp them.
-
-
Dieser Schritt ist noch nicht übersetzt. Hilf mit, ihn zu übersetzen!
-
Use the spugder to gently pry upwards on the motherboard.
-
-
Dieser Schritt ist noch nicht übersetzt. Hilf mit, ihn zu übersetzen!
-
Once the motherboard and the battery are removed, disconnect the battery at the connector.
-
-
Dieser Schritt ist noch nicht übersetzt. Hilf mit, ihn zu übersetzen!
-
Use a spudger to gently pry upward on the clasp connecting the battery to the motherboard.
-


Rückgängig: Ich habe diese Anleitung nicht absolviert.
36 weitere Nutzer:innen haben diese Anleitung absolviert.
Team

USF Tampa, Team 12-1, Blackwell Fall 2015 Mitglied von USF Tampa, Team 12-1, Blackwell Fall 2015
USFT-BLACKWELL-F15S12G1
4 Mitglieder
5 Anleitungen geschrieben
16 Kommentare
Apparently you can get them in Spain.